

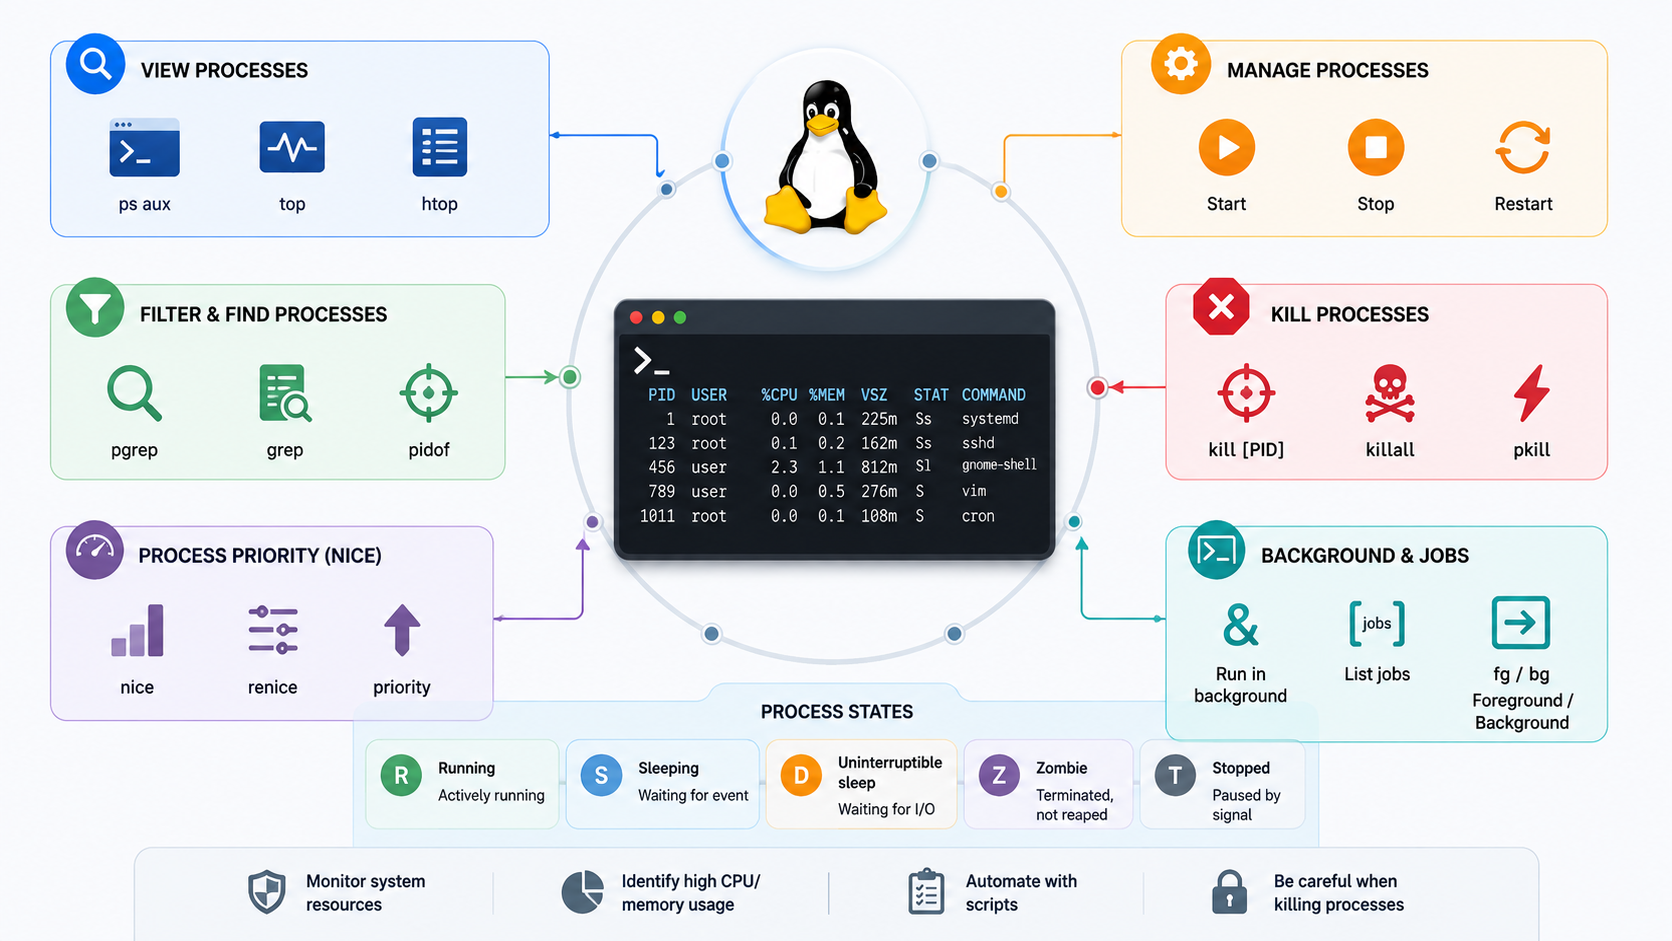
Process Management on RHEL 8 shows how to handle processes on Red Hat Enterprise Linux. However, the majority of Linux distributions work in the same way.
First and foremost: What is a Process?
In whatever Linux flavor, a process is any active (running) instance of a program (A process is a running instance of a launched, executable program).
But what is a program?
Technically, a program is any executable file stored on your machine. Anytime you run a program, you have created a process. One program can start many processes, so, as a system administrator, you need to know how to manage them effectively. Each process has an owner, so in simple terms, the user who initiated the process.
From the moment that a process is created, it consists of the following items:
- An address space of allocated memory.
- Security properties, including ownership credentials and privileges.
- One or more execution threads of program code.
- A process state.
An existing parent process duplicates its own address space, which is known as a process fork, to create a child process structure. Every new process is assigned a unique process ID (PID) for tracking and security purposes. The PID and the parent’s process ID (PPID) are elements of the new process environment. Any process can create a child process. So, all processes are descendants of the first system process, systemd, on a Red Hat system:
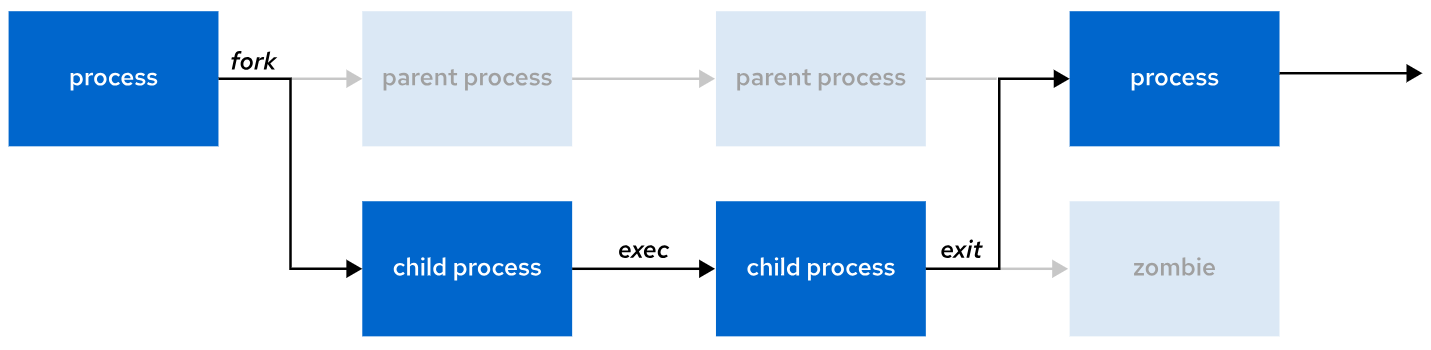
- When a child process runs, the parent process usually waits (sleeps).
- When the child finishes, it becomes a zombie — a leftover entry in the process table.
- The parent is then notified (signaled) that the child has finished.
- The parent cleans up the child’s entry (removing the zombie) and frees its resources.
- After that, the parent continues running its own code.
Process States
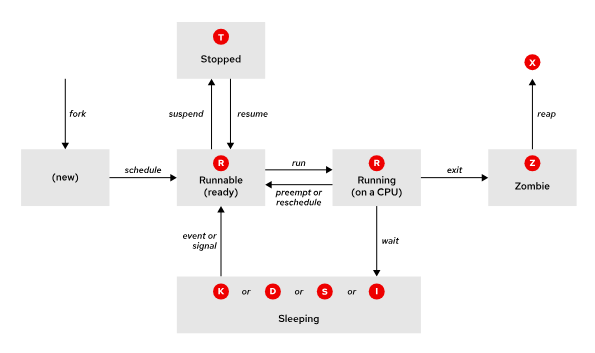
In a multitasking operating system, each CPU (or CPU core) can work on one process at a time. As a process runs, its immediate requirements for CPU time and resource allocation change. Processes are assigned a state, which changes according to the circumstances.
Let’s provide a visual diagram to show more details about that:
| Name | Flag | Kernel-defined state name and description |
|---|---|---|
| Running | R | TASK_RUNNING: The process is either executing on a CPU or waiting to run. The process can execute user routines or kernel routines (system calls), or be queued and ready when in the Running (or Runnable) state. |
| Sleeping | S | TASK_UNINTERRUPTIBLE: This process is also sleeping, but unlike the S state, it does not respond to signals. This state is used only when a process interruption might cause an unpredictable state of the device. |
D | TASK_UNINTERRUPTIBLE: This process is also sleeping, but unlike the S state, it does not respond to signals. This state is used only when a process interruption might cause an unpredictable state of the device. | |
K | TASK_KILLABLE: Same as the uninterruptible D state, but modified to allow a waiting task to respond to the signal to kill it (exit completely). Utilities often display Killable processes as the D state. | |
I | TASK_REPORT_IDLE: A subset of state D that is used for kernel threads. The kernel does not count these processes when calculating the load average. The TASK_UNINTERRUPTIBLE and TASK_NOLOAD flags are set. This state is similar to TASK_KILLABLE, and it accepts fatal signals. | |
| Stopped | T | TASK_STOPPED: The process is stopped (suspended), usually by being signaled by a user or another process. The process can be continued (resumed) by another signal to return to running. |
T | TASK_TRACED: A process that is being debugged is also temporarily stopped and shares the T state flag. | |
| Zombie | Z | EXIT_ZOMBIE: A child process signals to its parent as it exits. All resources except for the process identity (PID) are released. |
X | EXIT_DEAD: When the parent process cleans up (reaps) the remaining child process structure, the process is now released completely. This state cannot be observed in process-listing utilities. |
Interpreting Process States
The system assigns a state to every new process. The S column of the top command or the STAT column of the ps command displays the state of each process. On a single CPU system, only one process can run at a time. Several processes can be in an R state. However, not all processes are running consecutively; some of them are in waiting status.
user@host:~$ top
PID USER  PR  NI    VIRT    RES    SHR S  %CPU  %MEM   TIME+    COMMAND
  1 root  20   0   49516  41072  10164 S   0.0   0.7   0:02.30  systemd
  2 root  20   0       0      0      0 S   0.0   0.0   0:00.00  kthreadd
  3 root  20   0       0      0      0 S   0.0   0.0   0:00.00  pool_workqueue_release
...output omitted...

user@host:~$ ps aux
USER       PID %CPU %MEM    VSZ   RSS TTY      STAT START   TIME COMMAND
...output omitted...
root         2  0.0  0.0      0     0 ?        S    11:57   0:00 [kthreadd]
student   2496  0.0  0.0 231132  3872 pts/0    R+   16:45   0:00 ps aux
...output omitted...
List Processes
To display the current active process, use the ps command:
ps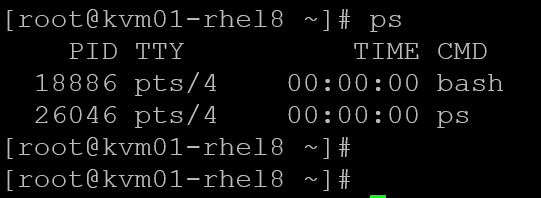
As we can see:
- PID = Each process has its own Process ID (PID). This is a unique value and it’s generated automatically by the system when a process is started.
- TIME = Amount of time that the process has been running.
- CMD = The command executed to launch the process.
Following ahead, we can use the command “ps aux” to get details of all processes running in the system:
ps auxWhere:
- a = all users
- u = shows the user/owner of the process
- x = displays processes not executed in the terminal (making the output rather long)
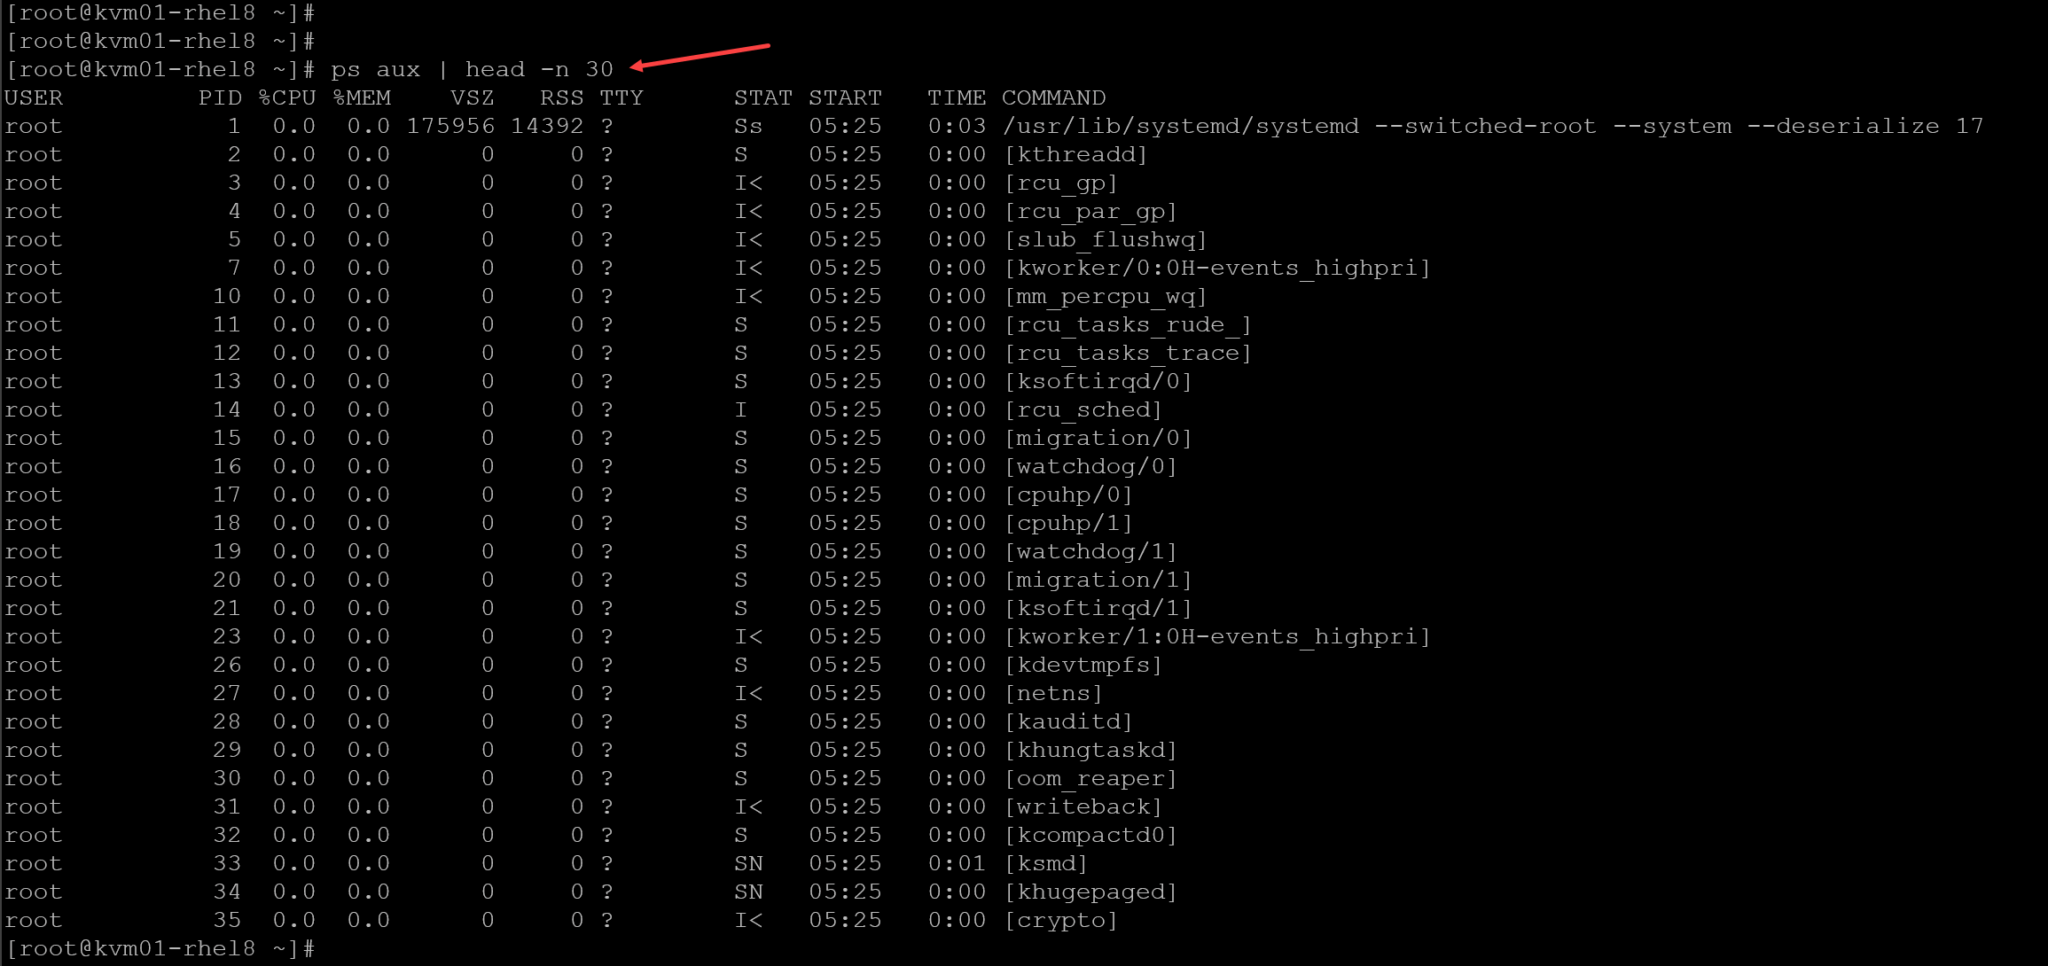
In the following picture, for instance, we’re showing only the first 30 lines. In the first column, we can see the user who initiated the process (the process owner). Additionally, we can see the percentage of CPU and MEMORY used by the process:
Let’s provide a practical example:
ps lax --forest | lessThe ps command --forest option to display the processes in a tree format so that you can view the relationships between parent and child processes:
- The main SSHD process has a process ID (PID) of 1117 and a parent process ID (PPID) of 1.
- The SSH session opened by the root user has a process ID (PID) of 2265. Note that the PPID for it is the main SSHD process (PPID of 1117).
- The bash shell that was opened under the root’s SSH session has the PID of 2291 and PPID of 2265.
- All commands executed under the bash shell have their own PID and the bash’s PPID of 2291:

Foreground and Background Jobs
We can start a program in the foreground or the background. In simple terms, when we start a program in the foreground, the program will grab the terminal to run the program. For example:
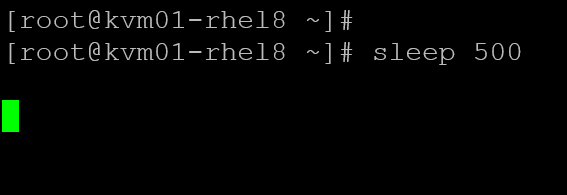
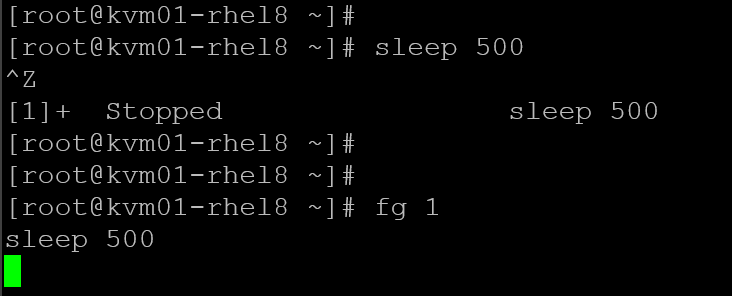
In the above picture, we ran the command “sleep 500”. Note that the command takes control of the terminal, preventing us from typing anything. This is a simple example of a program running in the foreground – we regain control of the terminal only when the program finishes, or we kill the program execution, or stop the program execution.
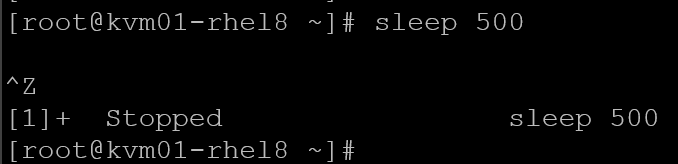
In the following picture, for instance, we’re stopping the program execution with Ctrl + Z – look at how we gave terminal access immediately after stopping the program:
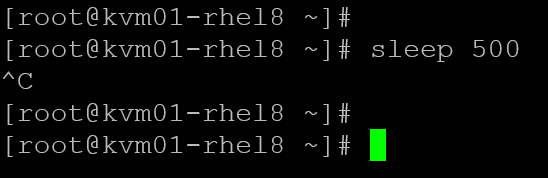
To cancel/abort the program execution, press Ctrl + C – it will kill the program and provide terminal access immediately:
Another example… if you run a program in the foreground and for some reason, need to stop the program to have access to the terminal and, later, start the program, you can do as we show in the following picture:
- sleep 500 –> starts the program to run in the foreground
- Ctrl + Z –> stops the program and provides terminal access
- fg 1 –> starts the program again in the foreground. The “1” is the job index, automatically assigned by the system
Otherwise, to run a program in the background, we must enter “&” in the final, for example:
sleep 500 &This command will execute in the background, allowing us to access the terminal. To list all jobs running in the background, use the command “bg”:
bg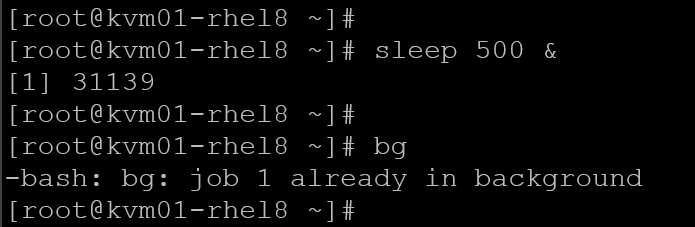
To switch the job to the foreground:
fg 1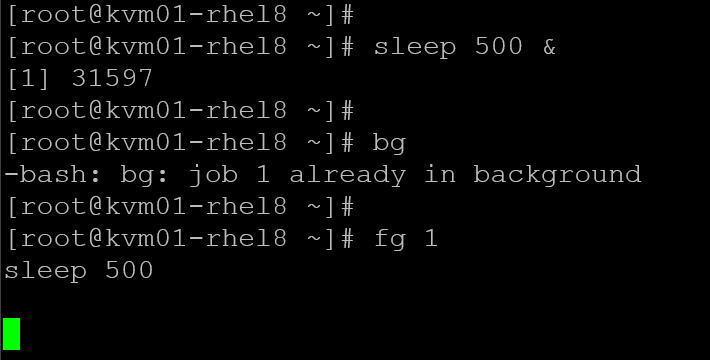
Note: We’re using “1” because it was the job index generated by the system. To remember, the job index is automatically generated by the system for each job.
Killing Processes
Inevitably, a process will get hung, and you will need to terminate it. The most accurate way to identify a process is by process ID (PID). With this information (PID), we can terminate the process using the command “kill”.
The “kill” command provides several signals that we can send to a process to terminate it. The “kill -l” shows all available signals:
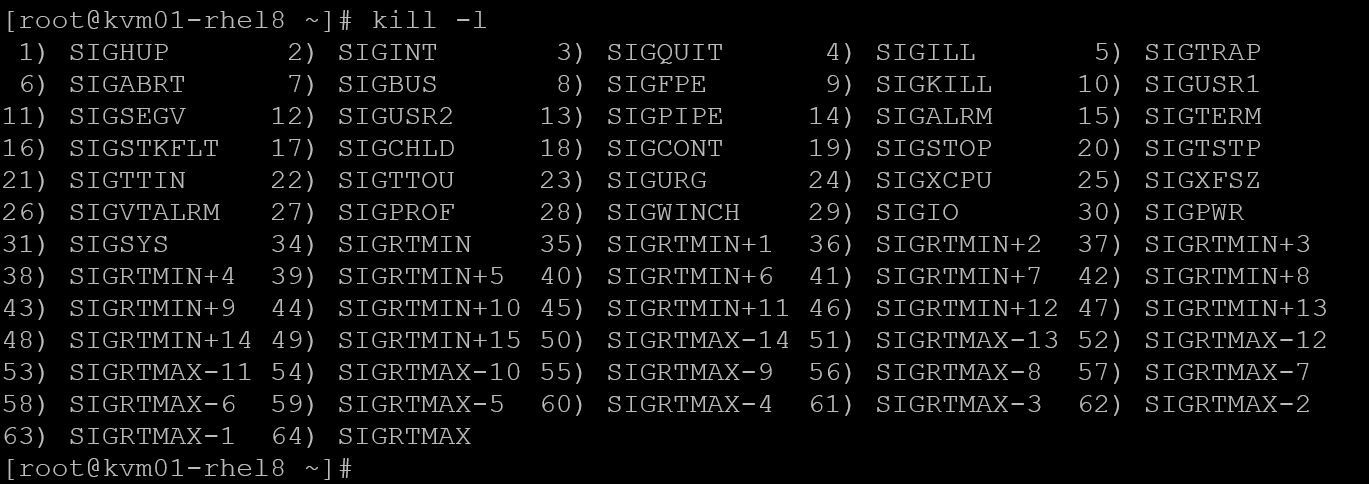
Note: The “9) SIGKILL” and “15) SIGTERM” are the most used signals:
- 9) SIGKILL –> send a signal to terminate/kill the process abruptly.
- 15) SIGTERM –> send a signal to terminate the process smoothly (it will try to terminate the process as best possible). If it doesn’t work, use “SIGKILL”.
Let’s give an example:
- Let’s execute two programs in the background: sleep and dd.
- Afterward, use the “ps” to list all processes for the logged user.
- Let’s identify the process ID for the sleep and dd programs:
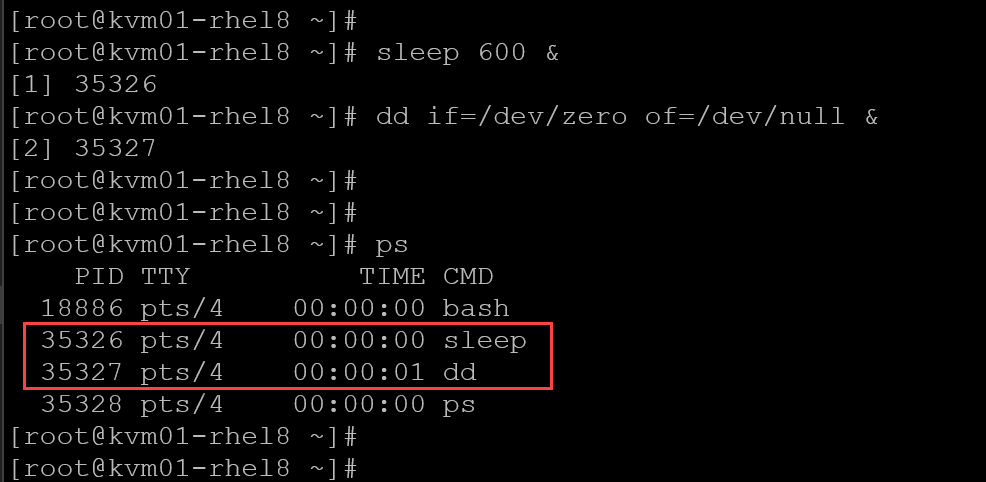
Let’s terminate the “dd” process with the “SIGTERM” and the “sleep” process with “SIGKILL”:
# Terminating the "dd" process using the "SIGTERM" (15):
kill -15 35327

# Terminating the "sleep" process using the "SIGKILL" (9):
kill -9 35236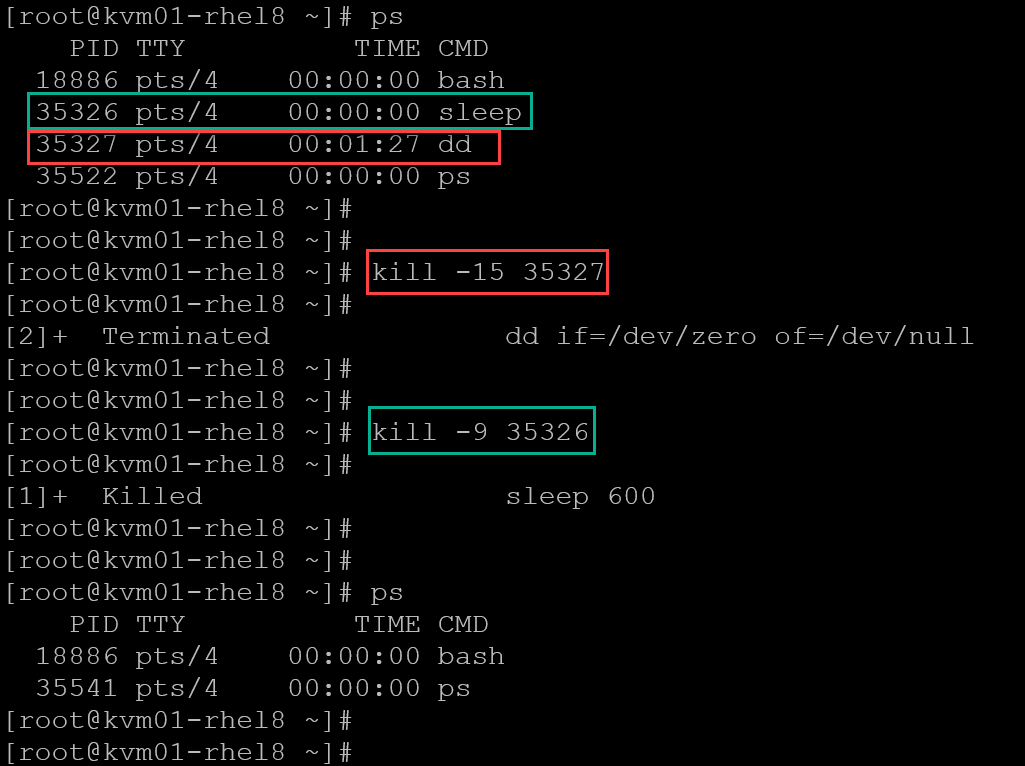
We can also terminate/kill a process by name using the “killall” command. Let’s give an example:
- Let’s execute the “sleep” command five times in the background:
sleep 100 &
sleep 200 &
sleep 300 &
sleep 400 &
sleep 500 &
To terminate/kill all the “sleep” processes, we can type:
killall sleep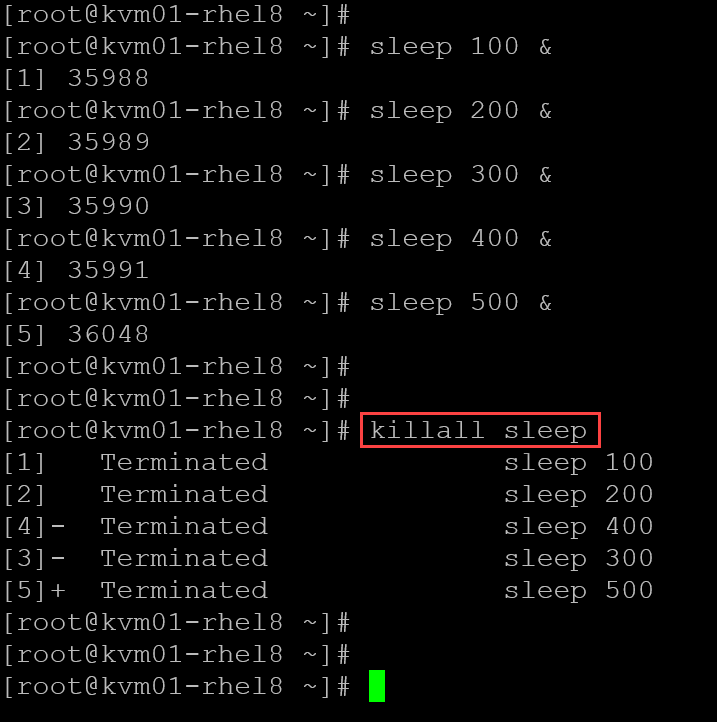
Another essential command for terminating or killing processes is “pkill”.
Let’s give an example:
- Switch to a normal user, for instance, “thor” username.
- Let’s create some processes with this user (create some “sleep” processes).
- Switch to the root user again, and list all processes filtering by the command “sleep”:
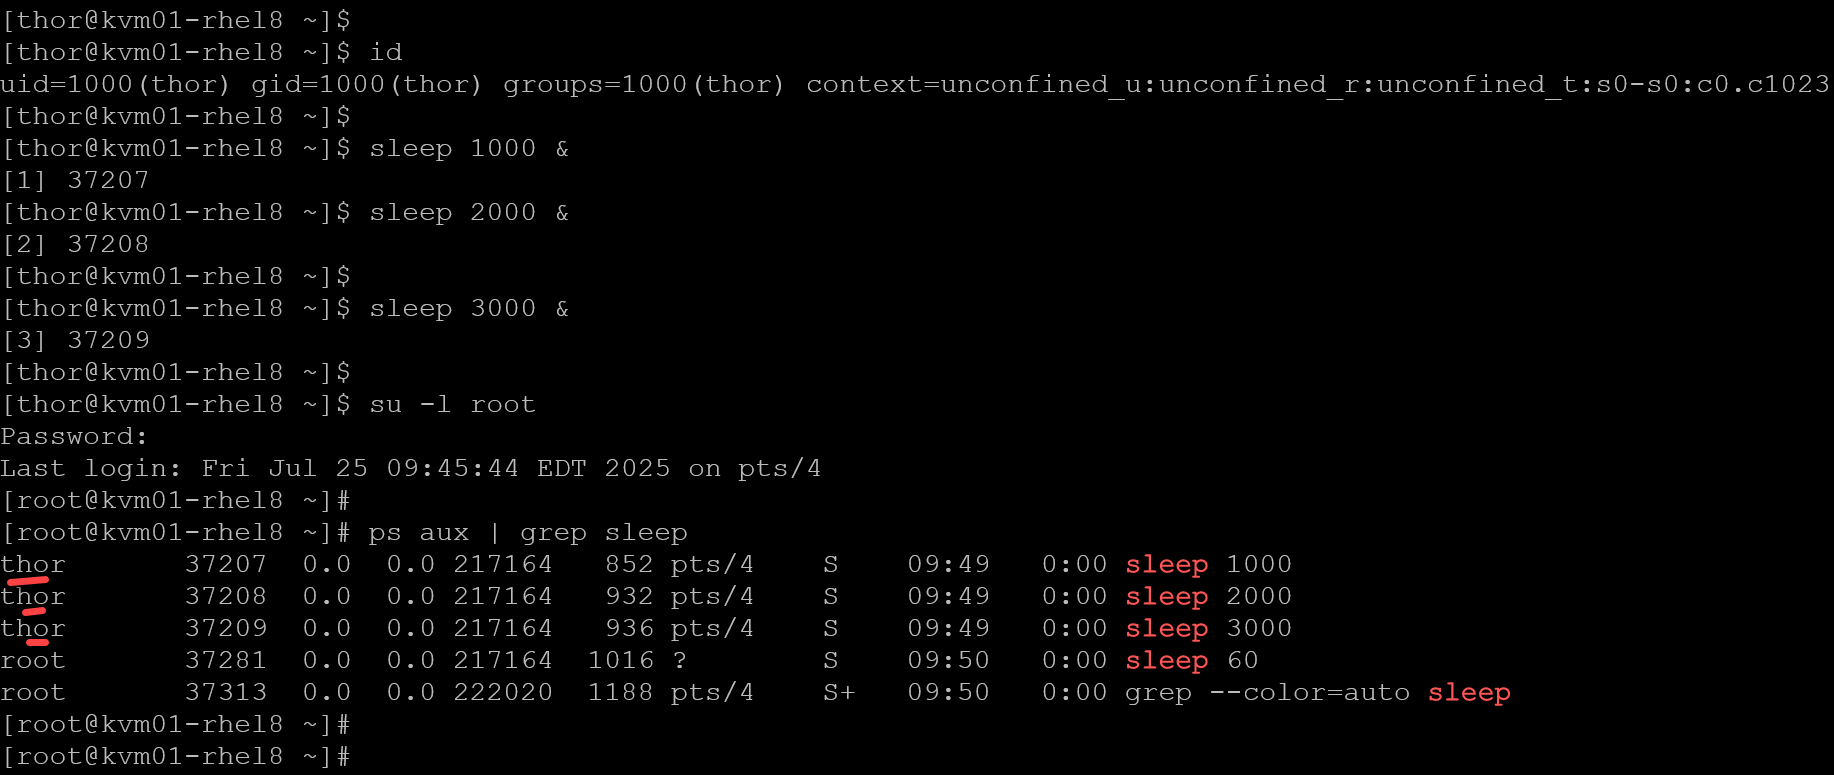
As shown in the above picture, in this example, three “sleep” processes were started by the “thor” user.
To kill all the processes started by the user “thor”:
pkill -u thor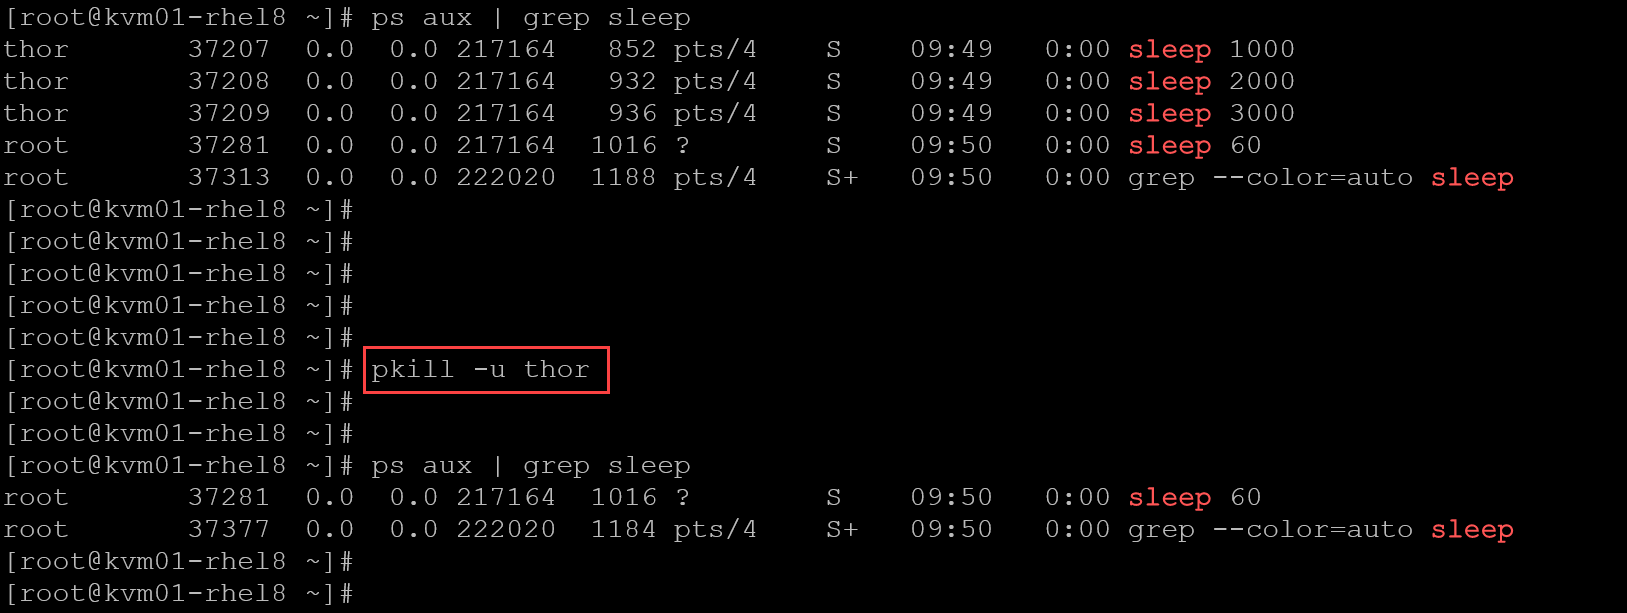
Another essential command for daily system administration is “top”.
The “top” command shows all processes dynamically running on the system:
top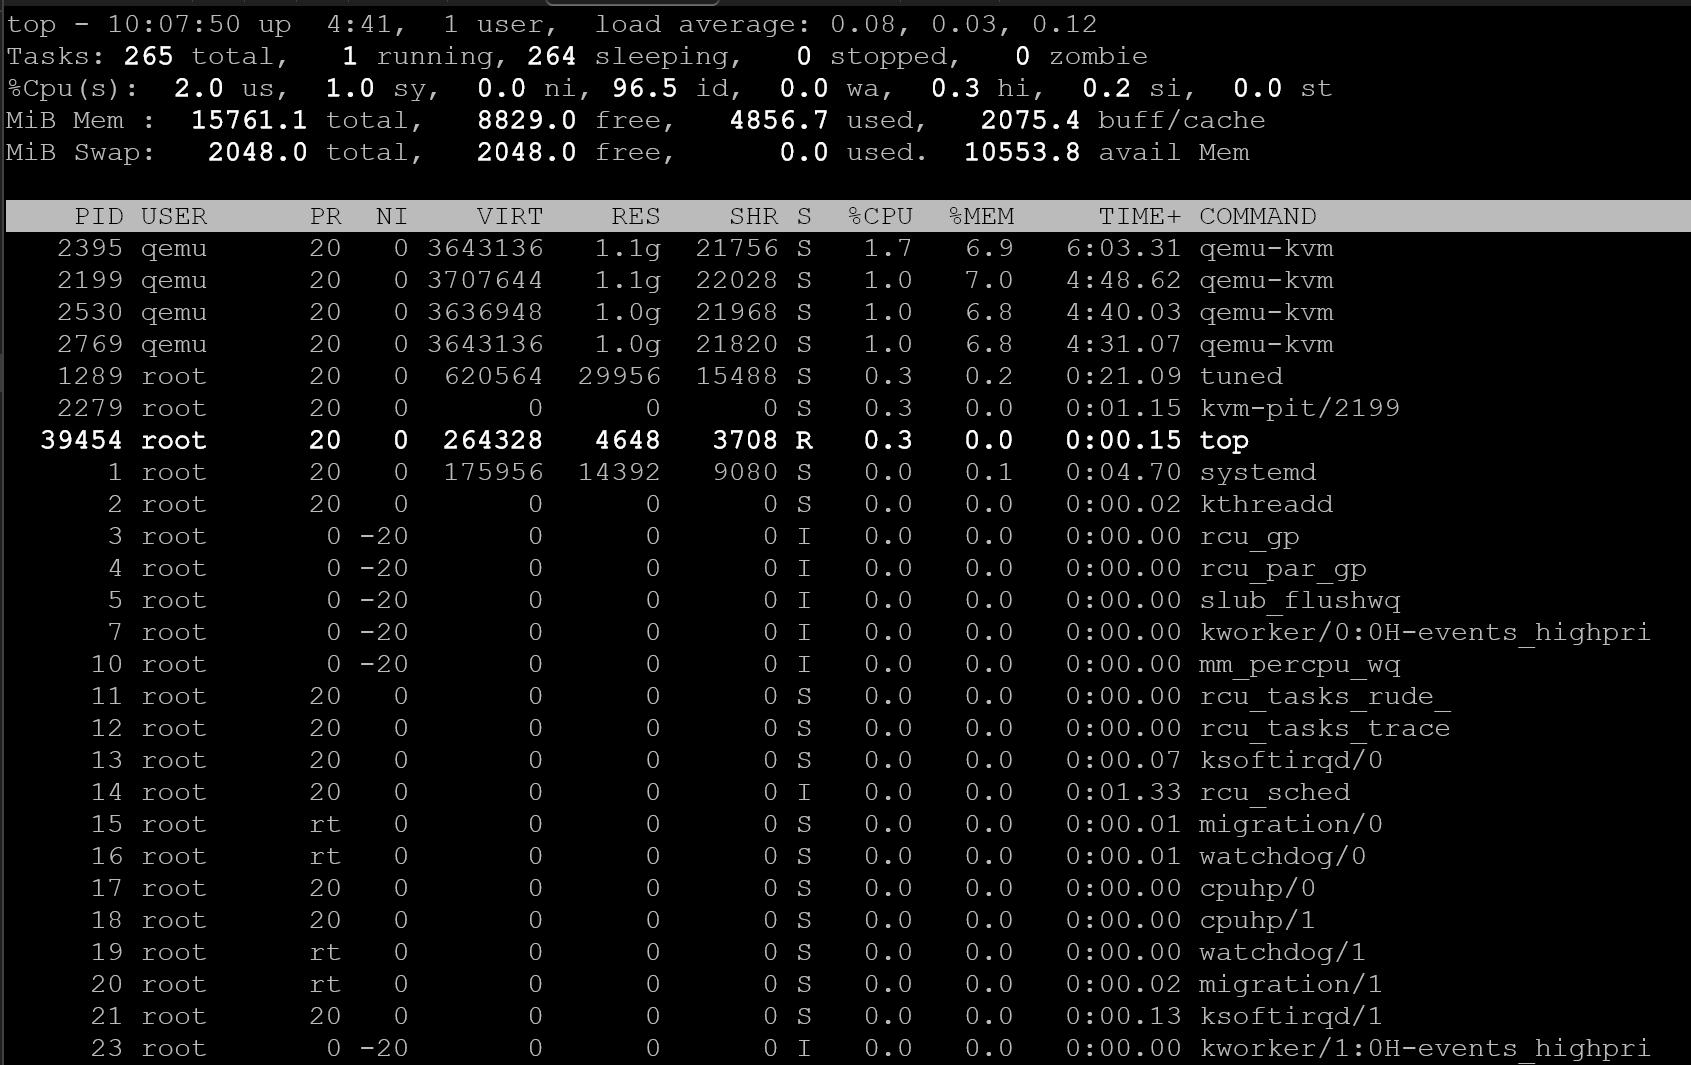
All the data in the “top” command is up-to-date every three (3) seconds by default.
Let’s provide an example:
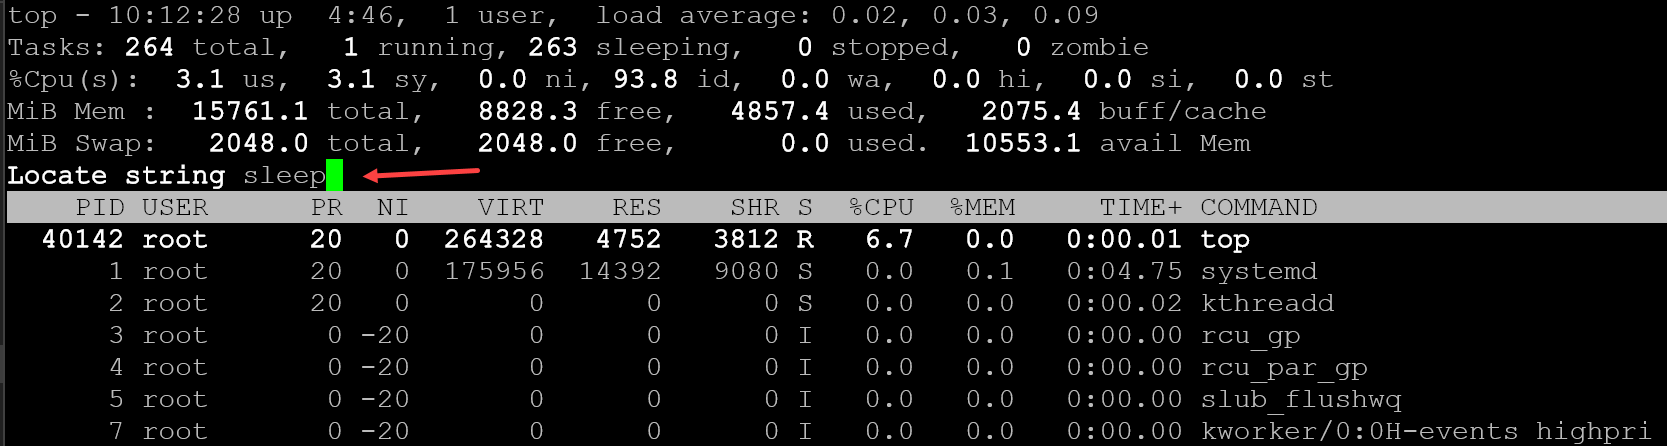
- We’ve started some “sleep” commands in the background.
- After executing the “top” command, press L to locate a process by entering a string.
- For example, the string is “sleep” – we’re searching for all processes that contain “sleep” – press ENTER to start the search:
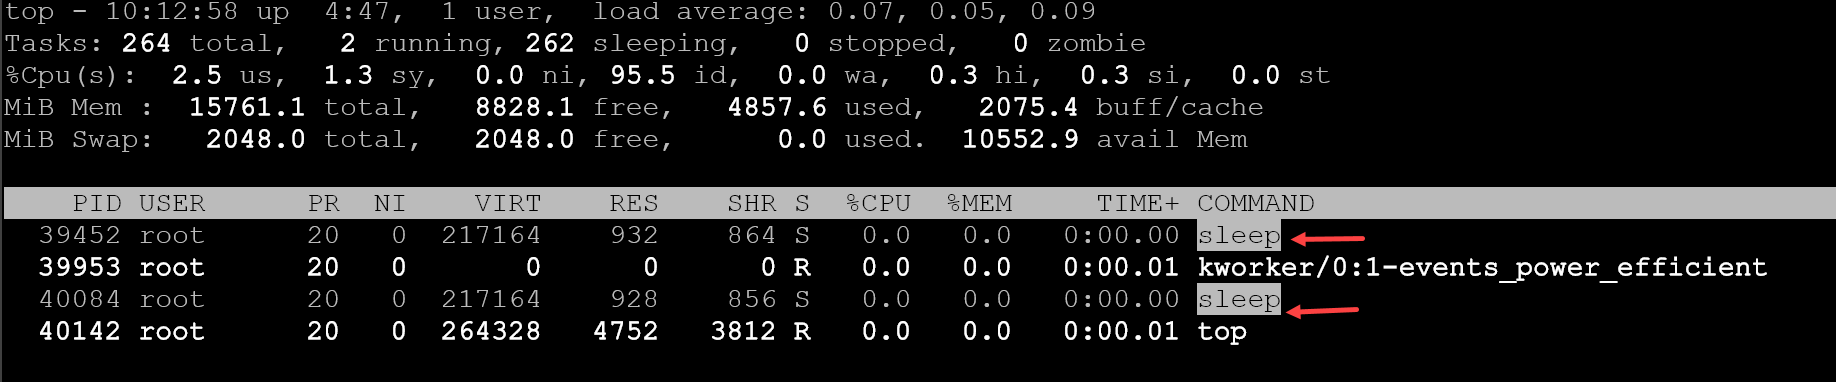
To kill the first “sleep” process (in our case, the process with PID 39452), press k.
A confirmation is displayed, indicating that the process with ID 39452 will be terminated. So, press ENTER to continue:
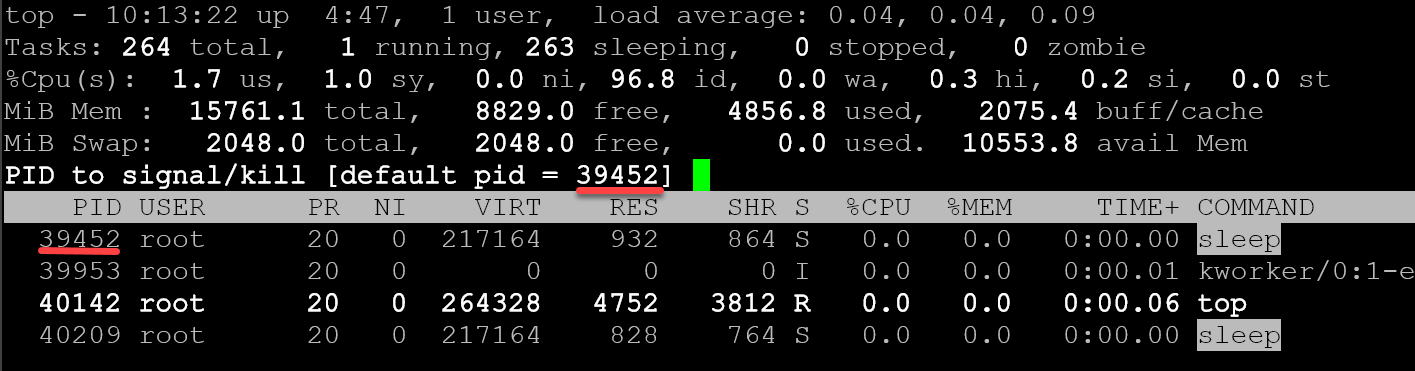
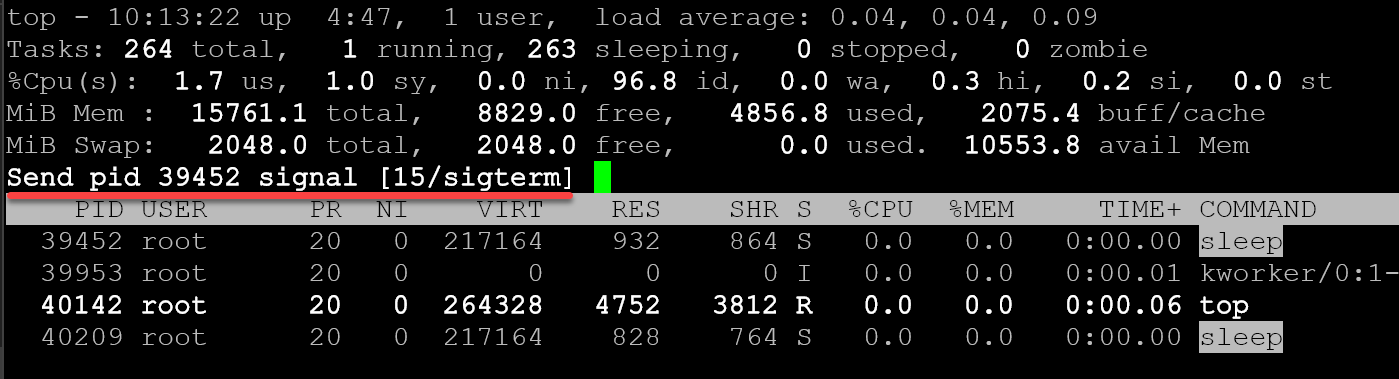
By default, a SIGTERM (15) signal will be sent to the process. Press ENTER to continue:
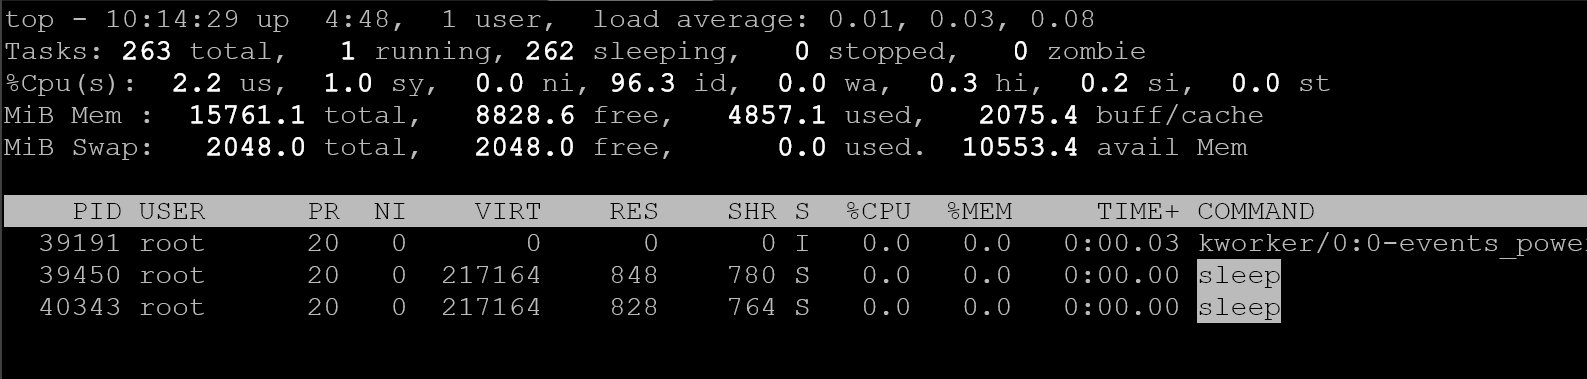
And that’s it. The process PID 39452 was terminated successfully:
So, that’s it for now 🙂
