

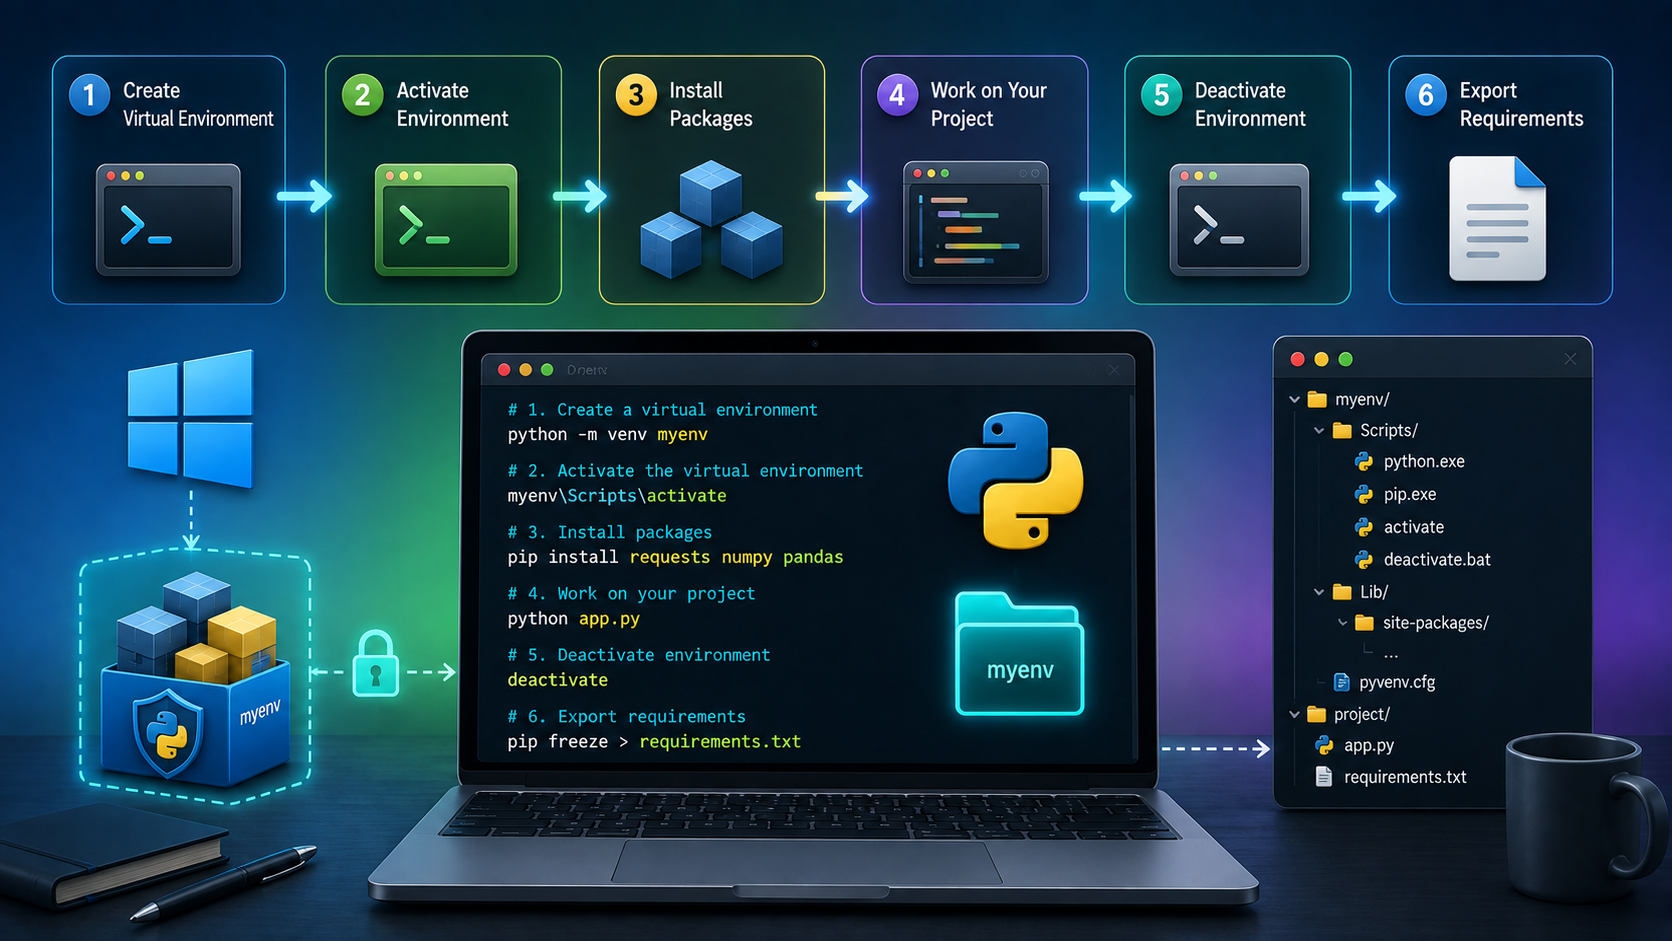
A Python virtual environment on Windows allows developers to create isolated environments for different projects, keeping Python packages and dependencies separated. In this guide, I will show how to create, activate, use, and manage a virtual environment using the built-in Python venv module.
When working with Python projects, managing different library versions can become a challenge. A virtual environment provides a clean and organized way to install project-specific packages without affecting the global Python installation on Windows.
I created this practical guide to demonstrate how Python virtual environments work in a Windows environment, including common tasks such as installing modules, running scripts, deactivating the environment, and creating a requirements.txt file.
First and foremost, if you are new to Python like me and would like to install Python on Windows, we’ve written a short article to show how to do it. Click here to access this article.
What is Python Virtual Environment?
A Python virtual environment (often called venv) is a way to create an isolated “mini-Python installation” for each project.
We can think of it like this:
- Your Windows system has:
- One global Python installation.
- Many projects, each one needing different modules/libraries versions.
Without Python virtual environments:
- Installing a package (a module, for example) for one project affects all projects.
- Version conflicts happen (Project A needs the requests 2.28, Project B needs the same requests module, but in the 2.31 version).
With Python virtual environments:
- Each project gets its own:
- Python interpreter.
- pip.
- Installed modules and libraries.
- No conflicts, clean and safe.
Why You Should Use It?
Using a Python virtual environment will:
- Keep your operating system clean.
- Allow you work on many Python projects at the same time.
- Let you test versions safely.
- Make your projects portable.
How does it work on Windows?
Let’s get started and explain it in a practical way:
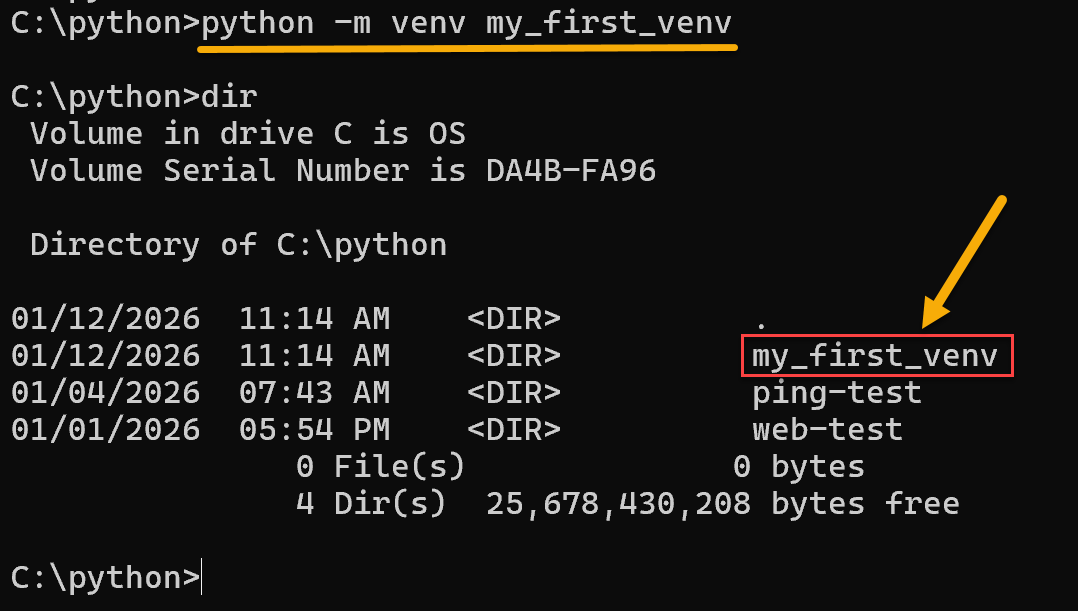
1. To create a Python virtual environment (venv), open the command-line (cmd) and create the virtual environment (of course, Python must be installed). In this case, for instance, the Python venv name is “my_first_venv”:
python -m venv my_first_venv2. Look at a new directory that was created with the same venv name:
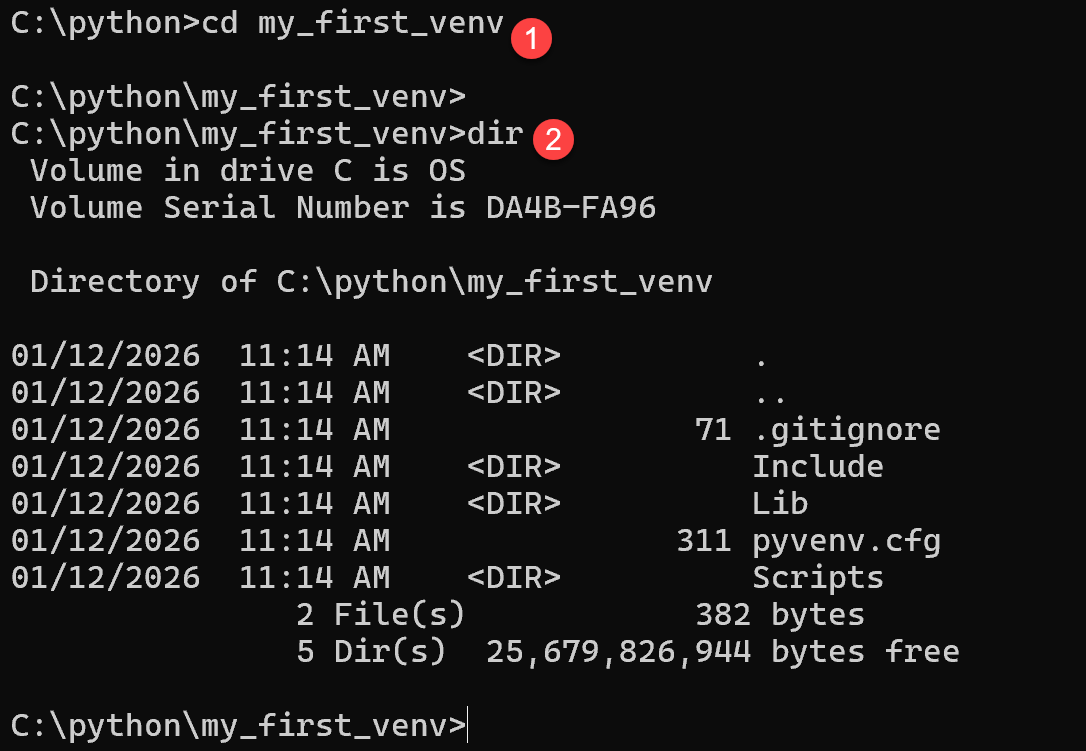
Inside it, we have the necessary structure to support our virtual environment:
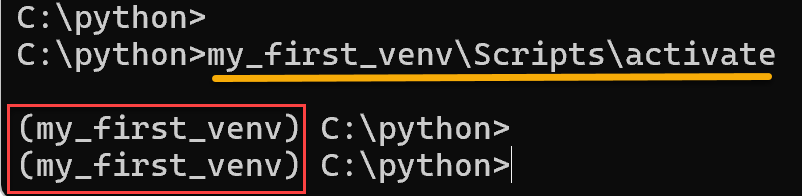
3. After creating the venv, we need to activate it to use it effectively:
my_first_venv\Scripts\activateAfter activating the venv, the prompt command was changed and added the venv name at the initial – it indicates that the venv was enabled successfully:
4. Now, let’s install the paramiko module:
pip install paramiko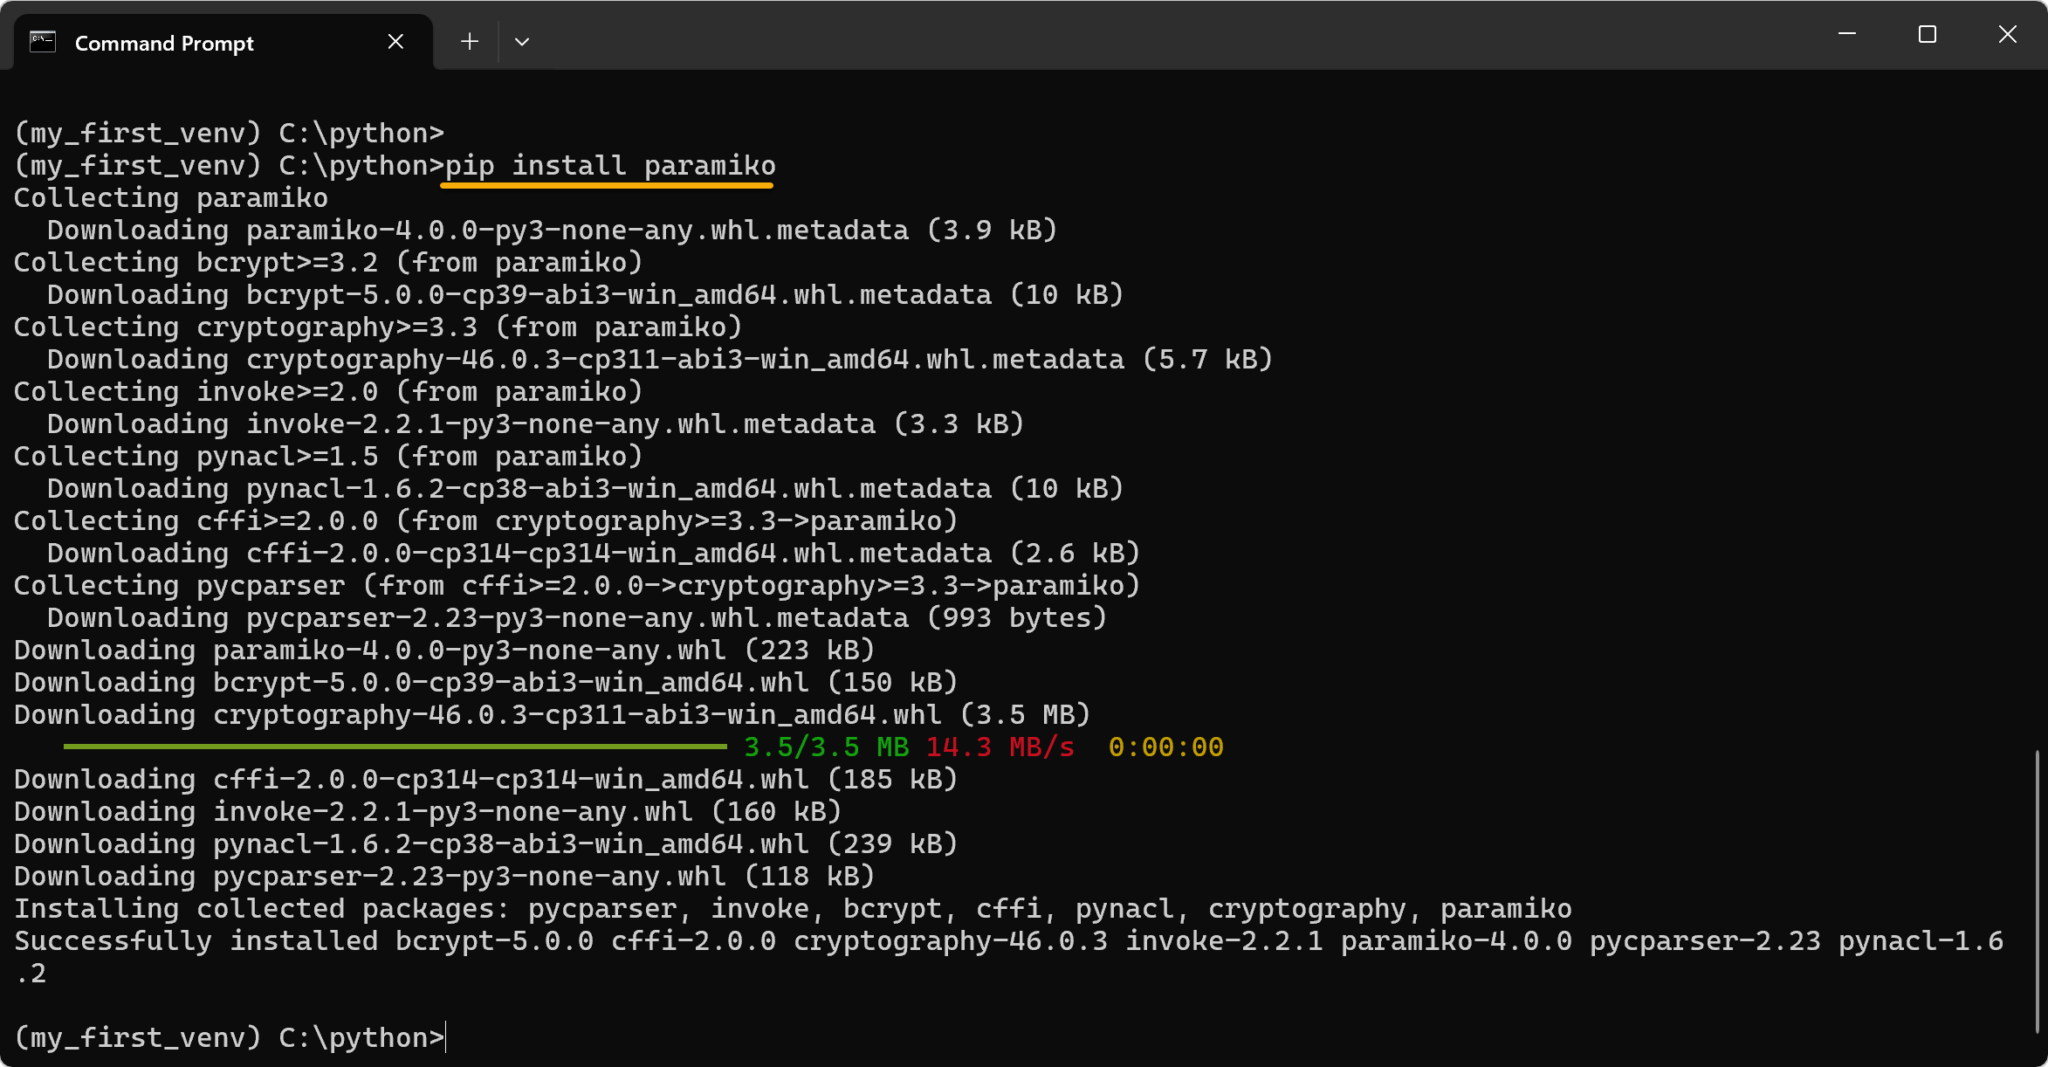
It installs only inside that project 😉
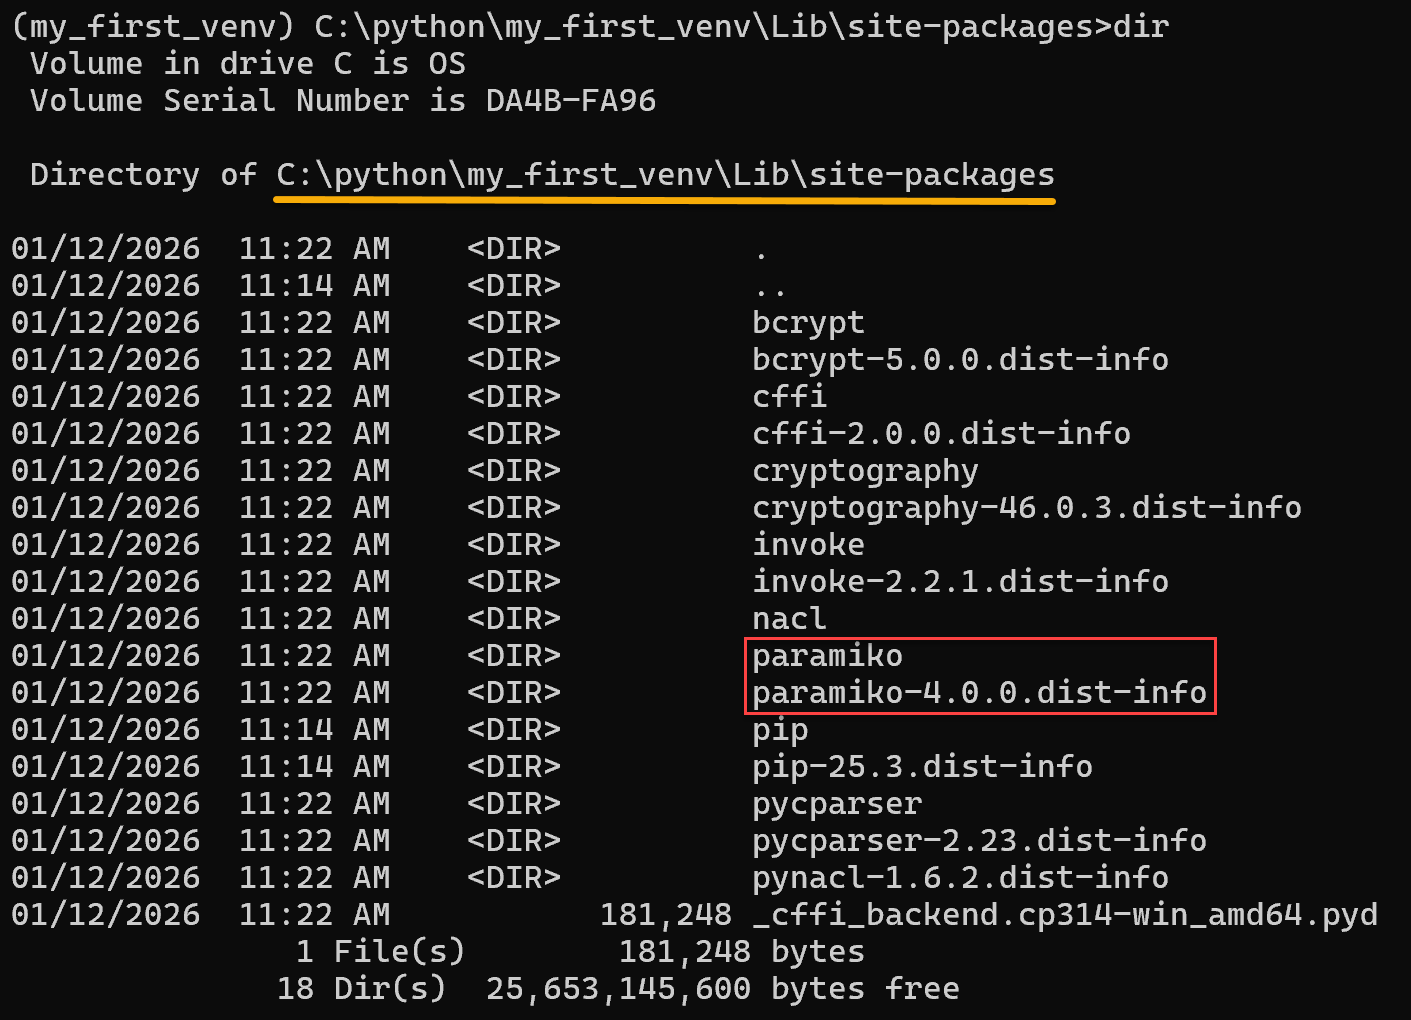
Inside the “Lib\site-packages” on the venv directory, we can see the paramiko packages:
5. Executing a Python script inside the venv:

Note: This is a very simple Python script, just to show the functionality:

6. To deactivate the virtual environment:
deactivate
Note: Look at the command prompt – the Python venv name is removed from it after deactivating!
7. If you need to go back and work with the venv again, just activate it again. Look, you can specify the absolute path to activate it:
C:\python\my_first_venv\Scripts\activate
8. To make your project portable, you can create a “requirements.txt” file inside your venv and put in it all the necessary modules to work with your project. For example:

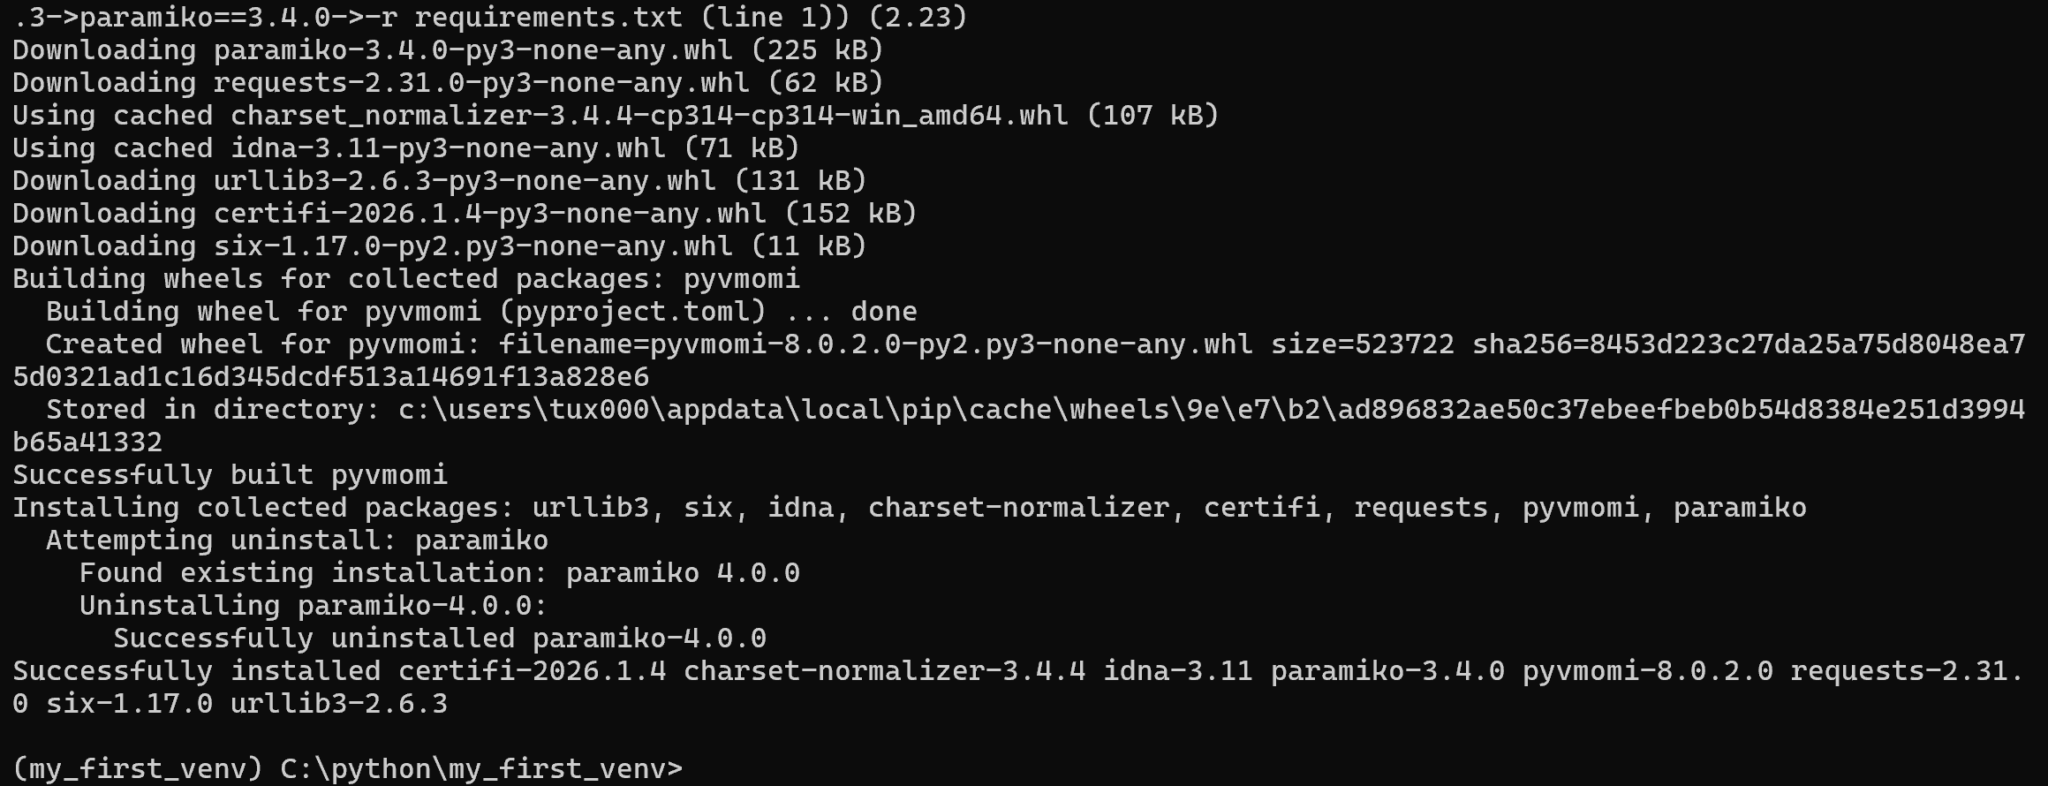
As we can see, our requirements file lists the modules paramiko, pyvmomi, and requests, along with their versions. To install these packages into the venv:
pip install -r requirements.txt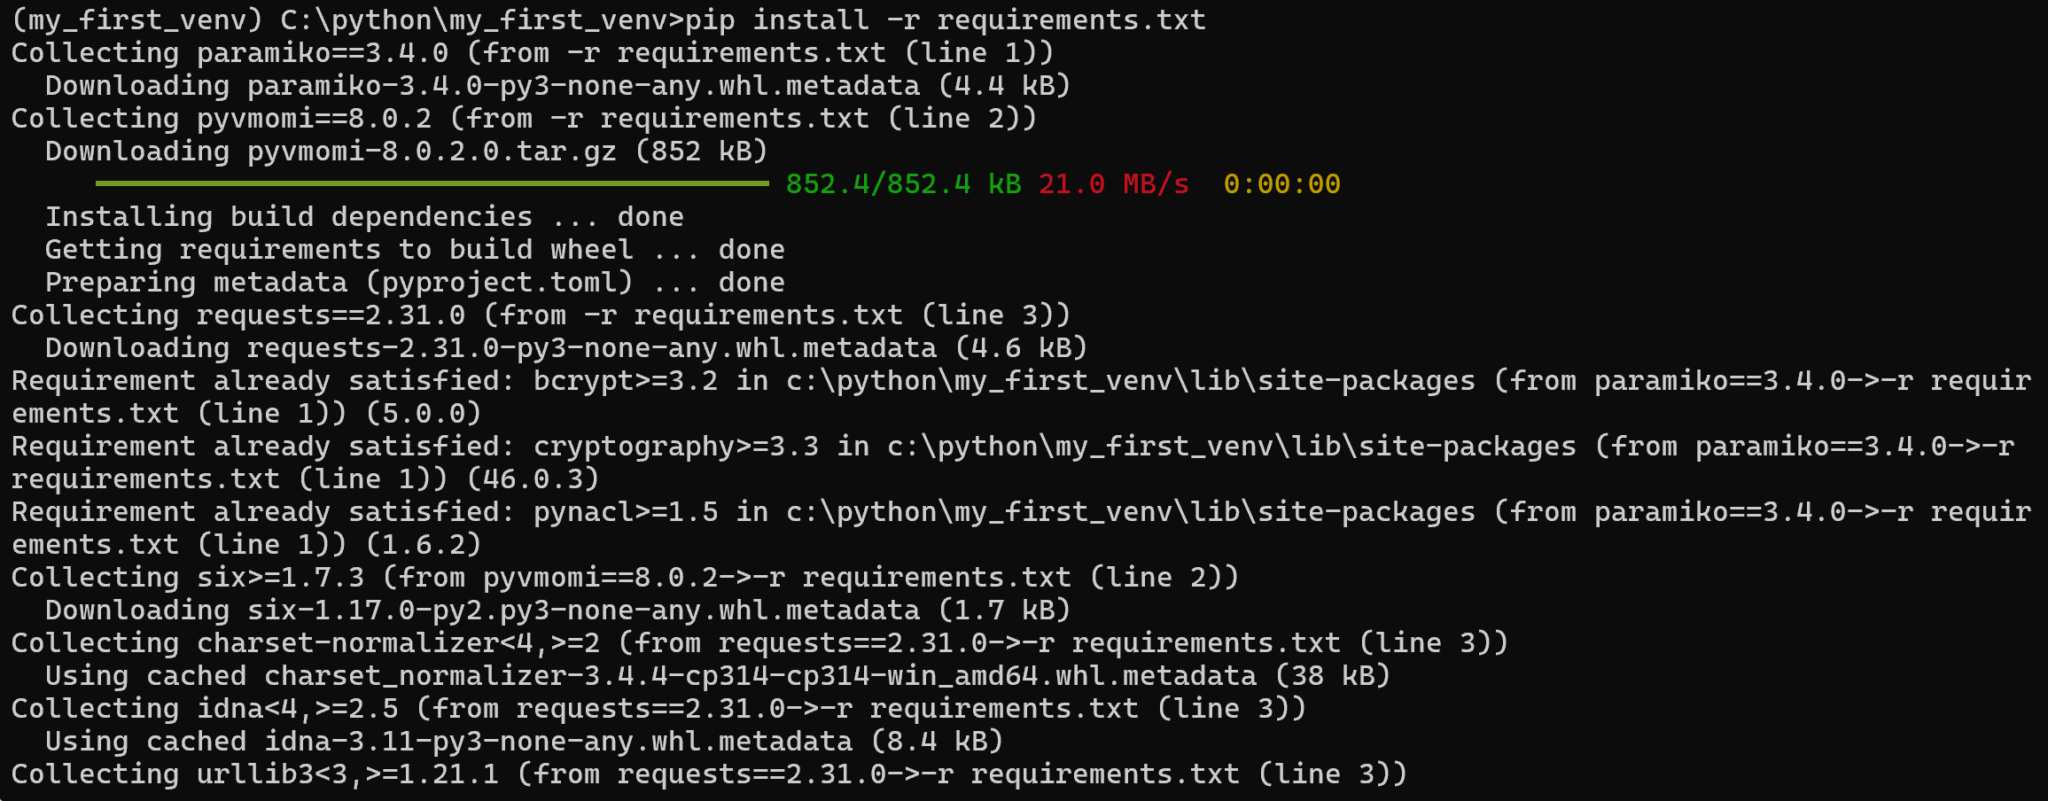
In short: A Python virtual environment is a safe, isolated, project-specific Python world!
That’s it for now 🙂
