

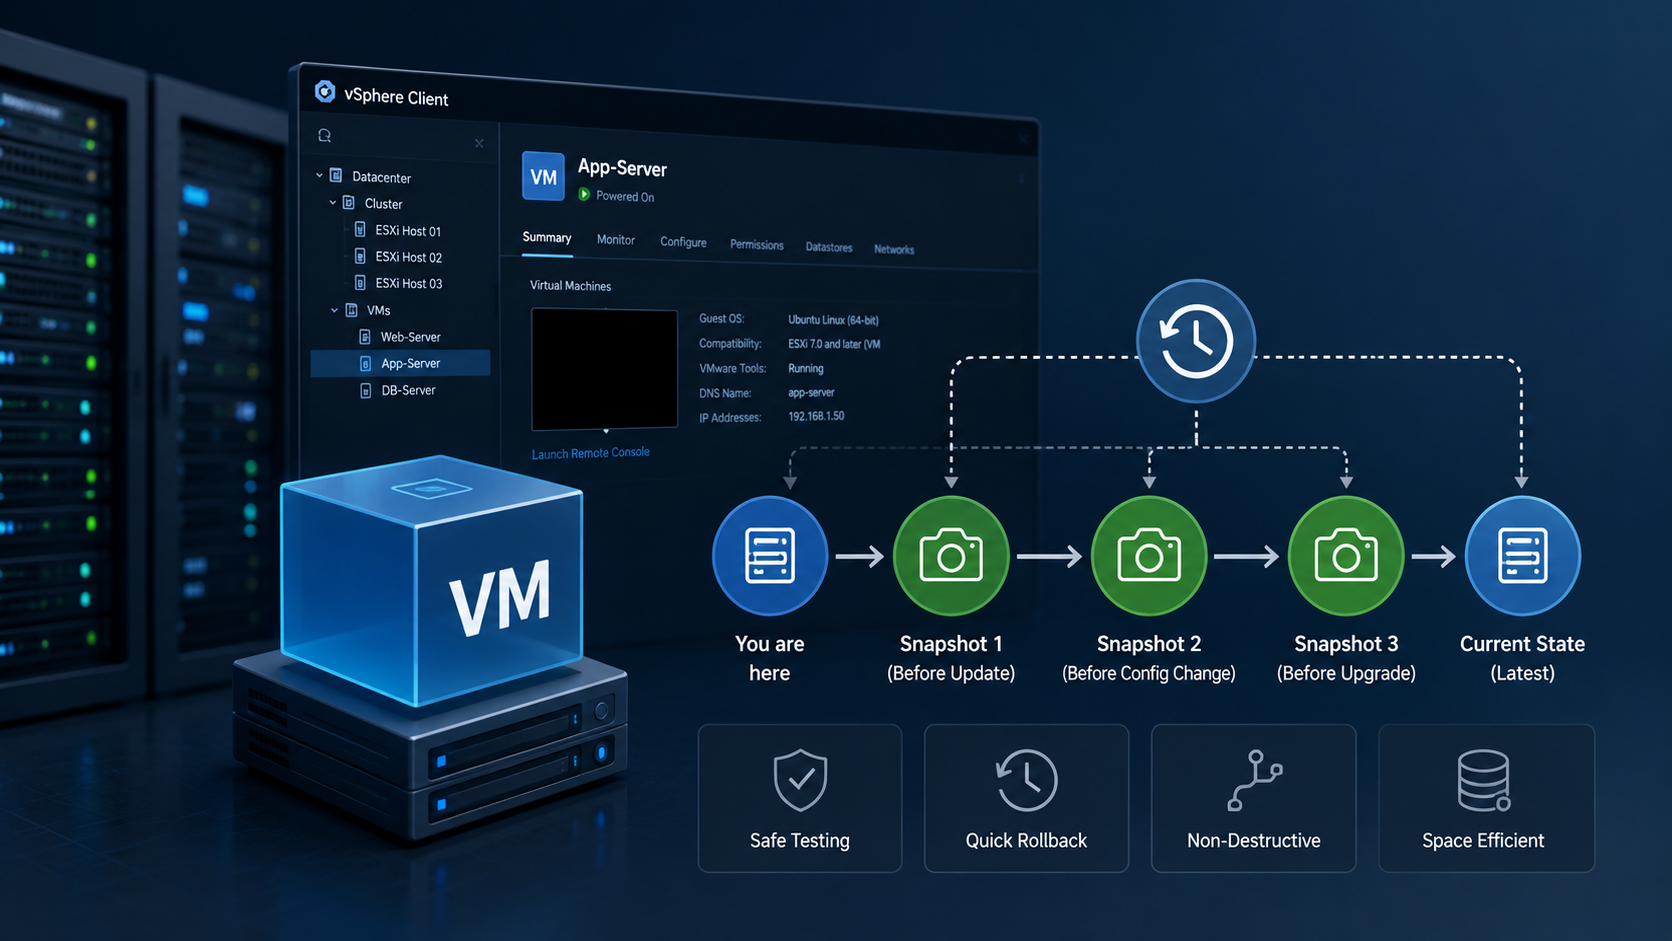
VM Snapshots Basics is an article that explains what is a VM snapshot and how it works in a vSphere Environment.
What is a Snapshot?
Basically, a Snapshot is a function that can be used to maintain or preserve the state and data of a virtual machine at a specific point in time (PIT):
- The states include the virtual machine’s power state (powered-on, powered-off, suspended);
- The data includes all files that make up the virtual machine. This includes disks, memory, etc.
A virtual machine provides several operations for creating and managing snapshots and snapshot chains. These operations let you create snapshots, revert to any snapshot in the chain, and remove snapshots. You can create extensive snapshot trees.
Important: Snapshot is not a BACKUP. So, YOU SHOULD NOT USE A SNAPSHOT AS A BACKUP!
Source: To get more details about VMware Snapshot, click here.
Snapshot Types
So, now we know what is a Snapshot and we never use a snapshot as a backup. The next step here is to describe some snapshot types:
| Snapshot Type | Notes about Usage | Snapshot File Name | Block Size |
| VMFSsparse | — VMFS5 with disks smaller than 2 TB | #-delta.vmdk | 512 bytes |
| SEsparse | — VMFS6 — VMFS5 with disks larger than 2 TB — Space efficient (thin provisioned) — Supports disk reclamation (unmap) | #-sesparse.vmdk | 4 KB |
| vsanSparse | — vSAN | Delta Object | 4 MB |
Creating a VM Snapshot
The action of creating a VM snapshot is straightforward and it is not a hard job.
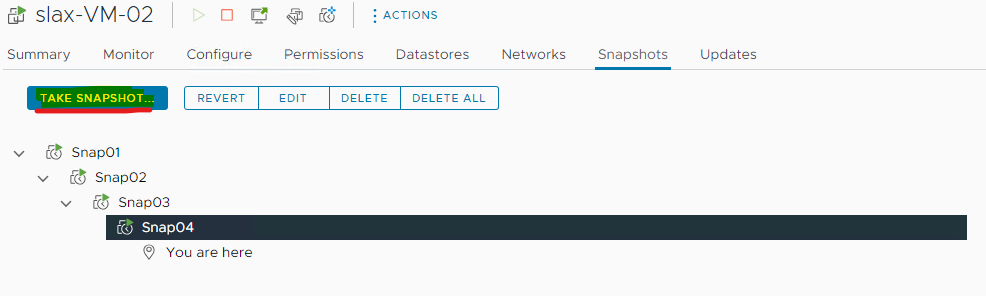
Firstly, we need to open the vSphere Client interface (if you are running a vSphere Cluster or you can open a DCUI interface to a specific ESXi host). After it, select the VM –> Go to Snapshot Tab –> and Click on “Take Snapshot”:
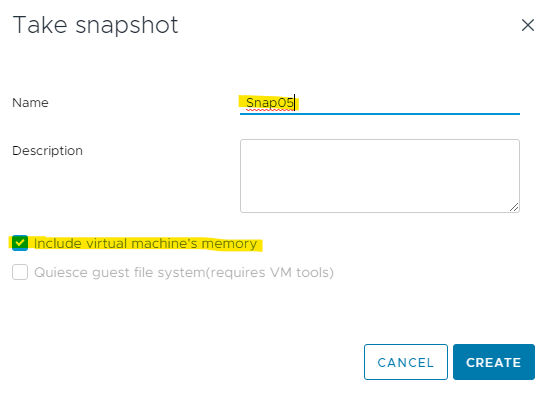
Type the snapshot name, type a snapshot description (optional), and if necessary, mark the option “Include virtual machine’s memory”. If this option will be marked, all virtual machine memory will be saved in this snapshot. After, click on CREATE:
Wait while the snapshot is being created.
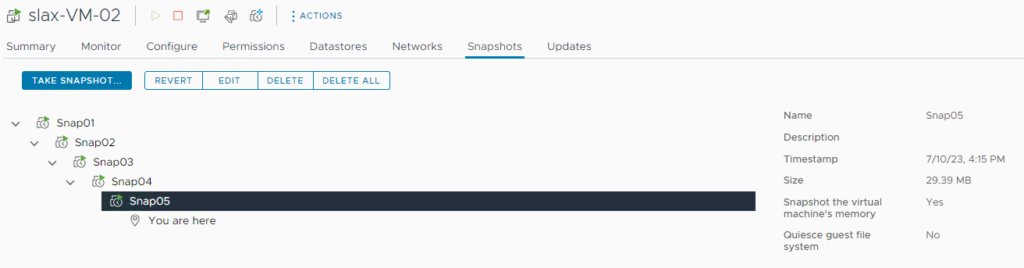
In our example, we have 5 snapshots. In the below picture, we can see these snapshots under the VM’s Snapshot tab:
Snapshot Files
A snapshot is composed of some files:
— Snapshot#.vmsn = Configuration state
— Snapshot#.vmem = Memory state (optional) – If you create a snapshot with memory, this file will be created
— 00000#.vmdk = Disk Descriptor File
— 00000#-delta.vmdk = VMFS5 delta file
— 00000#-sesparse.vmdk = VMFS6 delta file
.vmsd = Store name, descriptions, and relationships for all the VM’s snapshots (Basically, like a Snapshot Database)
Understanding the Snapshot Chain by an Example
As we saw before, our VM has 5 Snapshots. We can see details of each one from the vSphere Client interface or by command line.
Access the ESXi host that this VM is running and check the snapshot details with the below commands:
- Get the VMID:
vim-cmd vmsvc/getallvms
In this example, our lab VM has the VMID = 9. - Get snapshot details for the VM ID = 9:
vim-cmd vmsvc/snapshot.get 9
We can see a lot of details, such as:
— Snapshot Name
— Snapshot Id
— Snapshot Creation Time
— Snapshot State
— And see the Snapshot Chain (we can see the ROOT snapshot and all CHILD snapshots)
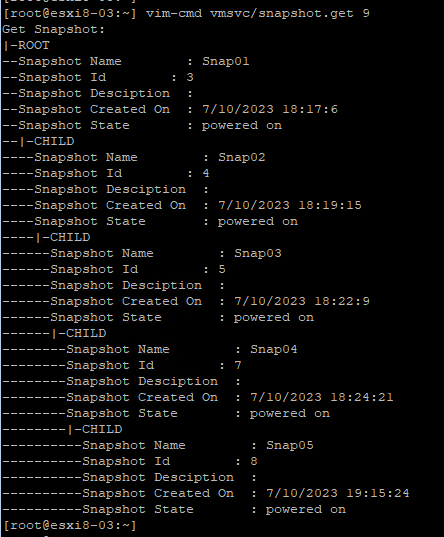
We can access the VM home directory and see what files we have under this directory. Access the ESXi host by SSH and access the VM home directory. After that, we can check the content of the “vmsd” file. This file is like a “Snapshot Database File”.
We can see all snapshots, from younger snapshots to older snapshots:
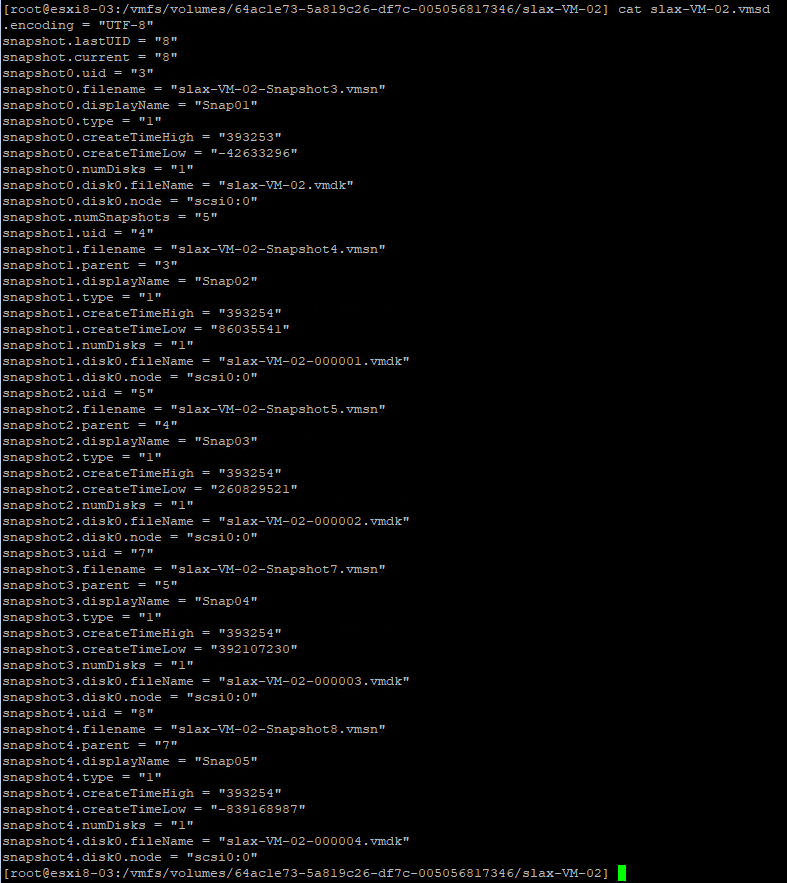
So, based on this information and information from files inside the home VM directory, we can enumerate all files for each snapshot, look at the below image:
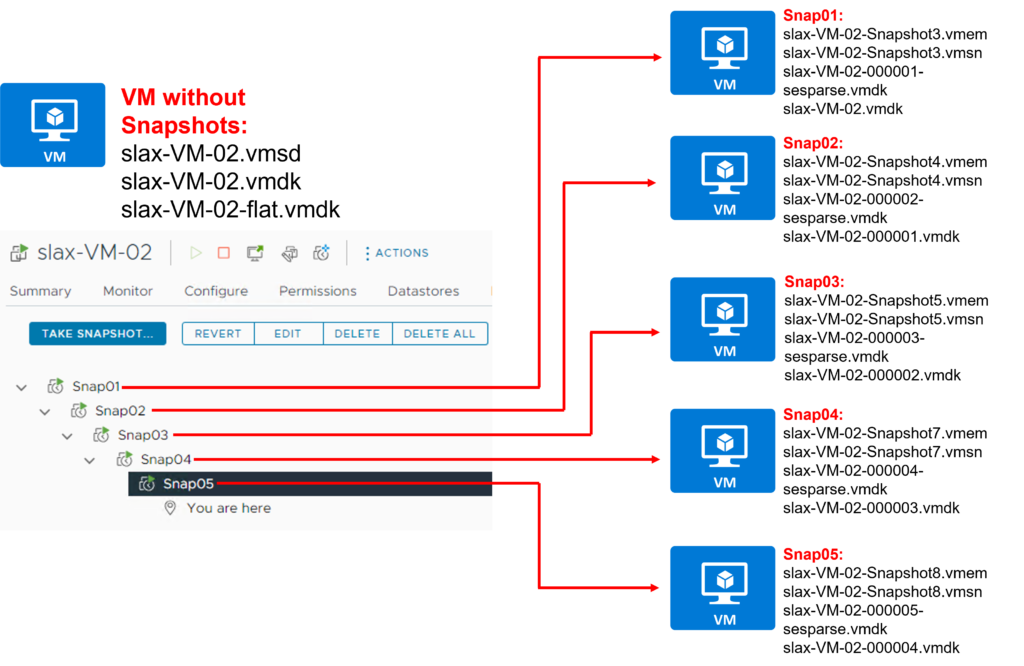
Important: I did not mention it in the picture above, but for each VM we have the “.vmx” file. This file has all details and configurations for a VM. For our VM called “slax-VM-02”, the VM configuration file is “slax-VM-02.vmx”.
If we search by “scsi” in this VM file (.vmx), look at the line “scsi0:0.fileName”.
In this case, the value “slax-VM-02-000005.vmdk” is the Disk File Descriptor that this VM is using:
| [root@esxi8-03:/vmfs/volumes/64ac1e73-5a819c26-df7c-005056817346/slax-VM-02] less slax-VM-02.vmx | grep scsi scsi0.virtualDev = “lsilogic” scsi0.present = “TRUE” scsi0:0.deviceType = “scsi-hardDisk” scsi0:0.fileName = “slax-VM-02-000005.vmdk” sched.scsi0:0.shares = “normal” sched.scsi0:0.throughputCap = “off” scsi0:0.present = “TRUE” scsi0.pciSlotNumber = “16” scsi0:0.redo = “” |
We can see the content of this file, as we will show below. In this file, we have a lot of details, such as:
— CID (Content ID)
— Parent CID
— Create Type (Type of Snapshot – In this case, we are using the “seSparse” type)
— Parent File Name
— What is the “delta” disk for this Disk Descriptor File (-sesparse.vmdk)
In this example, the disk descriptor file depends on the disk descriptor “slax-VM-02-000004.vmdk”:
| [root@esxi8-03:/vmfs/volumes/64ac1e73-5a819c26-df7c-005056817346/slax-VM-02] cat slax-VM-02-000005.vmdk Disk DescriptorFile version=1 encoding=”UTF-8″ CID=87e34964 parentCID=b6954aeb createType=”seSparse” parentFileNameHint=”slax-VM-02-000004.vmdk” Extent description RW 16777216 SESPARSE “slax-VM-02-000005-sesparse.vmdk” The Disk Data Base DDB ddb.grain = “8” ddb.longContentID = “963ce14942979e04c2e518fa87e34964” |
If we look at the file content “slax-VM-02-000004.vmdk”, we can see that this disk descriptor depends on the disk descriptor “slax-VM-02-000003.vmdk”:
| [root@esxi8-03:/vmfs/volumes/64ac1e73-5a819c26-df7c-005056817346/slax-VM-02] cat slax-VM-02-000004.vmdk Disk DescriptorFile version=1 encoding=”UTF-8″ CID=b6954aeb parentCID=47c7625c createType=”seSparse” parentFileNameHint=”slax-VM-02-000003.vmdk” Extent description RW 16777216 SESPARSE “slax-VM-02-000004-sesparse.vmdk” The Disk Data Base DDB ddb.grain = “8” ddb.longContentID = “b300d90dd39115d277ba65d4b6954aeb” |
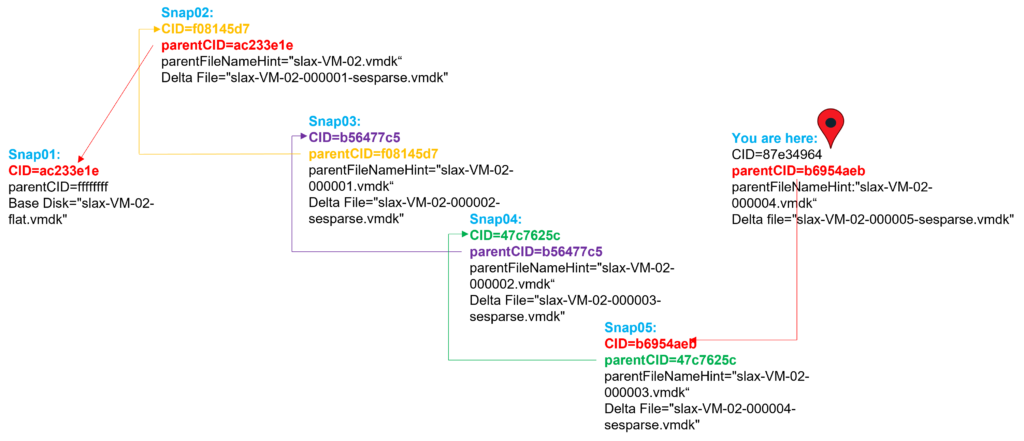
We can check each Disk Descriptor File to enumerate the Snapshot Chain. In the below picture, we can see the Snapshot Chain for our VM.
Look at the information “CID” and “parentCID”. Both pieces of information have a relation.
I recommend you look at this picture from LEFT to RIGHT (Start “You are here” –> Snap05 –> Snap04, etc):
Managing VM Snapshots
Besides creating a snapshot, we can delete a specific snapshot or we can delete all snapshots. It can be done under the Snapshots tab. Also, we can Revert the VM status before the specific snapshot:
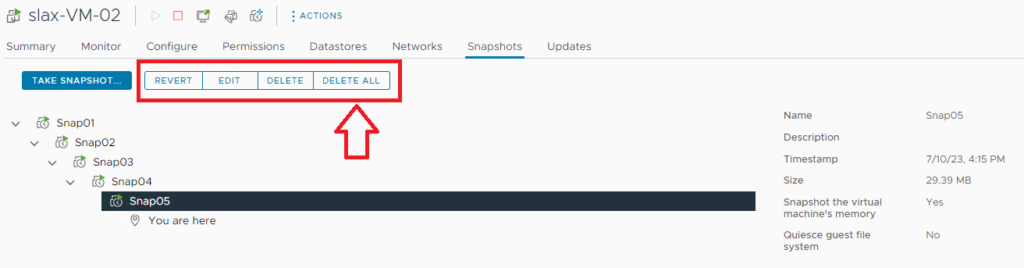
So, in this example, we will delete the snapshot “Snap05”:
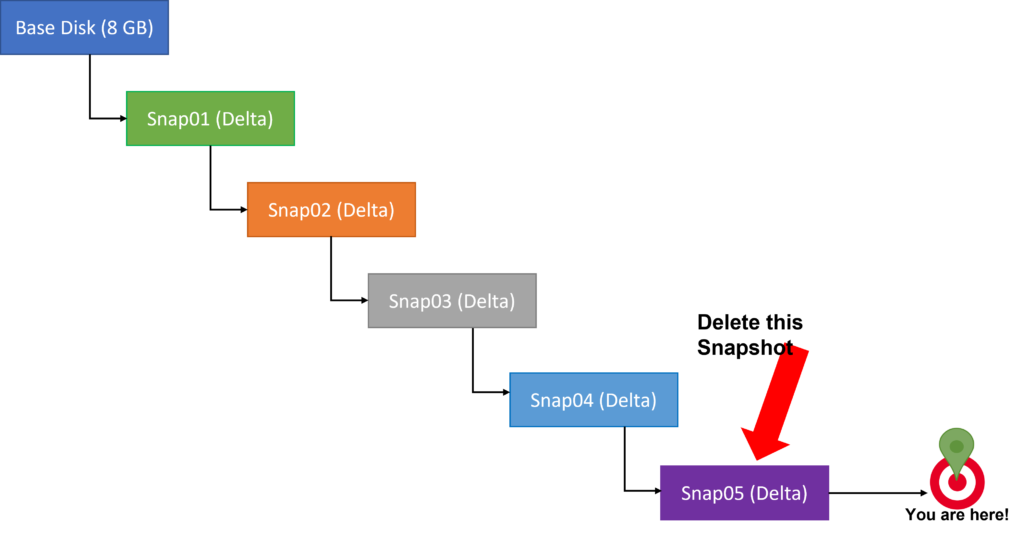
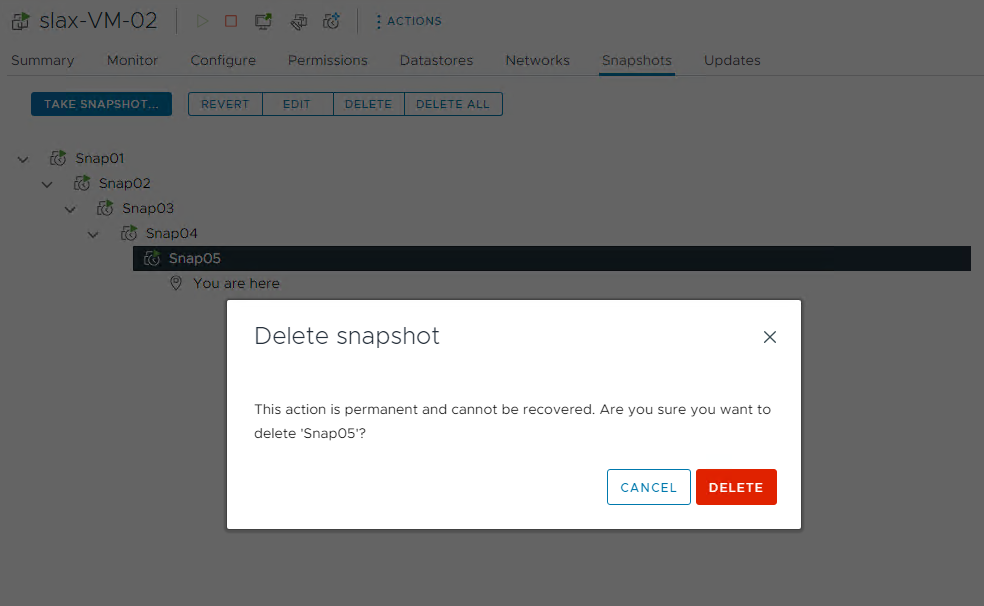
Select the snapshot and click on DELETE. A pop-up will show. Click on DELETE again to confirm this operation:
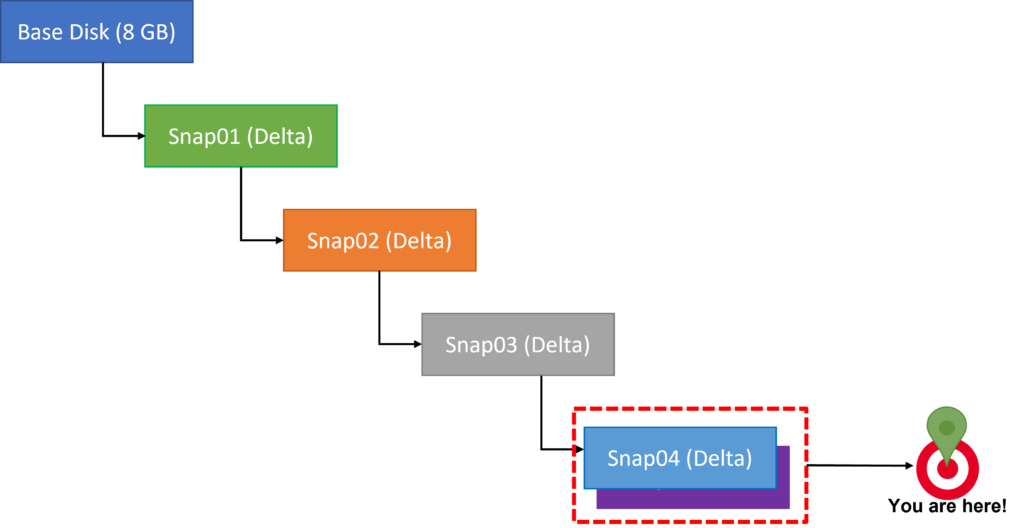
After that, the delta file for the snapshot “Snap05” will be committed into the snapshot “Snap04”:
So, about the Revert option, if you need to Revert a VM to a specific point, select the snapshot and click on REVERT:
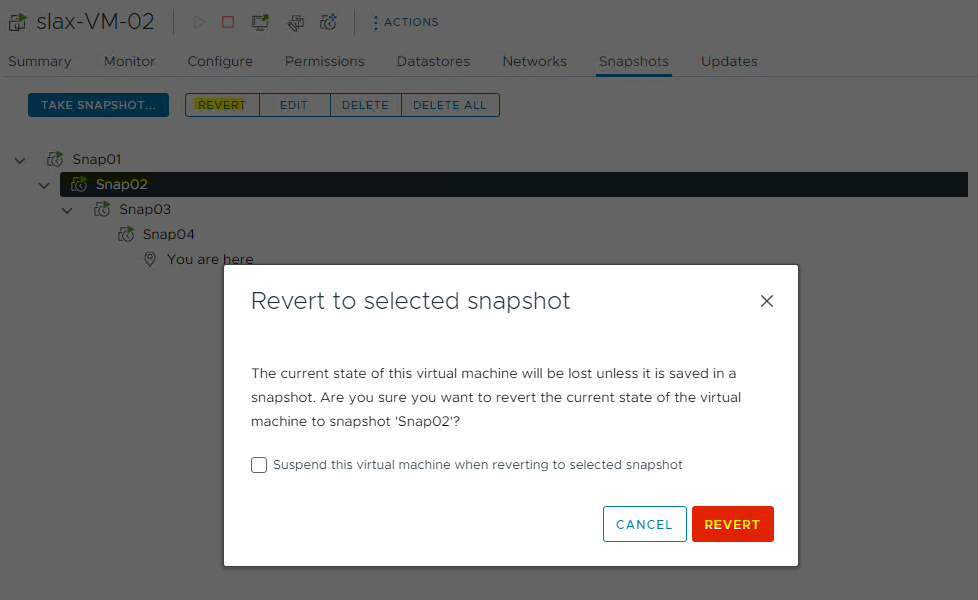
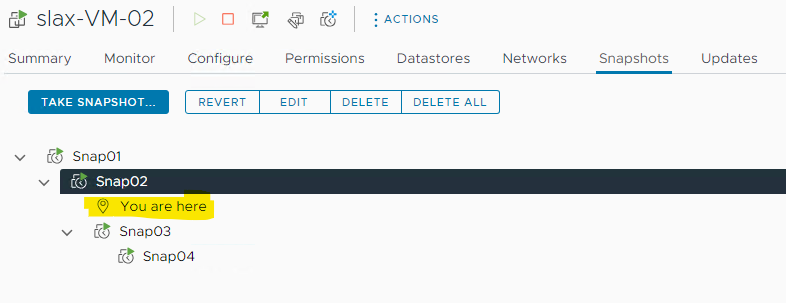
After that, look at “You are here”.
In this example, if we delete the snapshots “Snap03” and “Snap04”, we will not be able to revert the VM for these snapshots anymore. Be attention to it 😉
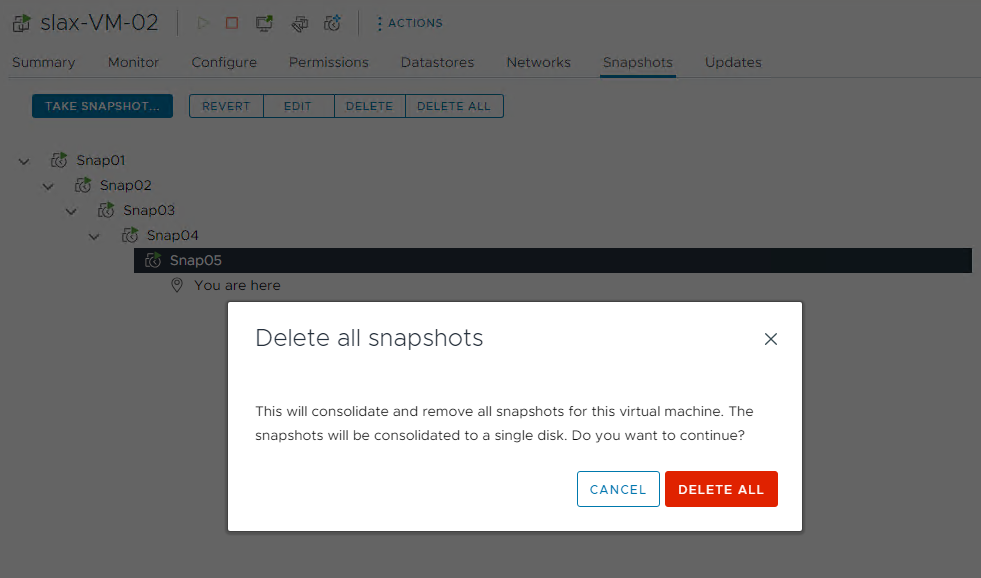
The option “DELETE ALL”, as the name suggests, will delete all snapshots and commit all delta files to the VM Base Disk. This option is used, for example, when you need to delete all snapshots, committing the changes in the VM Base Disk:
What happens if I revert a snapshot that was taken without memory?
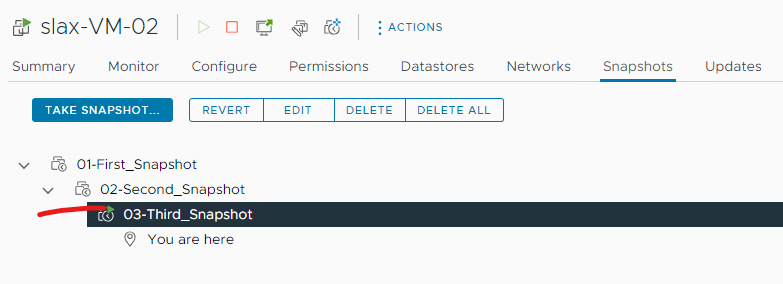
So, look at this example. We have three snapshots in our lab VM. The first and second snapshots were taken without memory. The third snapshot was taken with memory.
Under the Snapshots tab, we can detect a snapshot with memory by the green symbol in front of the clock symbol, as shown in the below picture:
At the moment, the VM is running (powered on) normally. So, what happens if we revert the VM for the snapshot “01-First_Snapshot”?
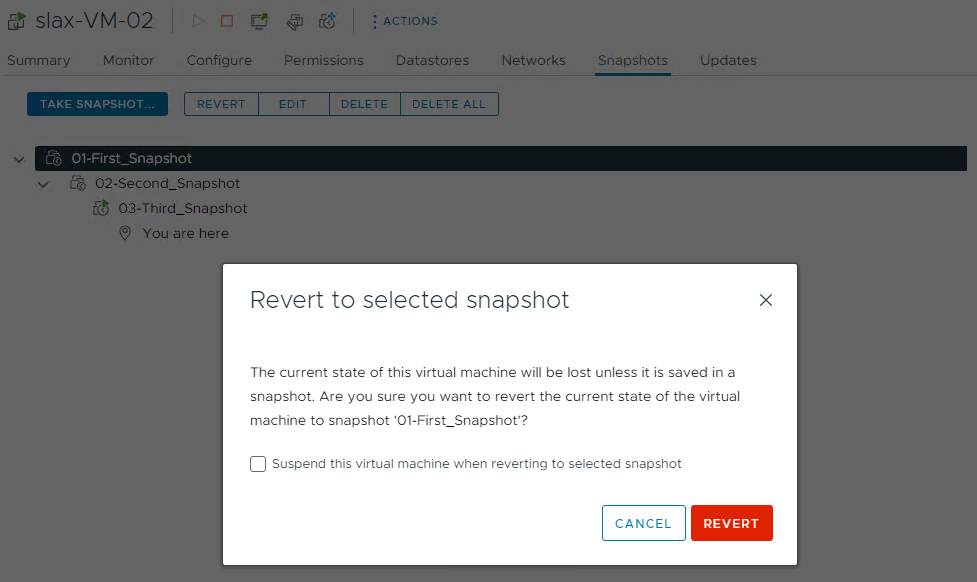
The VM state will be reverted to this point, but the VM will be powered off:
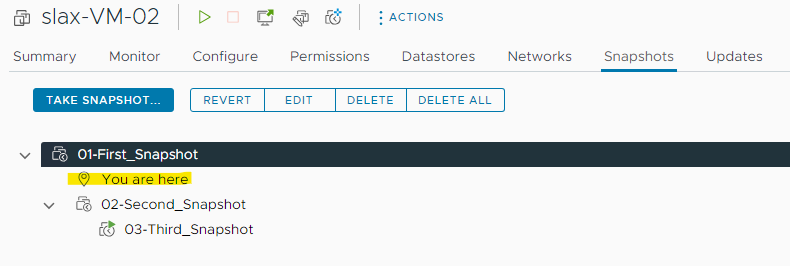
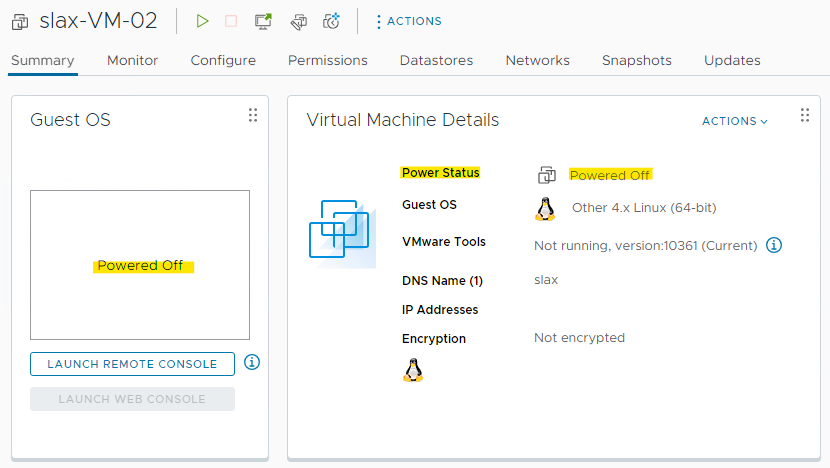
The reason for that: When the snapshot was created, the memory was not included in the snapshot. So, we can revert this VM for this point, but we do not have the memory state. Based on it, the VM needs to be powered up again.
This is an important thing to know or to consider when you work with snapshots: Should I make a snapshot WITH or WITHOUT memory?
I do not have this answer for you because it will depend on each situation, scenario, application, etc. In some cases, we can create both snapshots (with and without memory).
I would like to share a VMware KB with useful best practices to work with snapshots:
https://kb.vmware.com/s/article/1025279
