

Applying ESXi patch with vLCM is a practical way to update multiple ESXi hosts in a vSphere cluster while maintaining image consistency. This article explains how to use vSphere Lifecycle Manager Images to define a desired ESXi image and remediate hosts according to that configuration.
With vSphere 7.0, VMware introduced vSphere Lifecycle Manager Images (vLCM), a declarative approach that allows administrators to manage the desired state of ESXi hosts, including ESXi versions, firmware, and drivers. When a host differs from the configured image, vLCM can remediate it to restore compliance.
In this guide, we will demonstrate the process of importing an ESXi patch into vLCM, updating the cluster image, checking compatibility, and applying the remediation process across ESXi hosts in a vSphere cluster environment.
Before we show the practical steps to perform it, we will talk a little about vSphere vLCM.
Background
With vSphere 7.0, VMware launched a feature called vSphere Lifecycle Manager Images (vLCM), which uses a declarative model, to holistically define the desired state of the ESXi host image; including the target ESXi version, firmware & drivers. This feature enables all the ESXi hosts, to adhere to the desired state; by enforcing consistency across the cluster. When a host drifts from the desired state, the host can be “remediated” to become compliant to the desired state, once again.
With the launch of vSphere 8.0, Vmware is announcing the deprecation of vSphere Lifecycle Manager Baselines (previously known as vSphere Update Manager – a.k.a. VUM). The capability will continue to be supported, will remain in the product, and is available for use in vSphere 8, until its removal in the next Major release of vSphere.
To check more detail about that, access the VMware KB89519:
About our environment
In our lab environment, there is a vSphere Cluster with 6 ESXi hosts. All ESXi hosts are in the 8.0 GA build 20513097.
Our plan is to apply the ESXi Patch 8.0 Update 1 build 21495797.
VMware has an excellent KB with all details about ESXi build numbers. The KB name is “Build numbers and versions of VMware ESXi/ESX (2143832)“:
And also, if you would like to read details about the ESXi 8.0 Update 1, check the Release Notes:
Creating a Cluster Object in the vSphere Client
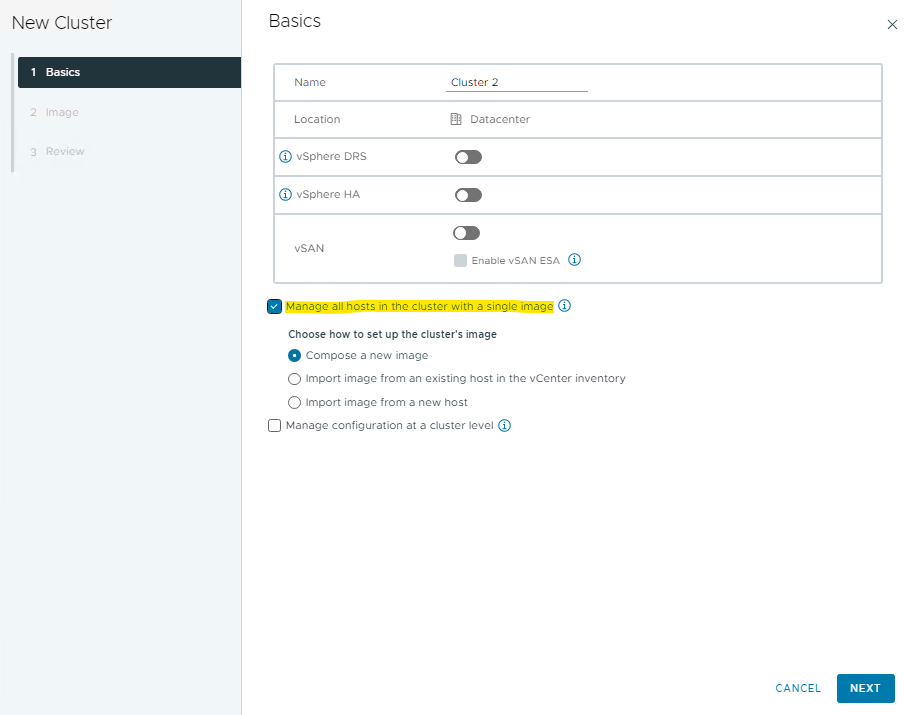
When we are creating a vSphere Cluster (in this example, using the vSphere 8), by default the box “Manage all hosts in the cluster with single image” is selected.
Based on it, we have three options:
1- Compose a new image
2- Import image from an existing host in the vCenter inventory
3- Import image from a new host
You can choose the best option for your needs or for your environment:
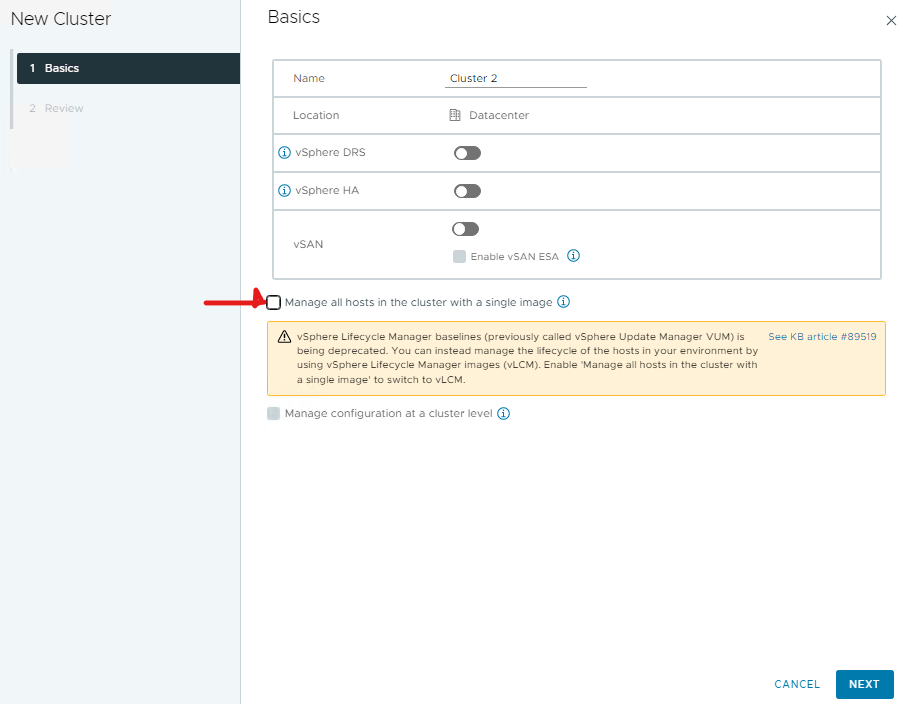
But, if you remove the selection “Manage all hosts in the cluster with a single image”, you can use the vSphere Update Manager – VUM (baselines):
Importing the ESXi patch into vSphere vLCM
Firstly, we need to access the vSphere Lifecycle Manager. To do that, open the vSphere Client page –> Click on Menu –> Lifecycle Manager.
After that, we need to import the ESXi Patch. To download the patch, the below URL can be used:
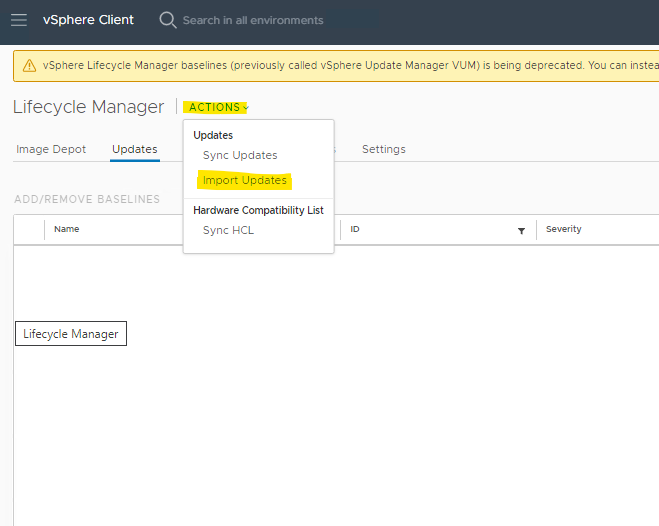
On the Lifecycle Manager page, click on ACTIONS –> Import Updates –> Select the Patch File (generally, the patch file is a .zip file):
The importing process is in progress:
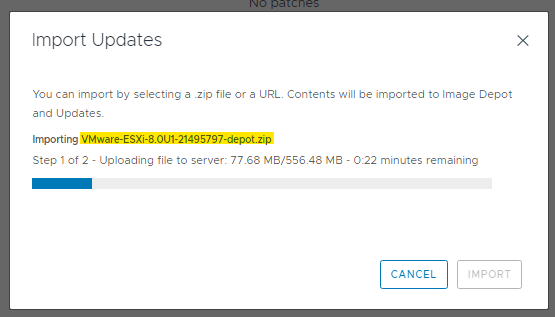
We can follow the process on the vSphere Client “Recent Tasks”:

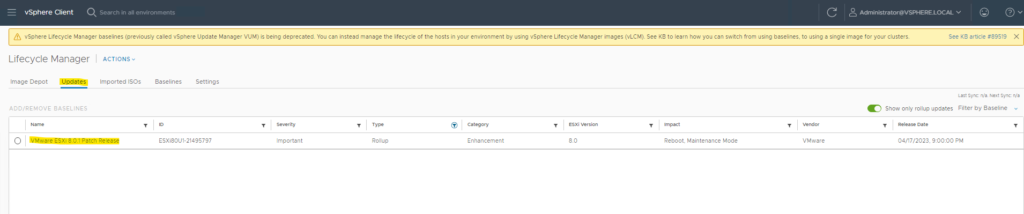
After it, click on the “Updates” tab. We can see the image imported:
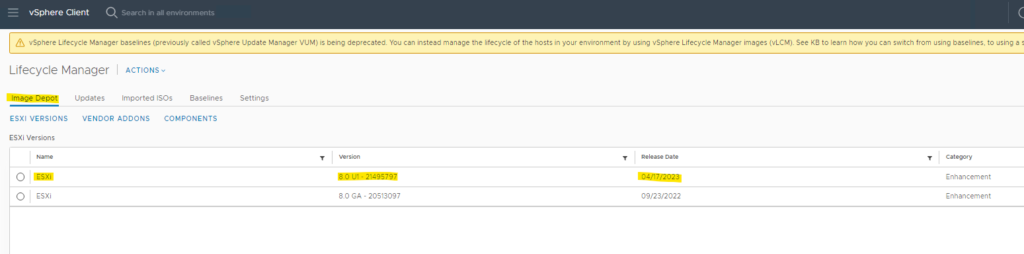
On the “Image Depot” tab, we can see the new ESXi version that we imported before:
Changing the Cluster Image
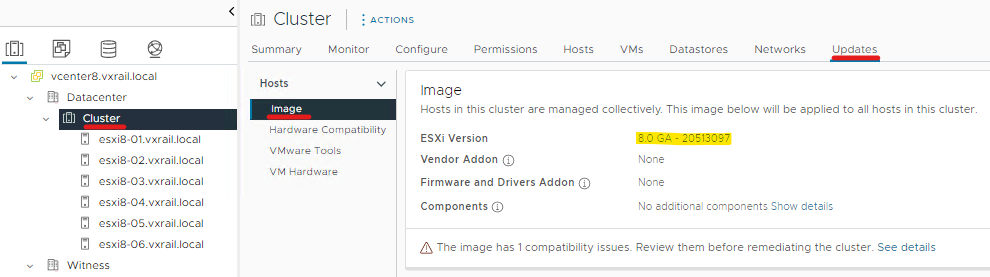
To apply the ESXi Patch that we imported, select the Cluster –> Updates tab –> Select Image under Hosts.
In this example, we can see that the ESXi version image used by this cluster is 8.0 GA build 20513097:
To change this image for the new image, click on EDIT:
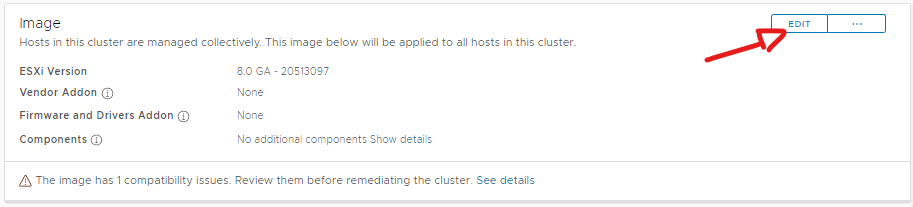
On the ESXi Version, select the new image. In this example, the image is 8.0 U1 – 21495797. Click on SAVE:
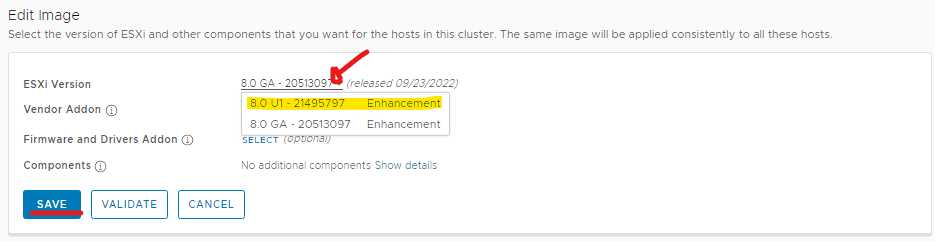
A process to check for compatibility issues will start:
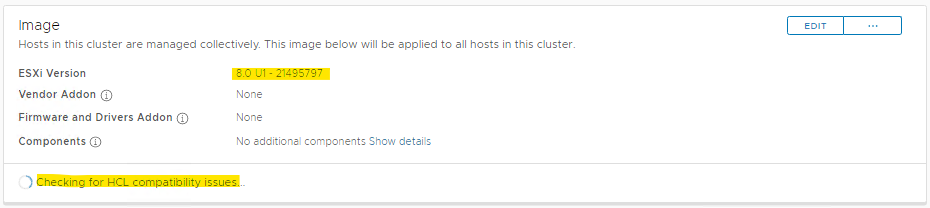
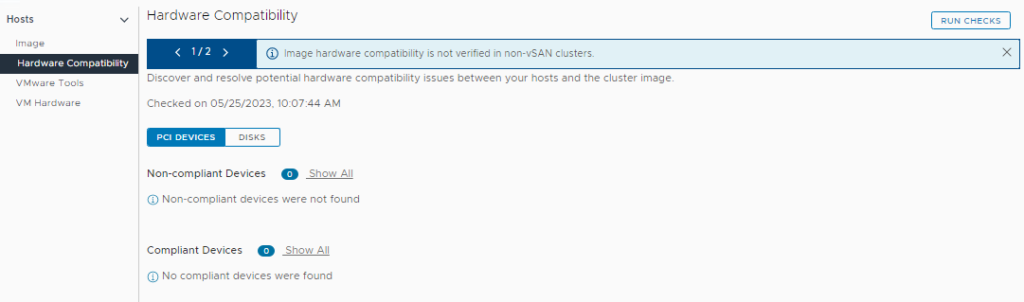
In this case, we are using a lab environment and any issue related to hardware compatibility can be ignored. But, in a production environment, I highly recommended analyzing any alerts related to it BEFORE to continue applying this image:
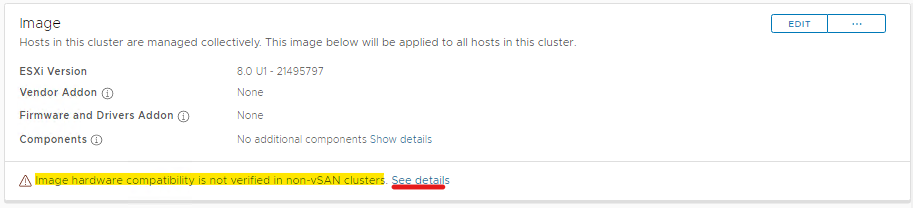
Click on “See details” It is possible to see the details:
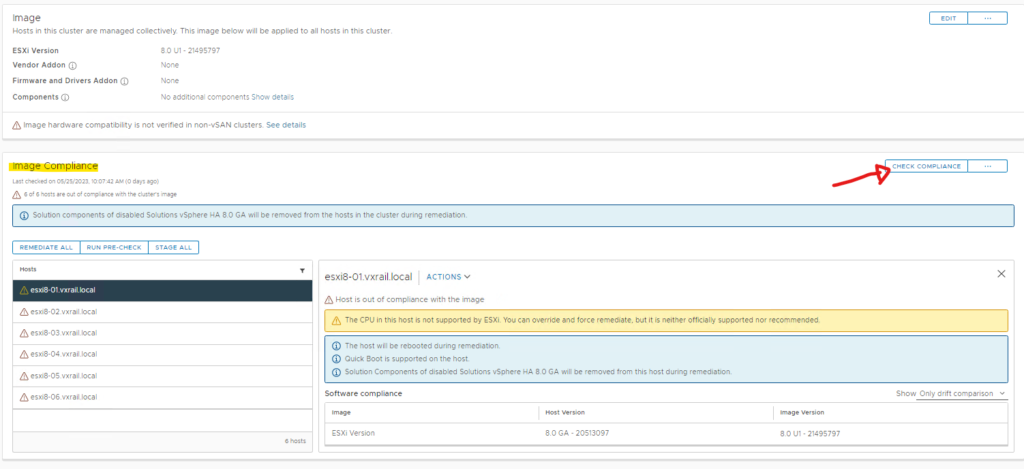
Under Image Compliance, we can click on “CHECK COMPLIANCE” to check ESXi hosts compliance with this new image. As I said, our cluster is in a lab environment. So, we can ignore the alerts and go ahead:
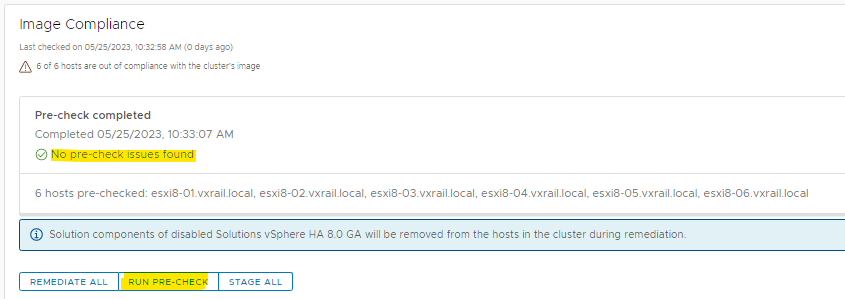
If you prefer, you can run the pre-check again. To do it, click on “RUN PRE-CHECK”. Wait some moments and analyze the results later:
Applying the ESXi Patch to the vSphere Cluster
Click on “REMEDIATE ALL” to start the Remediation Wizard:
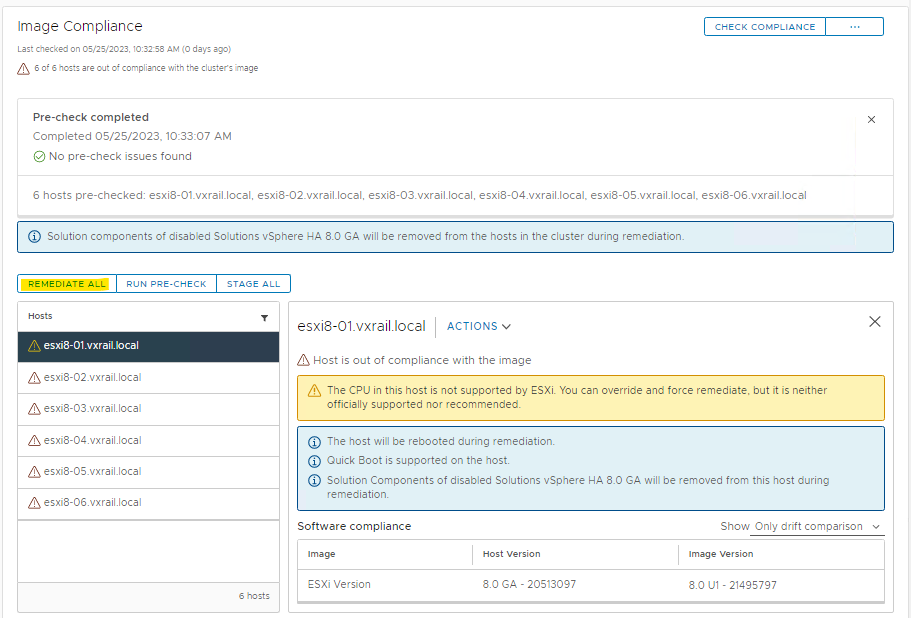
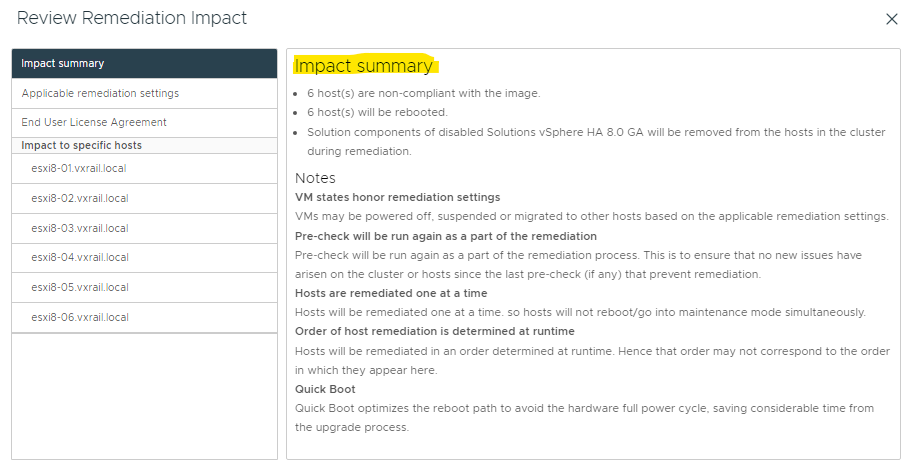
The first tab on the Remediation Wizard is the “Impact Summary”.
This tab describes the impact detected with the remediation process. I recommend reading with attention to all detail on this page.
An important point here:
— Hosts are remediated one at a time:
Hosts will be remediated one at a time. So, hosts will not reboot/go into maintenance mode simultaneously.
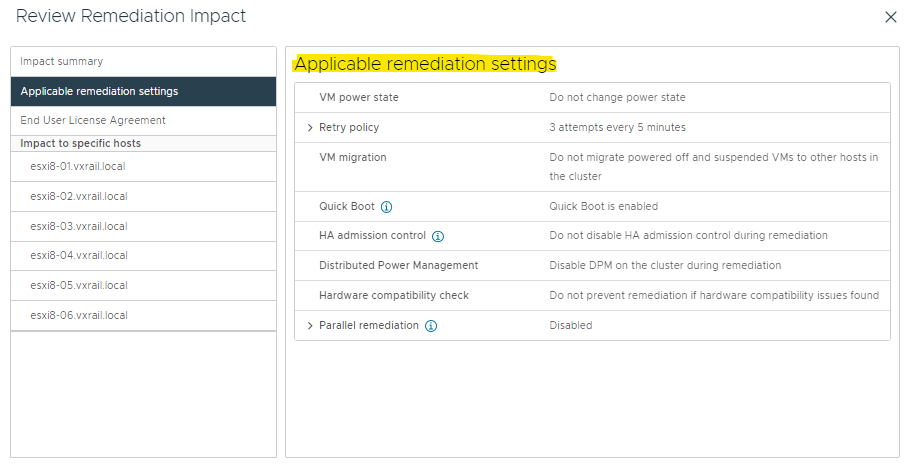
On the “Applicable remediation settings” tab we have details and configurations about the remediation settings. Some values we can change, but I recommend maintaining the default values (obviously, you can change anything based on your environment’s needs):
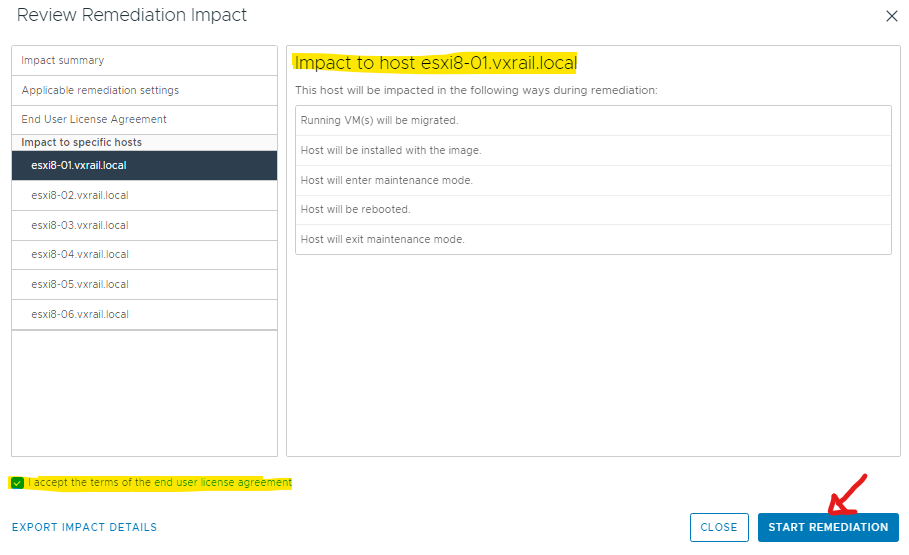
Next, we have the “Impact to specific hosts” section. Here, we can click on each ESXi host to see what impact we will have on this specific ESXi host.
In this example, we are selecting the ESXi host “esxi8-01.vxrail.local” and we are seeing all impacts on this host.
After analyzing each ESXi host, select the option “I accept the terms of the end user license agreement” and click on “START REMEDIATION”:
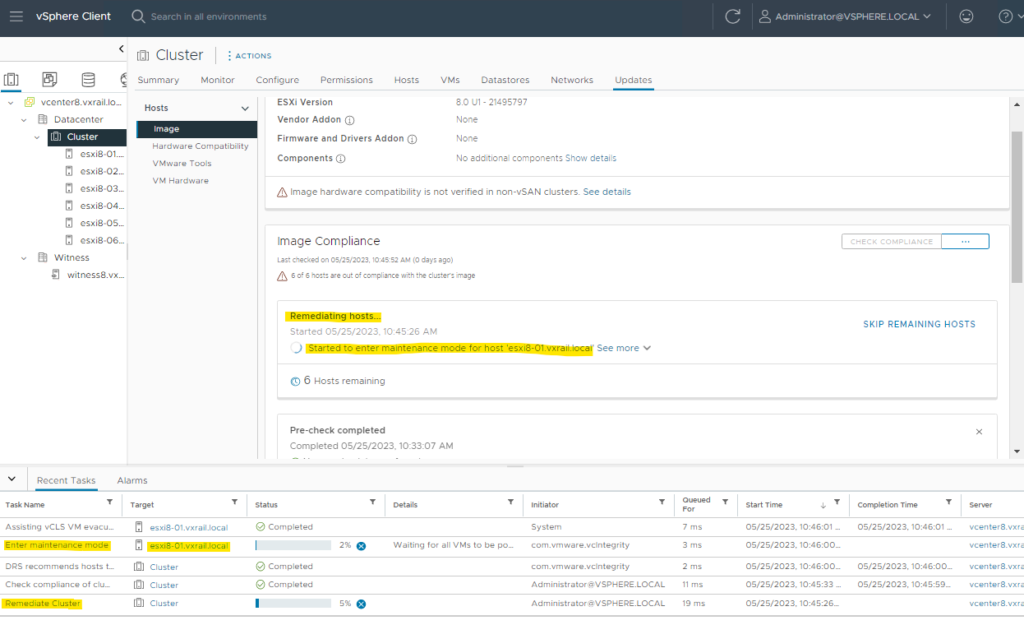
The remediation process will start. This process can be monitored under the Updates tab and through the vSphere Client Recent Tasks.
Have patience and wait for the process to finish. A lot of time can be necessary for it 🙂
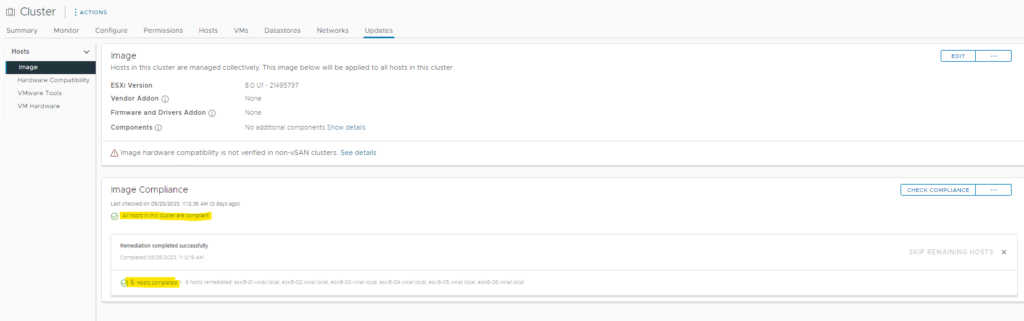
Now, we can see that the remediation process has been finished successfully:
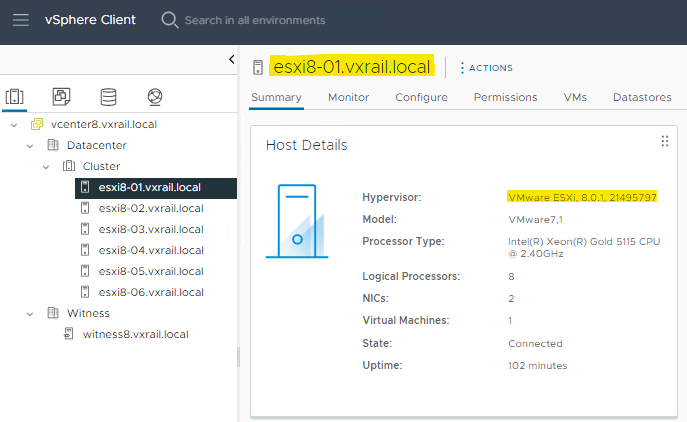
Selecting the first ESXi host –> Summary tab, we can see that the ESXi version is the new ESXi version 😉
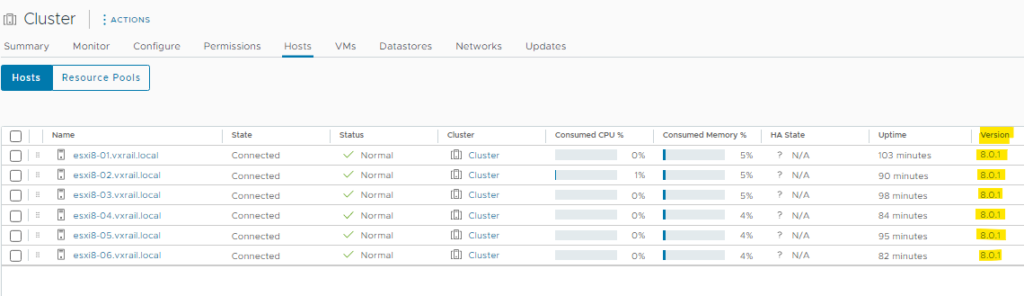
Under the Hosts tab, we can see that all ESXi hosts on the Cluster have the new ESXi version:
After it, the process of Applying ESXi Patch with vLCM is finished 🙂
