


Creating a vSAN Stretched Cluster with vSAN 8 is a practical guide that explains how to configure a Stretched Cluster using the new vSAN Express Storage Architecture (ESA). This article demonstrates the required steps to implement a vSAN 8 Stretched Cluster in a lab environment, including the main components and configuration process.
vSAN 8 introduced the Express Storage Architecture (ESA), a new optional storage architecture designed to take advantage of modern hardware capabilities while improving performance, scalability, resilience, and data services. ESA works alongside the traditional vSAN Original Storage Architecture (OSA), allowing administrators to choose the most suitable architecture for their environment.
In this article, we will create a vSAN Stretched Cluster using vSAN 8 ESA. Before starting the configuration, it is recommended to understand the differences between OSA and ESA architectures, as well as the main concepts related to vSAN Stretched Clusters, data sites, and the Witness Appliance.
So, I would like to share a link that compares both vSAN Storage Architectures (OSA x ESA):
Also, there are other interesting links talking about the vSAN 8 and ESA (Express Storage Architecture). I really recommend you guys read these links to understand a bit more about the new vSAN Technology:
Introduction to our Lab environment
In our lab, we already have the vCenter Server 8 and all ESXi hosts installed and working normally. Also, we have Witness Appliance working to create the Stretched Cluster.
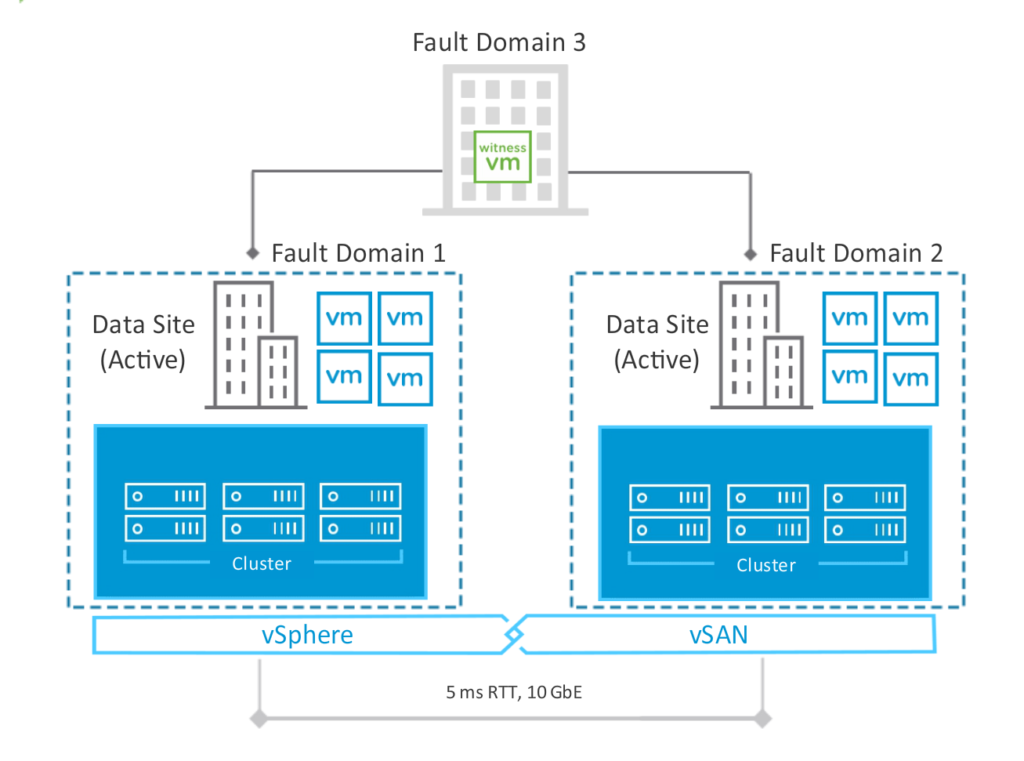
We have both data sites (Site A and Site B) and the third site where we have the Witness Appliance. The picture below represents our lab topology, for instance:
vCenter Server and ESXi Details
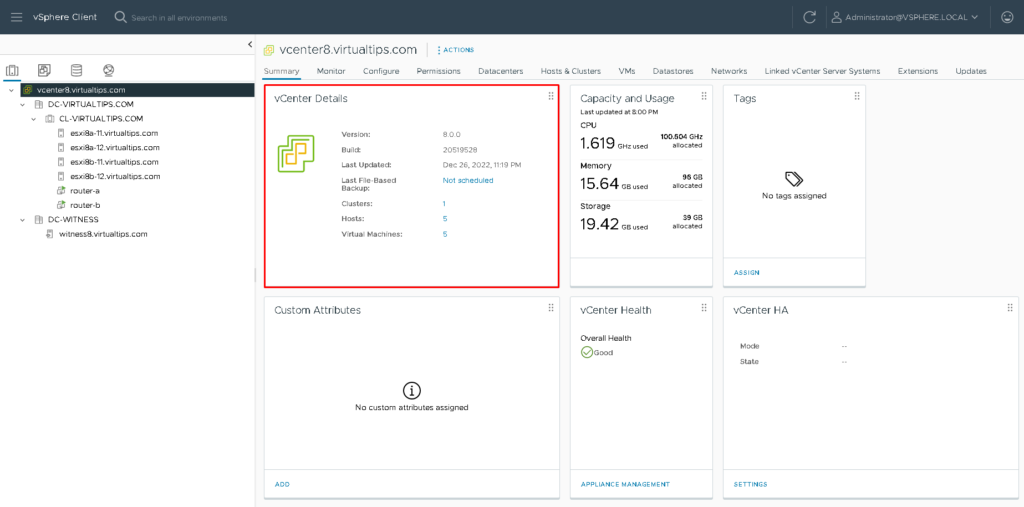
Below, it is possible to see the vCenter Server 8 version that we are using in our lab environment:
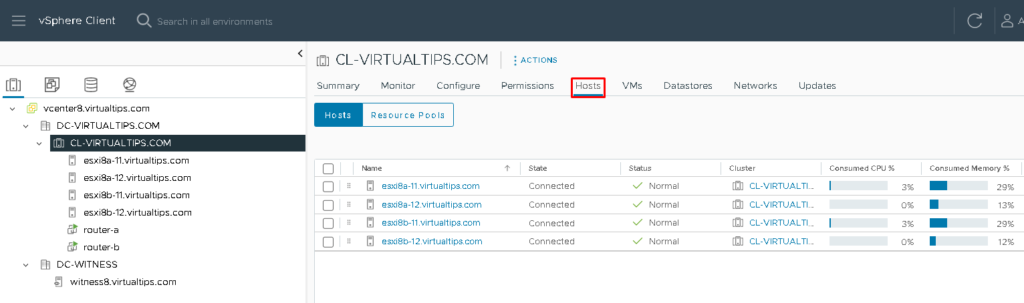
So, we have four ESXi hosts using ESXi version 8. Two ESXi hosts are on Site A and two ESXi hosts are on Site B. The Witness Appliance is on the third site, as shown in the picture below:
For each ESXi host, there is 6 vCPU and 24 GB of ram memory.
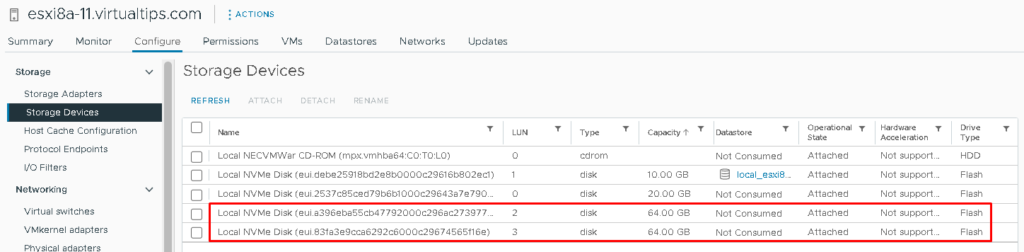
Related to the disk, for each ESXi there are two NVMe disks of 64 GB for creating the vSAN datastore:
Also, related to the network, two network interfaces are in use for the vSAN network. One uplink is active and one uplink is on standby:
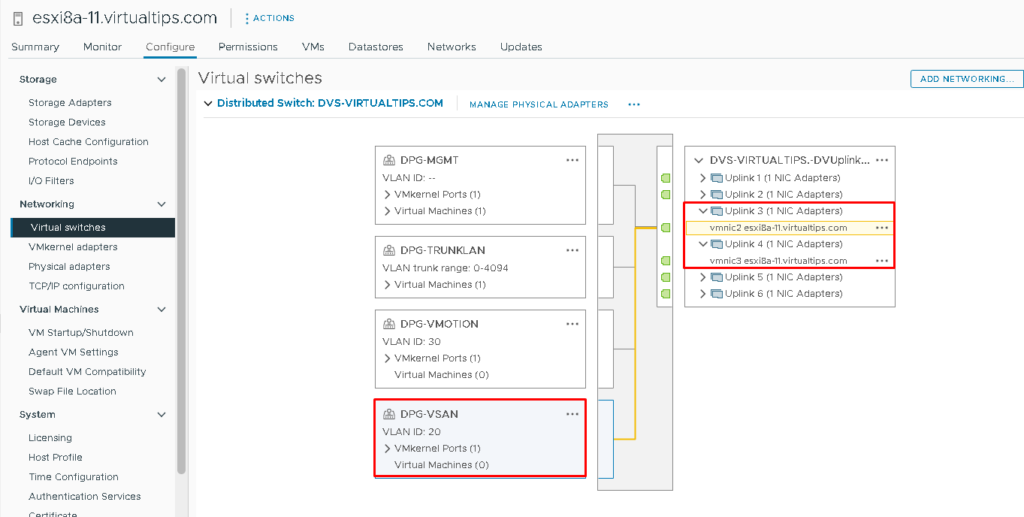
Note: All ESXi hosts have network communication on the vSAN network with each other. Also, each ESXi host can communicate normally with the Witness Appliance. Before proceeding with vSAN activating, check the network communication between them!
Configuring the vSAN Stretched Cluster with ESA
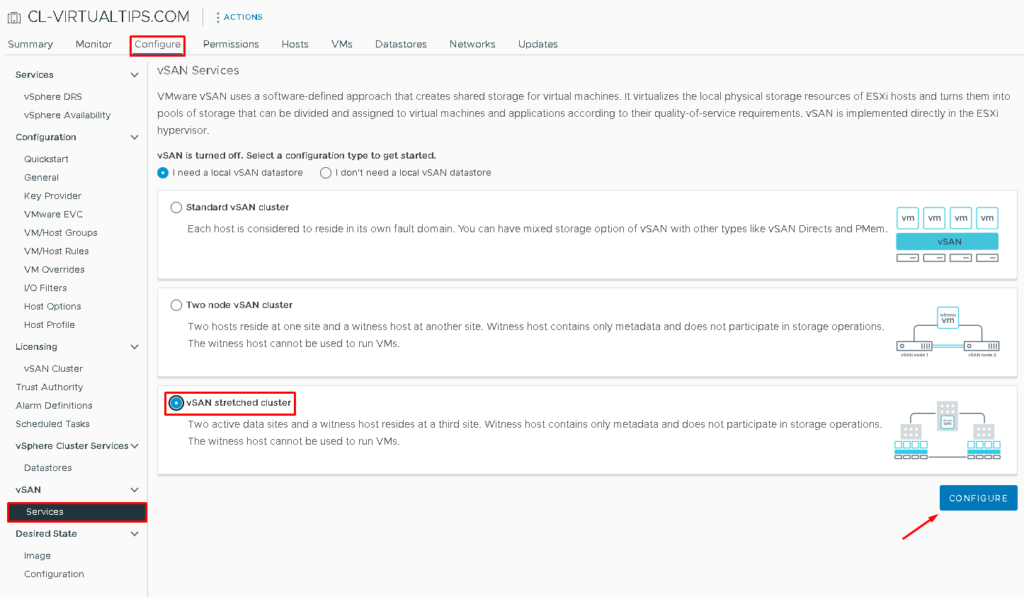
Select the Cluster Name –> Configure –> vSAN and then click on Services.
On this page, it is possible to select what deployment type of the vSAN cluster. In our case, we will select “vSAN stretched cluster”. Click on “CONFIGURE” for starting the configuration wizard:
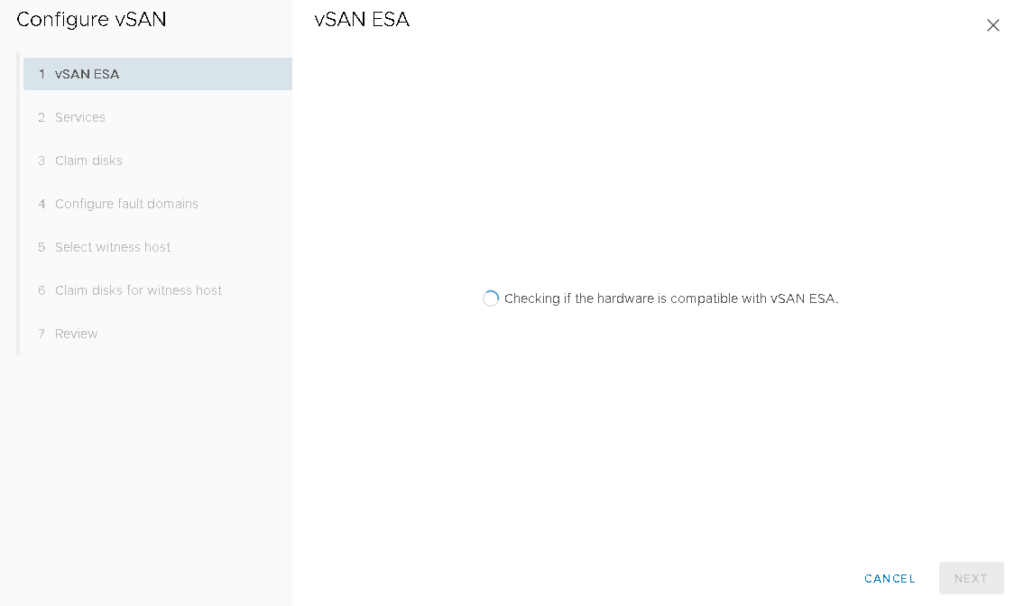
Firstly, the vSAN ESA will check the hardware to validate if it is compatible to run the vSAN ESA.
Here, we will not do anything – However, we need to wait a few moments:
In our case, for instance, the compatibility check process detected an issue on “vSAN HCL DB up-to-date”, as shown in the picture below:
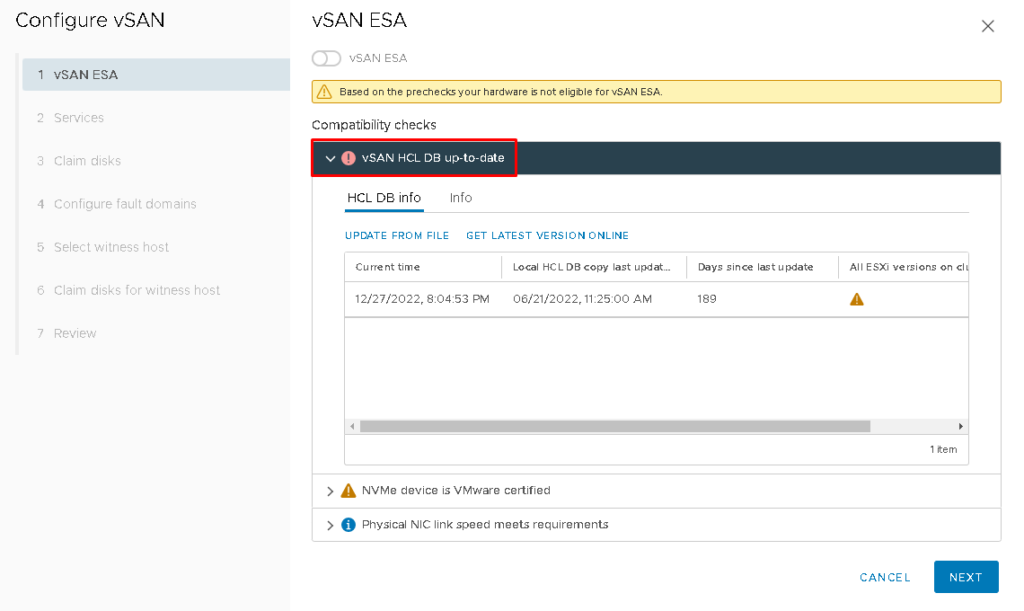
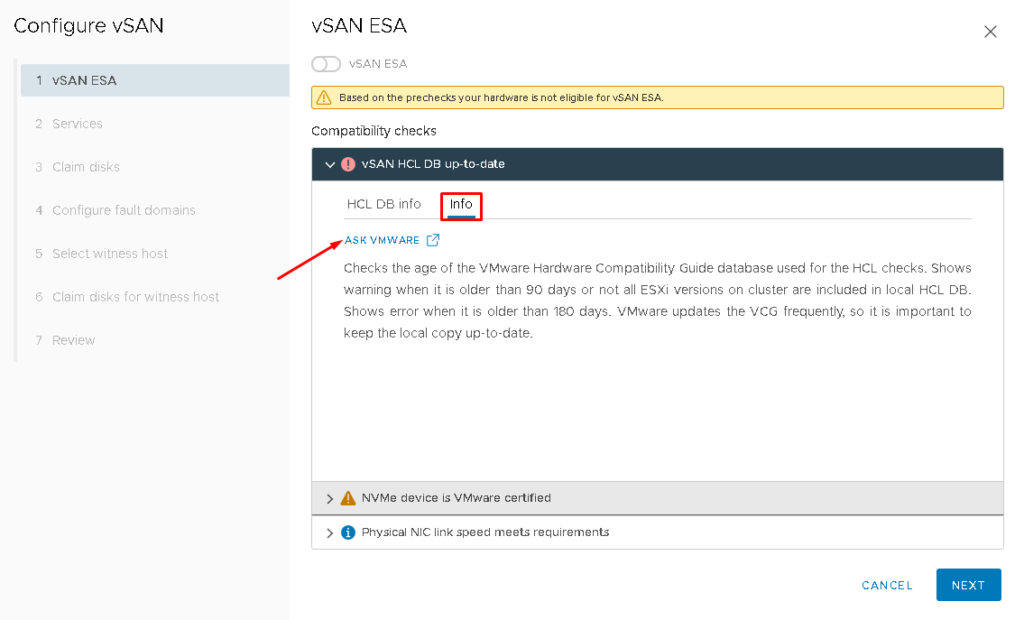
Clicking on the Info tab, there is an explanation about the vSAN HCL DB Info. This is a very important thing to understand. Also, click on “ASK VMWARE” to open an URL with more details about that:
With VMware KB it is possible to understand what is the vSAN HCL DB and how it is possible to fix this issue:
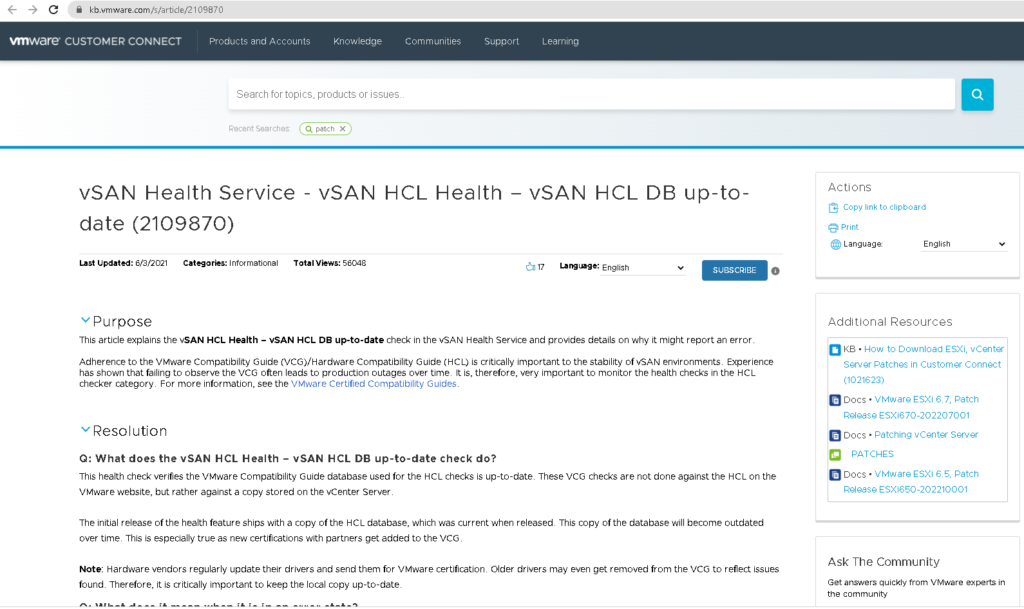
Note: So, at the final of this KB, there is a question to help solve it manually:
Q: How does one troubleshoot and fix the error state?
- If your vCenter Server has Internet access, then, click the Get the latest version online button. (Do not support vCenter Server without DNS, will hit the error message “Unable to get the latest HCL database version online”. Please try the method for the vCenter Server that doesn’t have Internet access).
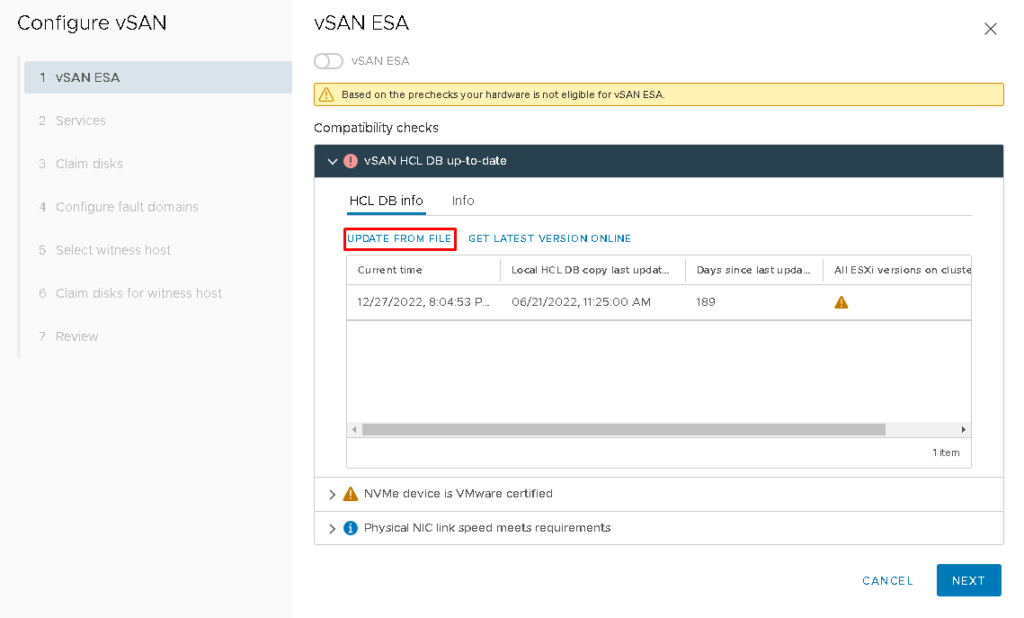
- If your vCenter Server doesn’t have Internet access, then you can get the latest HCL DB from http://partnerweb.vmware.com/service/vsan/all.json, save this JSON file locally then use the Update from file button to upload it to vCenter Server.
Downloading or creating all.json file and select the option “UPDATE FROM FILE” to update the vSAN HCL DB Info manually:
After that, there are other two details about the compatibility check:
- NVMe device is VMware certified
- Physical NIC link speed meets requirements
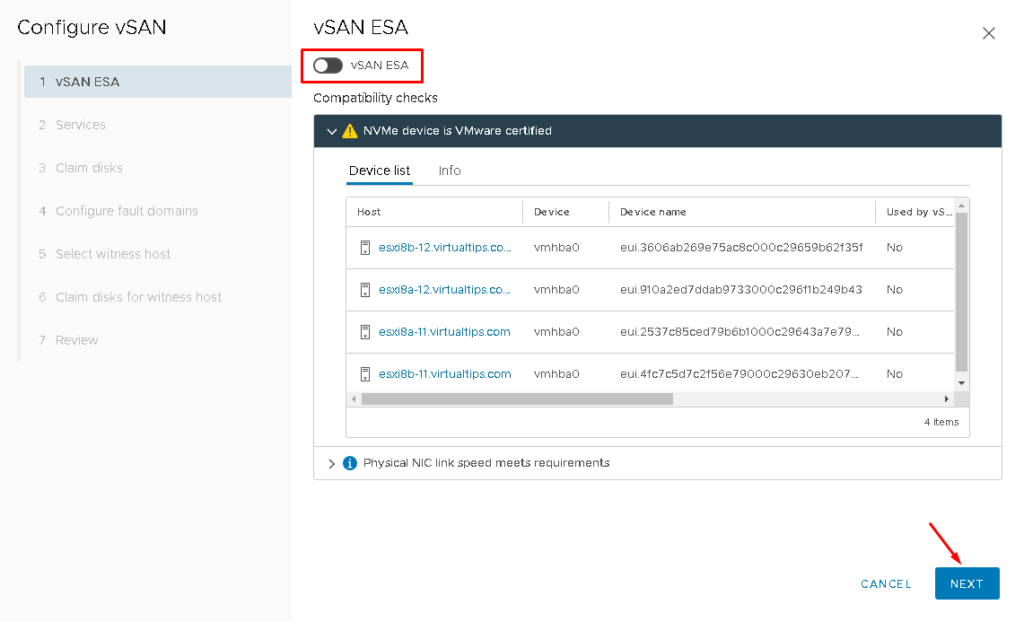
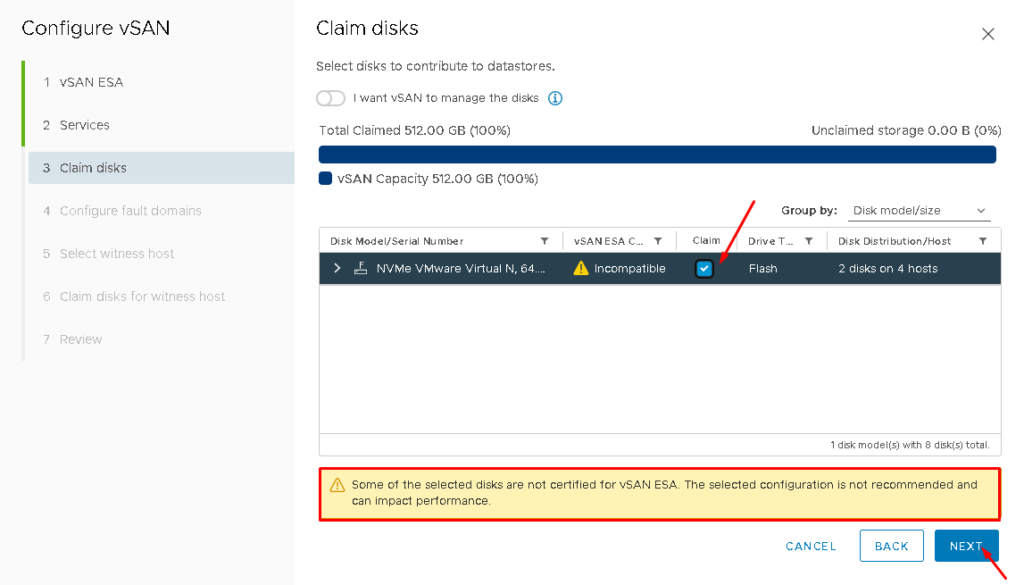
Due to it being a nested lab environment, the hardware it is not totally certified by VMware to run vSAN with ESA. But, for learning and testing purposes, we can proceed 🙂
Turn ON the vSAN ESA and click on NEXT to continue:
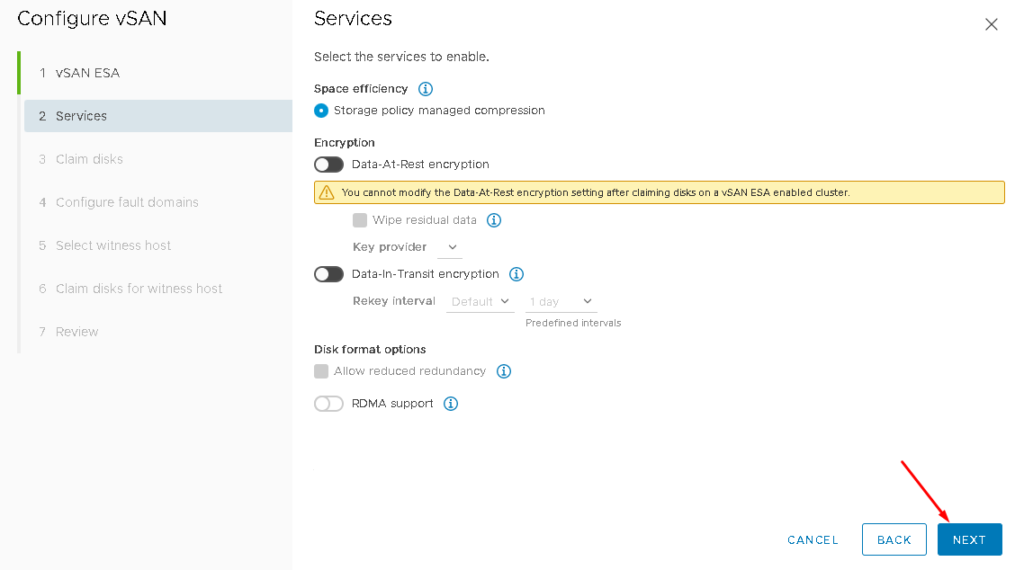
On Services, we will not change anything. Click on NEXT to continue:
On Claim Disks, we will select disks that will use to create the vSAN Datastore.
With vSAN ESA, we don’t have the Disk Group concept. However, a Storage Pool concept is introduced with vSAN ESA. At the Claim column, mark the box and click on NEXT to continue:
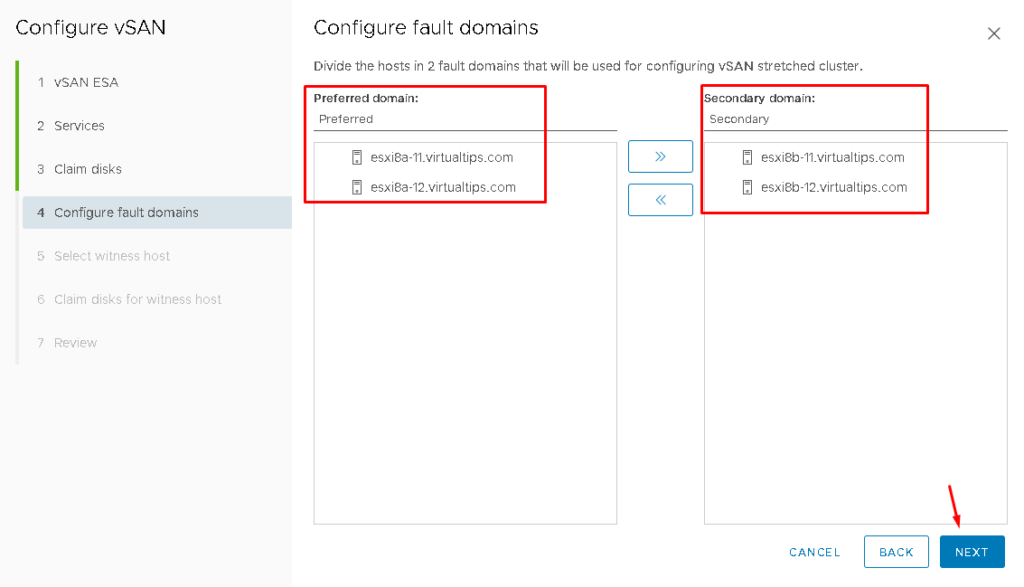
On Configure fault domains, we will divide all hosts into two different fault domains.
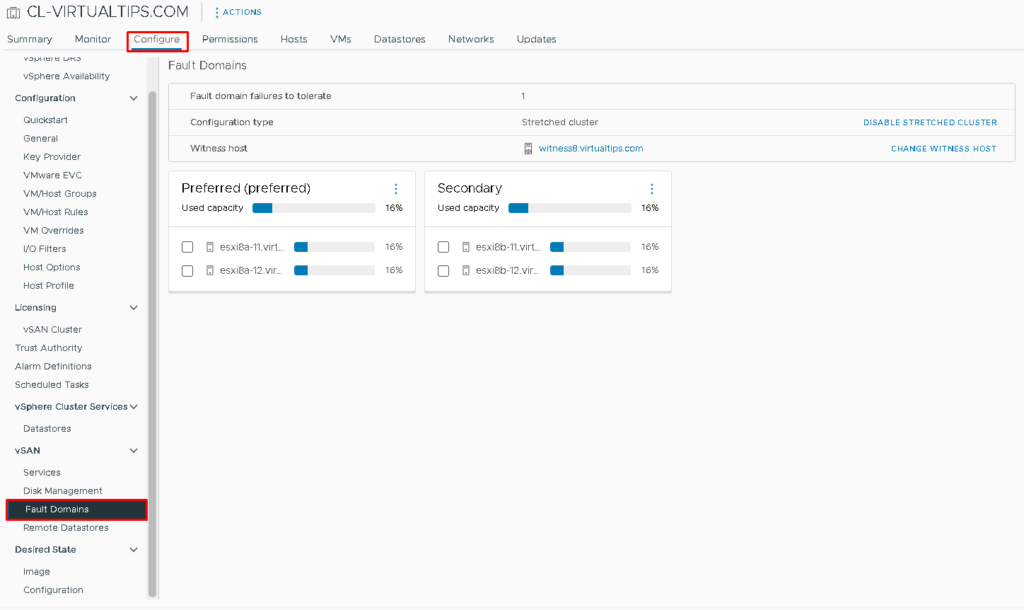
In our case, on the Preferred domain (Site A), there are the hosts:
- esxi8a-11
- esxi8a-12
On the Secondary domain (Site B), there are the hosts:
- esxi8b-11
- esxi8b-12
Click on NEXT to continue:
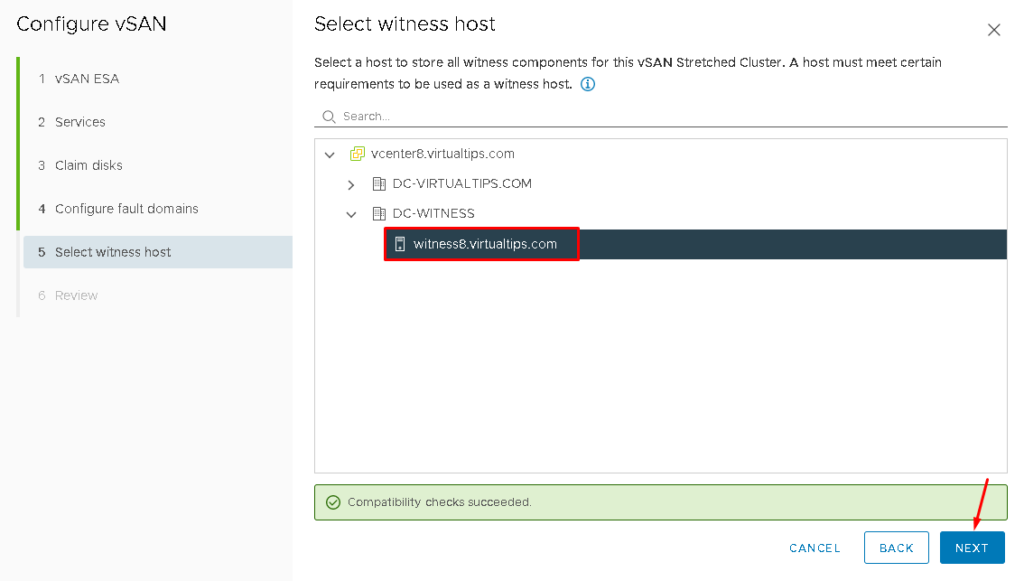
On Select witness host, select the Witness Appliance and click on NEXT to continue:
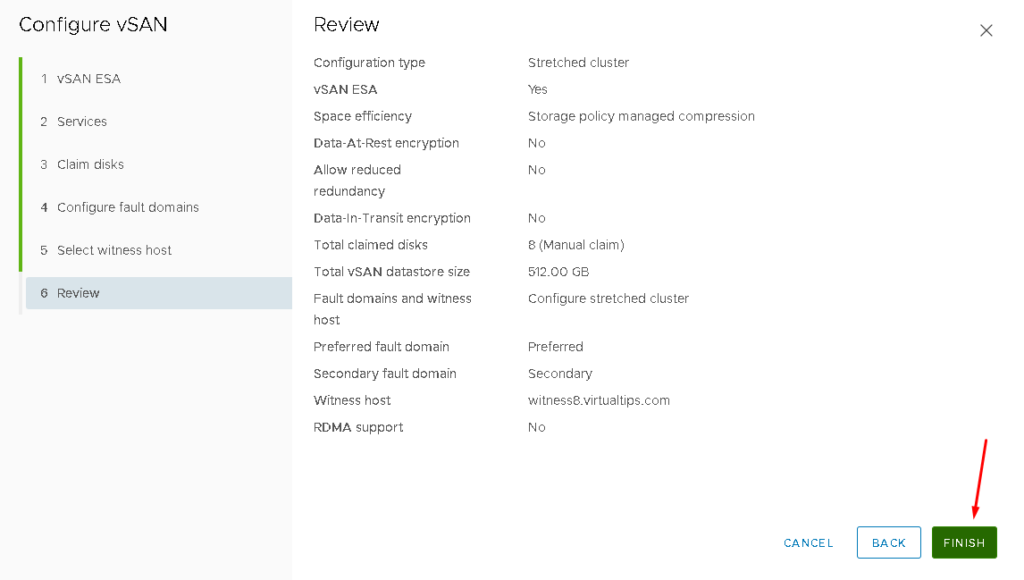
Here we have a review of all configurations. Click on FINISH to continue:
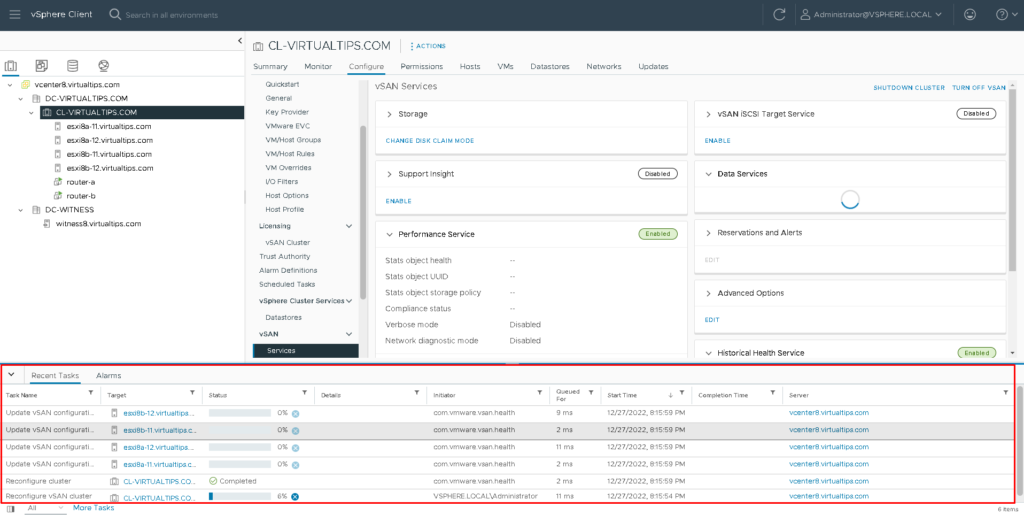
We can follow the process on the Recent Tasks on the vSphere Client. A lot of tasks will be created for enabling and configuring the vSAN:
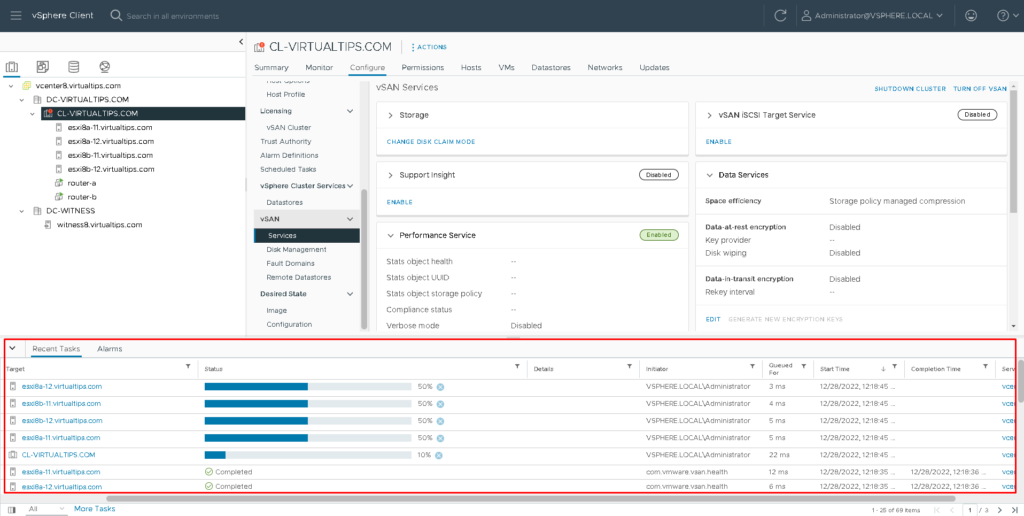
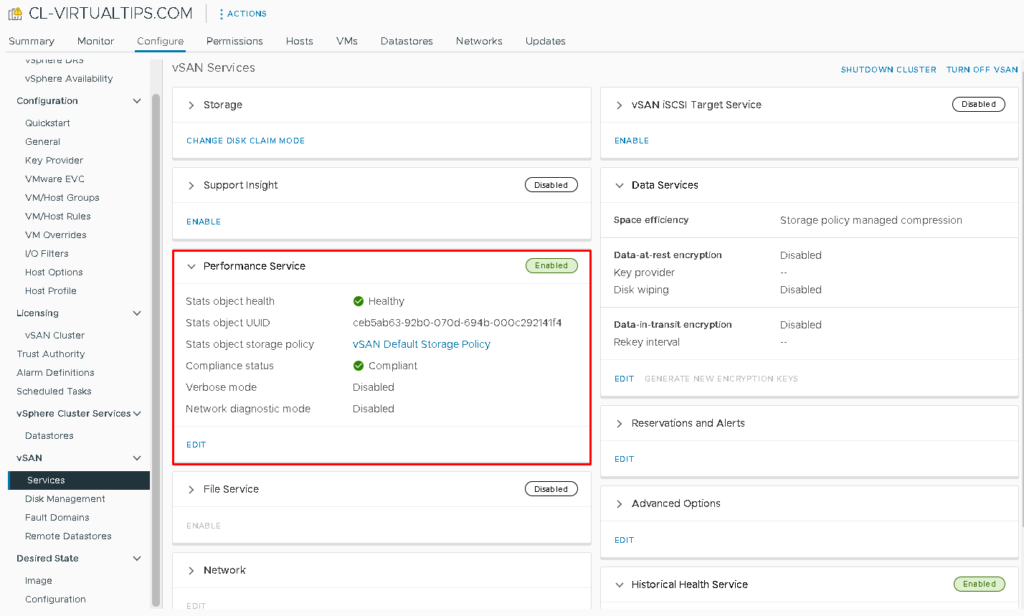
After a few minutes, all related tasks will be finished. Under vSAN –> Services, it is possible to see the Performance Service enabled and Healthy, as shown in the picture below:
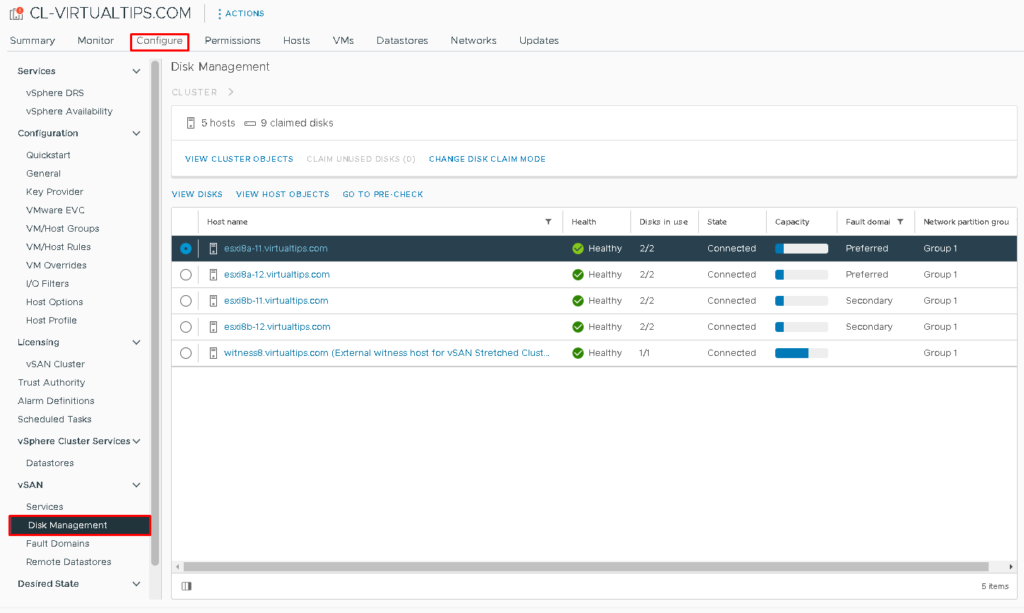
On Configure –> vSAN –> Disk Management there are all disks claimed for the vSAN:
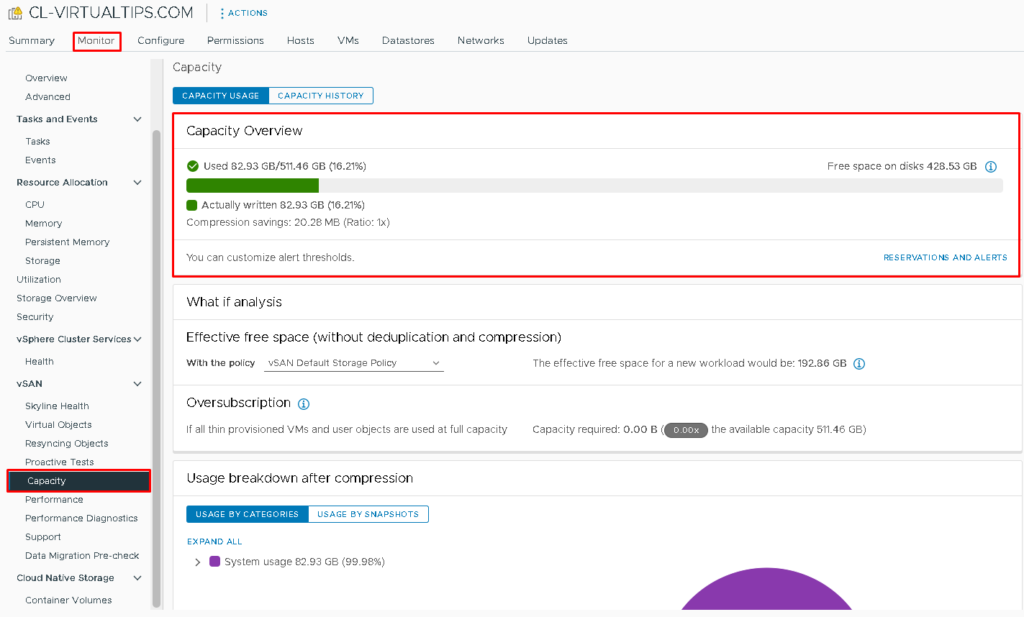
Under Monitor –> vSAN –> Capacity it is possible to see details about the vSAN Datastore like Capacity Overview, What if analysis, Usage breakdown, etc:
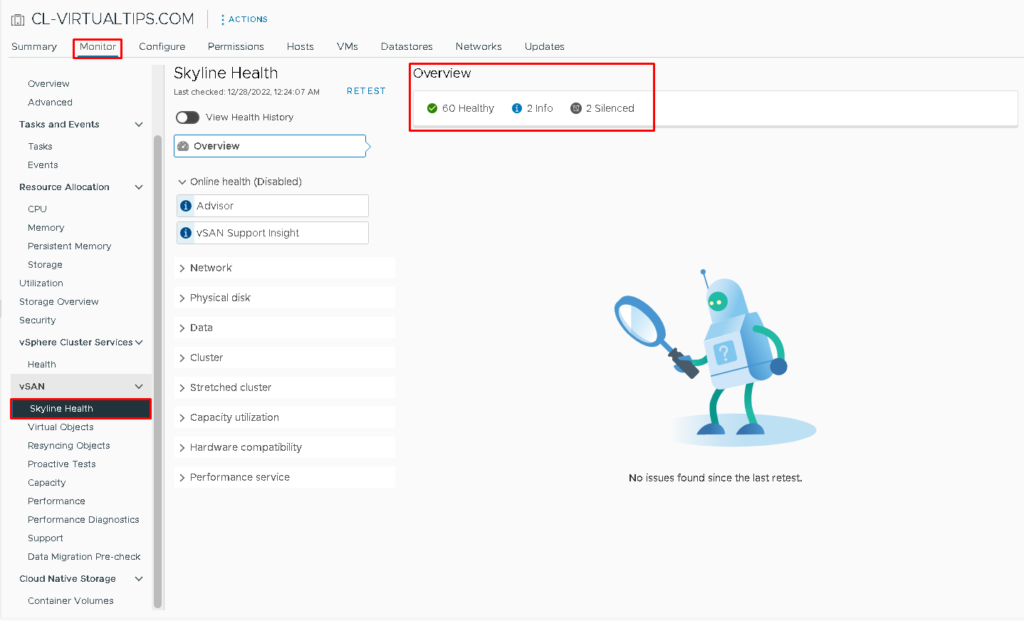
Under Monitor –> vSAN –> Skyline Health, we can see the status of all components or subsystems that vSAN is composed. In this case, all components are healthy:
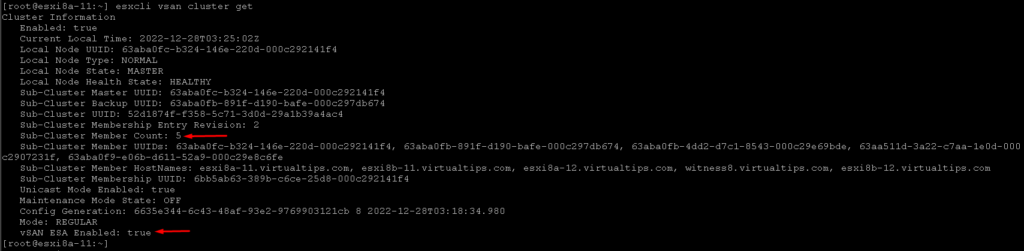
Additionally, we can run a lot of esxcli commands to get details about the vSAN.
Open an SSH session to an ESXi host into the vSAN Cluster and execute the command below:
esxcli vsan cluster get
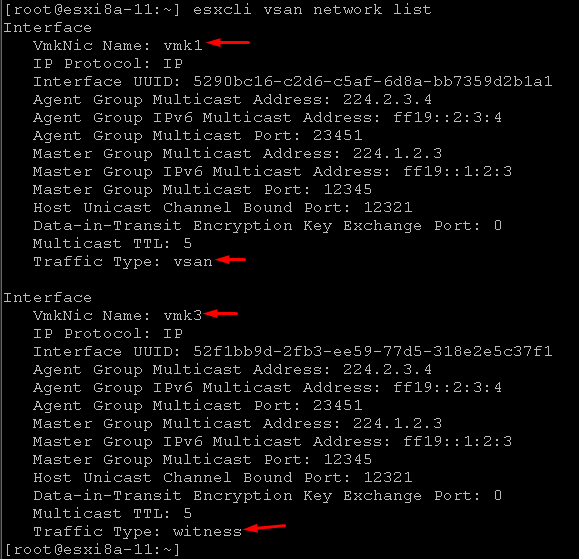
Also, it is possible to get details about the vSAN network. Each ESXi host has two VMkernels, one is used for vSAN network (used for each ESXi host to talk with each other on the vSAN network) and one is used for Witness communication (used for each ESXi host to talk to the Witness Appliance):
Under Configure –> vSAN –> Fault Domain it is possible to see the Fault Domain details, vSAN configuration type, what Witness Host is being used, etc:
At this point, our vSAN Stretched Cluster with ESA is ready. We can create the Virtual Machines normally 🙂
