


Adding hosts into an existing vSAN Cluster is a practical guide that explains how to expand a VMware vSAN environment by introducing new ESXi hosts with minimal impact. In this example, we are working with a vSAN Stretched Cluster and will demonstrate the required steps to add additional hosts and integrate them into the existing infrastructure.
Before adding new hosts, it is important to understand the current vSAN Cluster configuration, including the existing ESXi hosts, Witness Appliance, network configuration, and available datastore capacity. These details help ensure that the new hosts are added correctly and follow the existing cluster design.
During this procedure, we will add the ESXi hosts into the cluster, configure the Distributed Switch, create the required VMkernel adapters, assign hosts to the appropriate Fault Domains, claim disks for vSAN, and verify that the cluster remains healthy after the expansion process.
In our case, we have a vSAN Stretched Cluster and we need to add more ESXi hosts to expand this cluster. So, we will show how to do it in a practical way.
Cluster’s Details
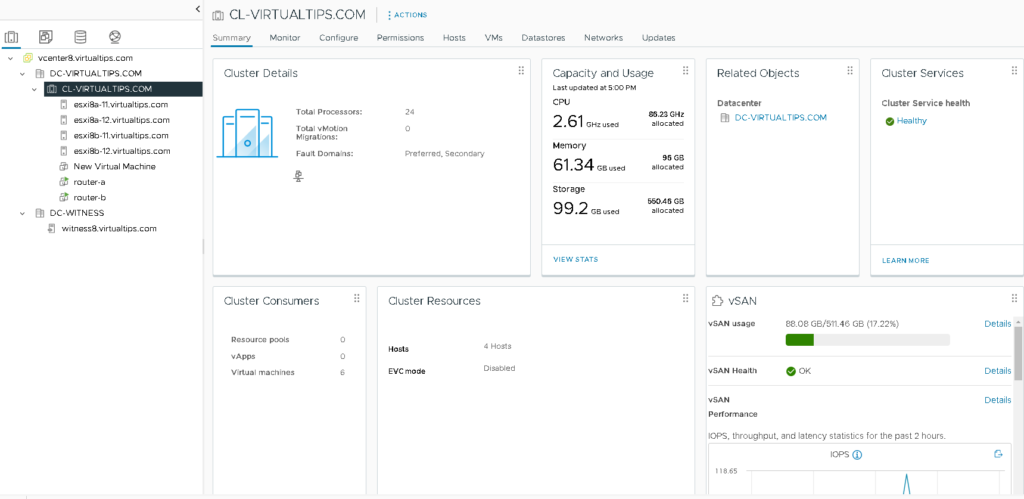
In our vSAN Stretched Cluster, there are four ESXi hosts + the Witness Appliance:
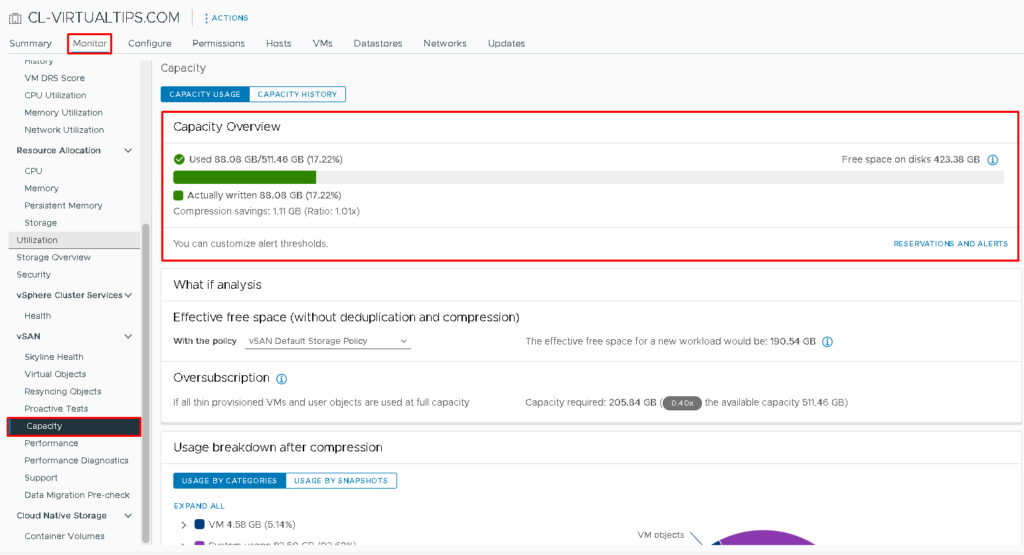
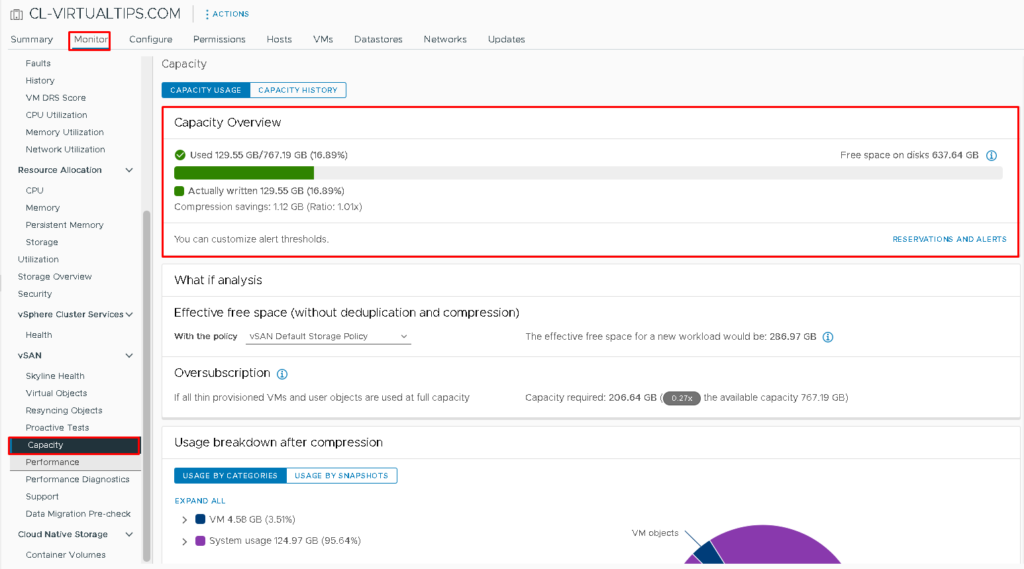
Under Monitor –> vSAN –> Capacity it is possible to see the actual capacity of the vSAN datastore:
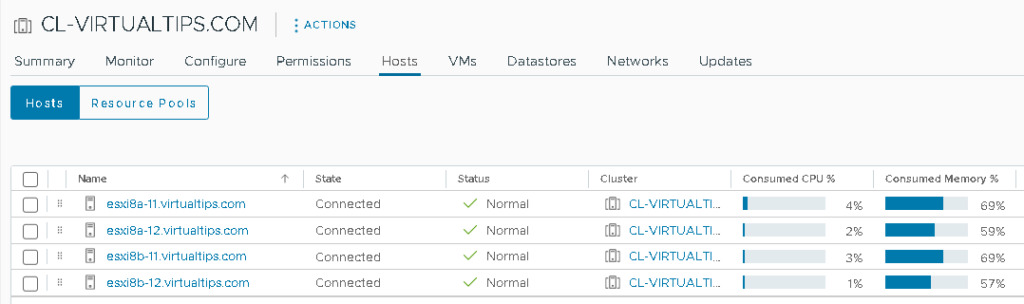
Here, it is possible to see details about all ESXi hosts present in our vSAN Cluster:
Adding Hosts into the Cluster
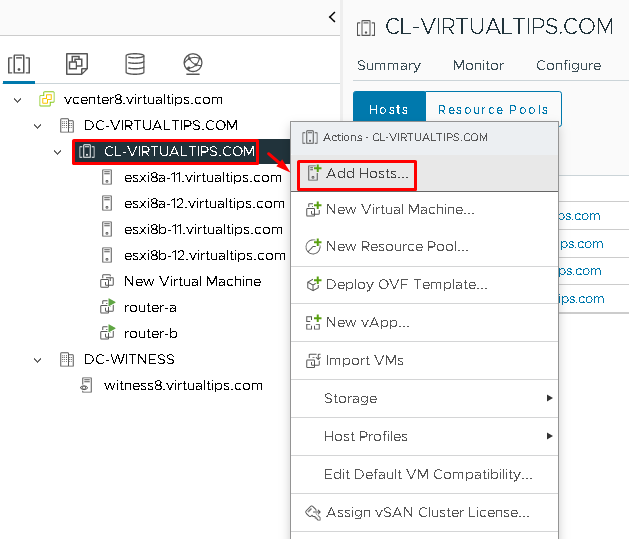
Select the Cluster Name –> Right Click –> Add Hosts:
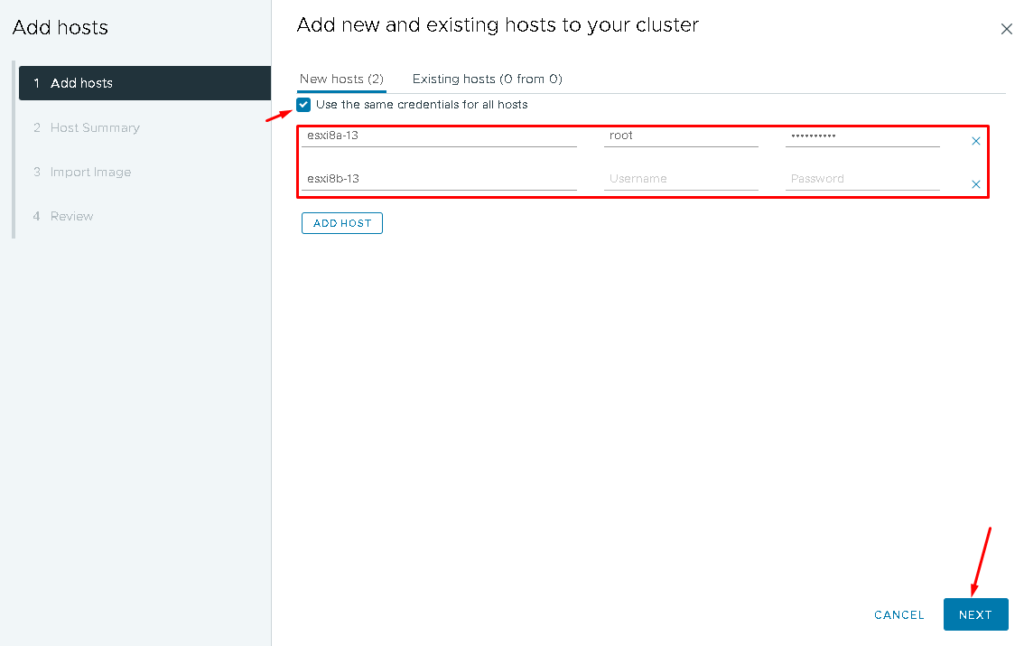
Type the IP address or Hostname of each ESXi host. In this example, we are adding two ESXi hosts.
Mark the option “Use the same credentials for all hosts” if the root password is the same for all ESXi hosts. Then, click on NEXT to continue:
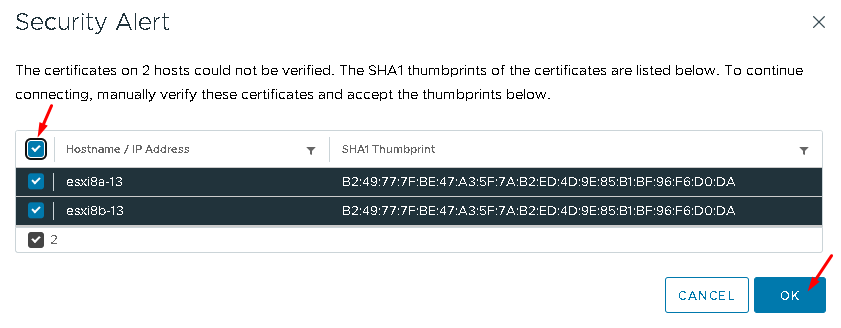
Accept the thumbprint for both ESXi hosts and click on OK to continue:
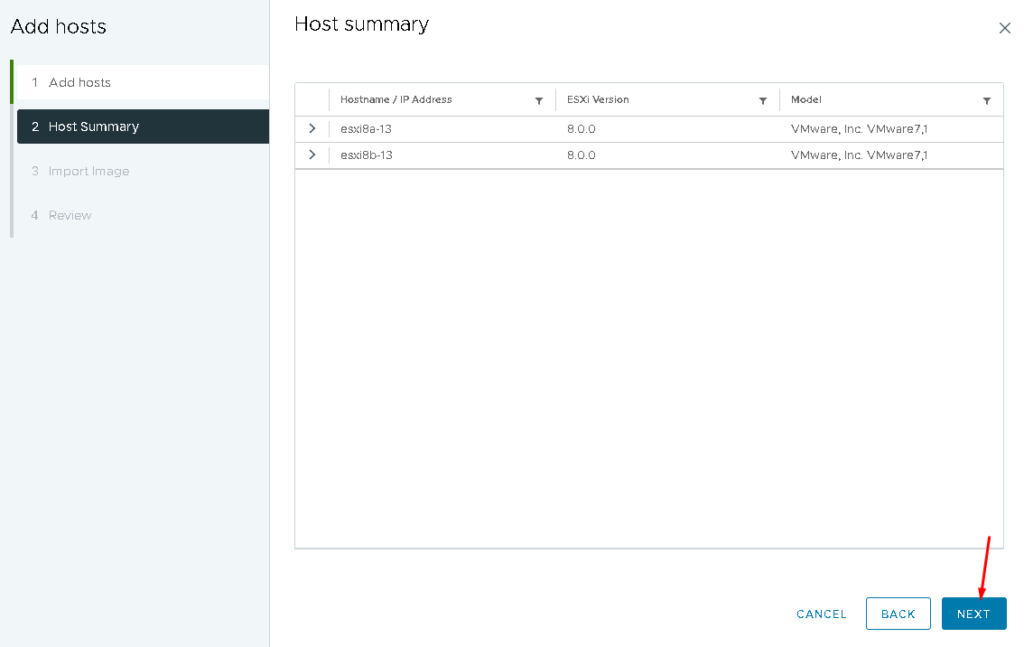
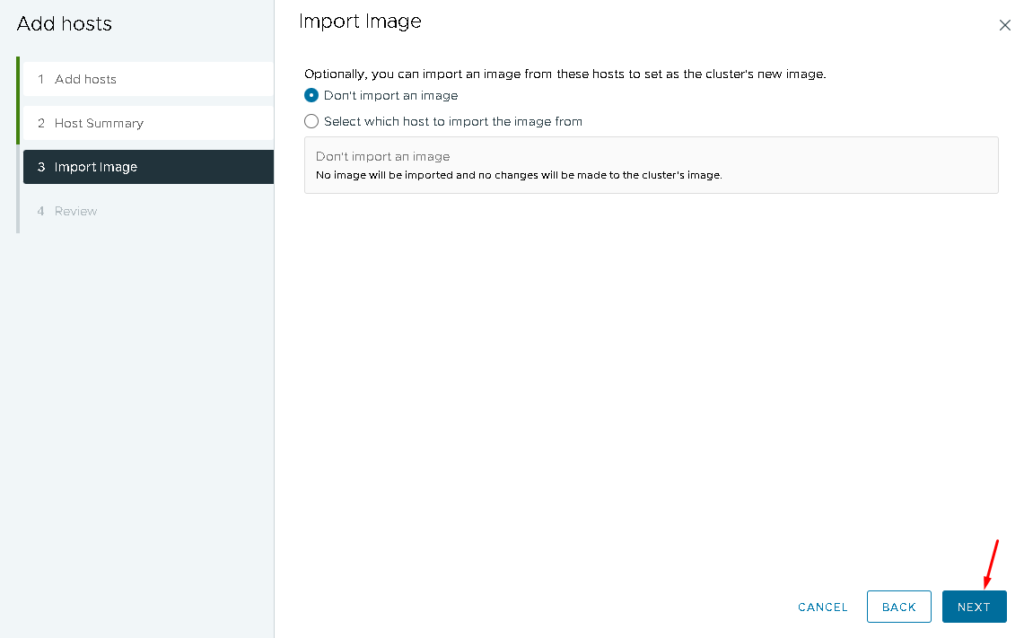
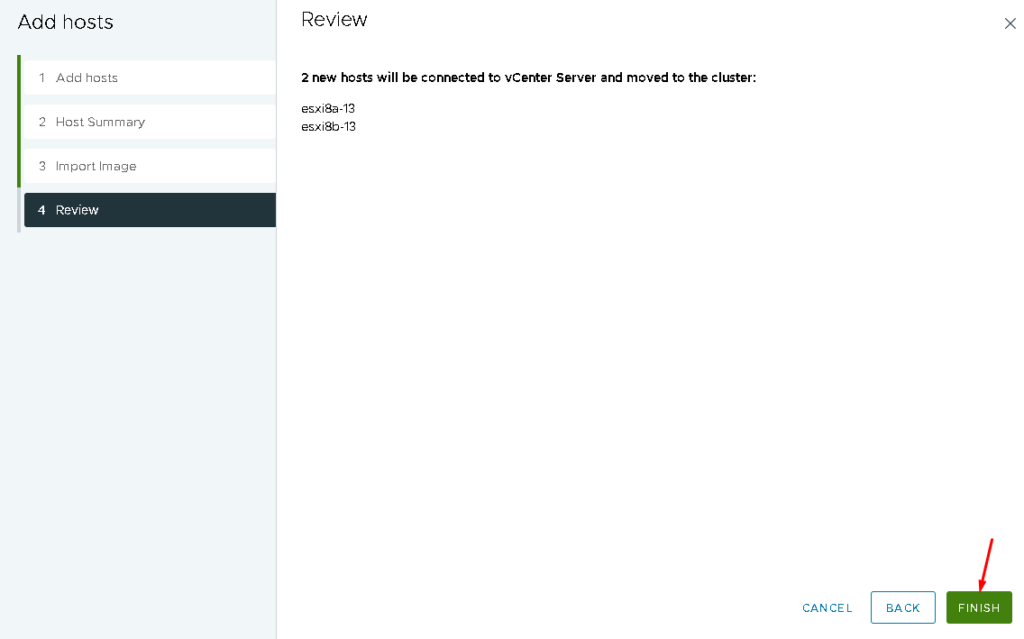
Later, click on NEXT –> NEXT –> FINISH:
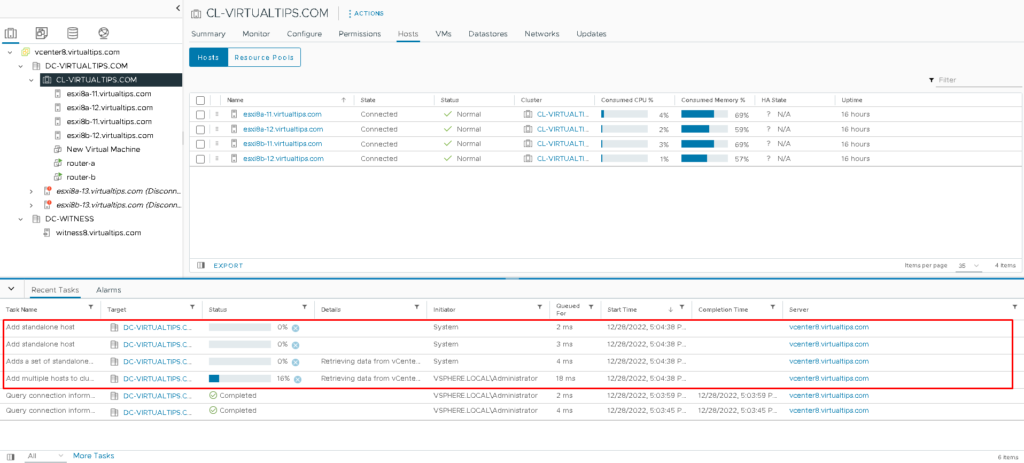
So, on the Recent Tasks it is possible to follow the adding hosts’ process:

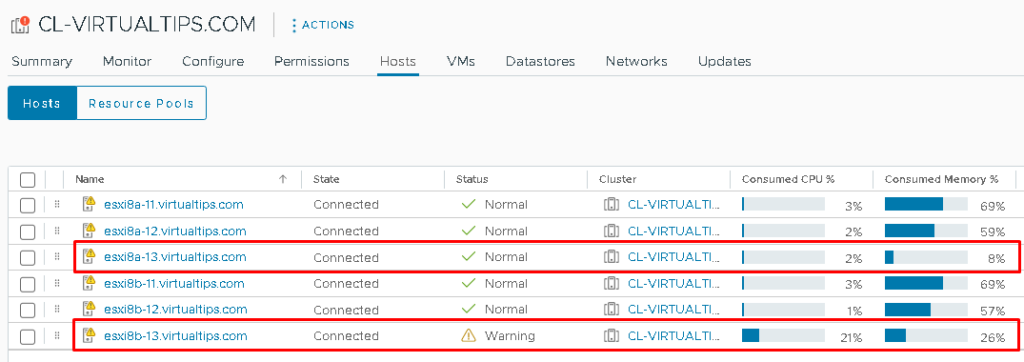
After a few moments, on the Hosts tab, both new ESXi hosts will be shown:
But, on the vSAN Skyline Health is showing a lot of issues, such it is possible to see in the picture below:
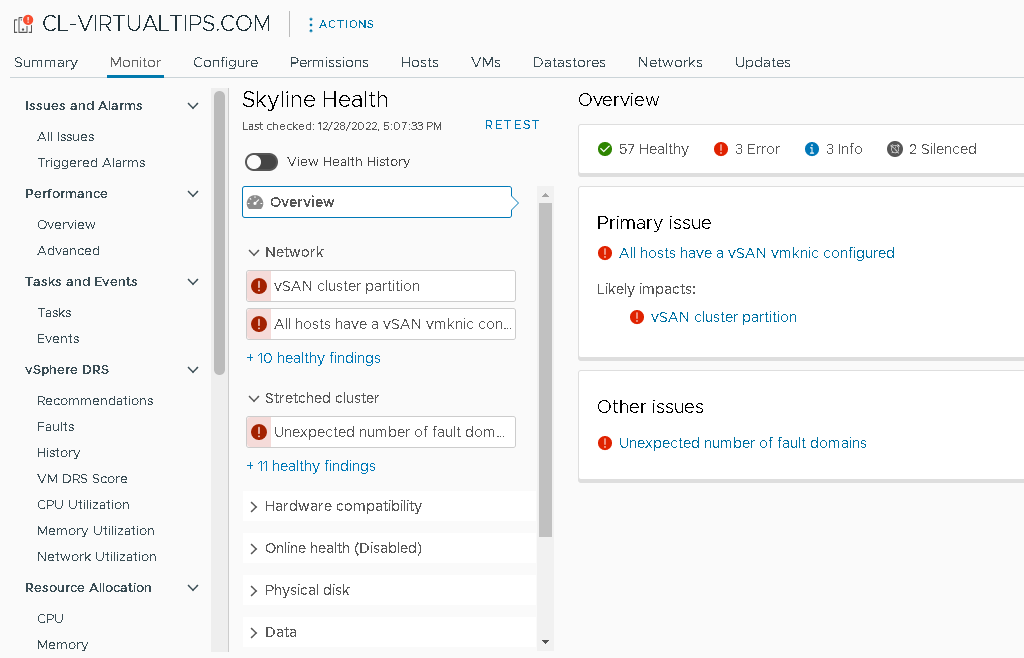
Note: At this point, these issues found on the vSAN Skyline Health are expected because all new hosts don’t be in the Distributed Switch and don’t have Distributed Port Groups and VMkernel as necessary. We will adjust these points in the next steps of this article.
Adding Hosts into the Distributed Switch
Firstly, on the vSphere Client, click on the Networking tab, select the Distributed Switch –> Add and Manage Hosts:
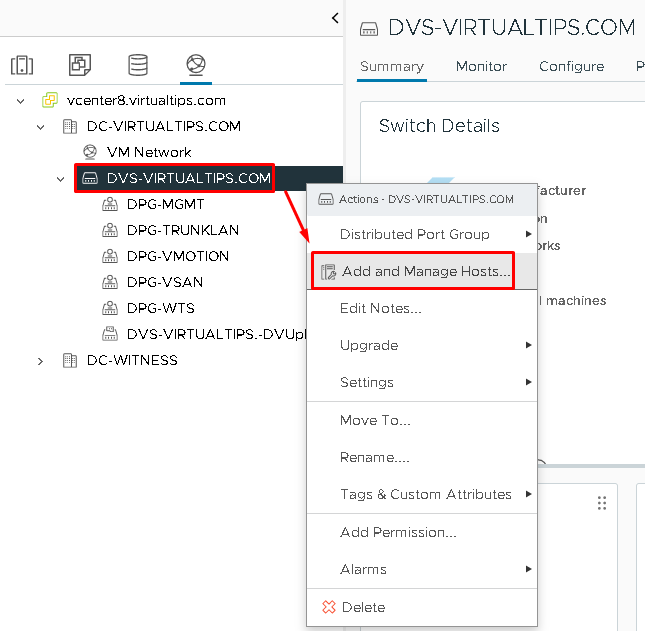
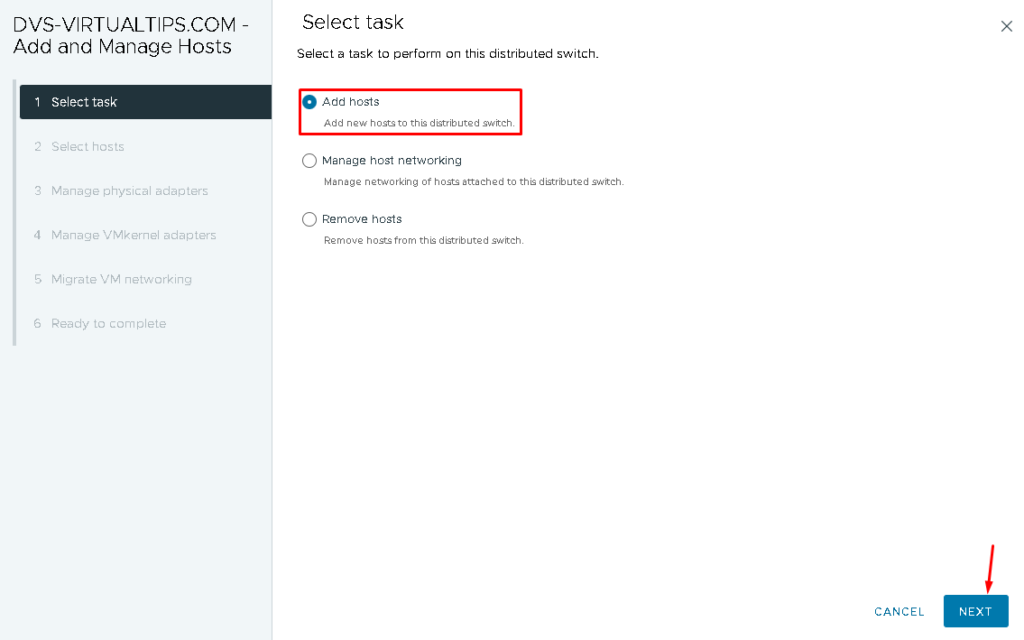
So, click on Add hosts and then click on NEXT to continue:
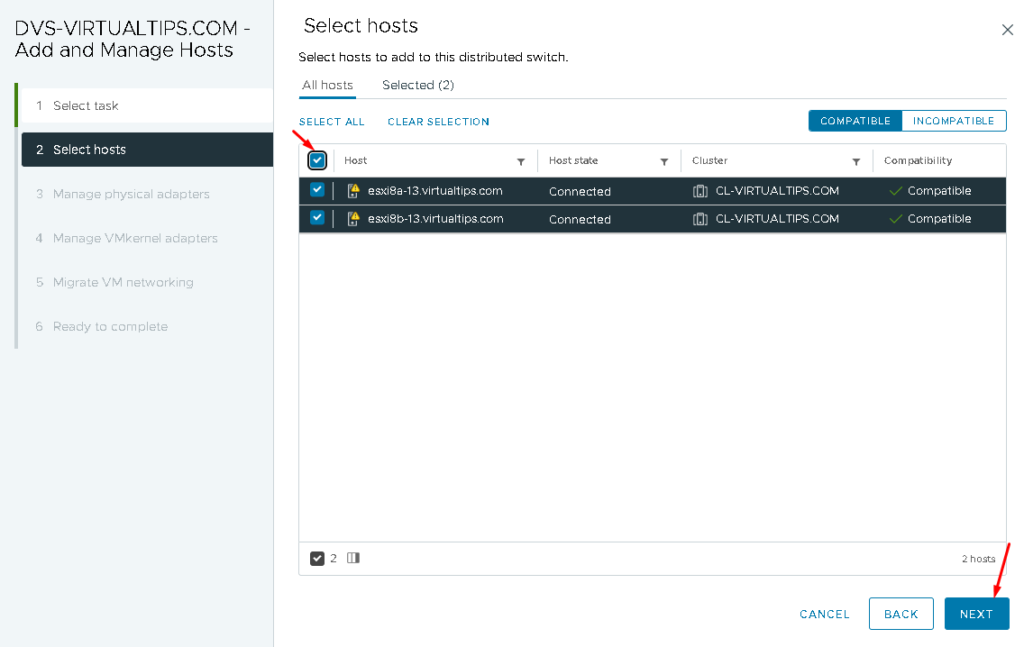
Then, select both ESXi hosts and click on NEXT to continue:
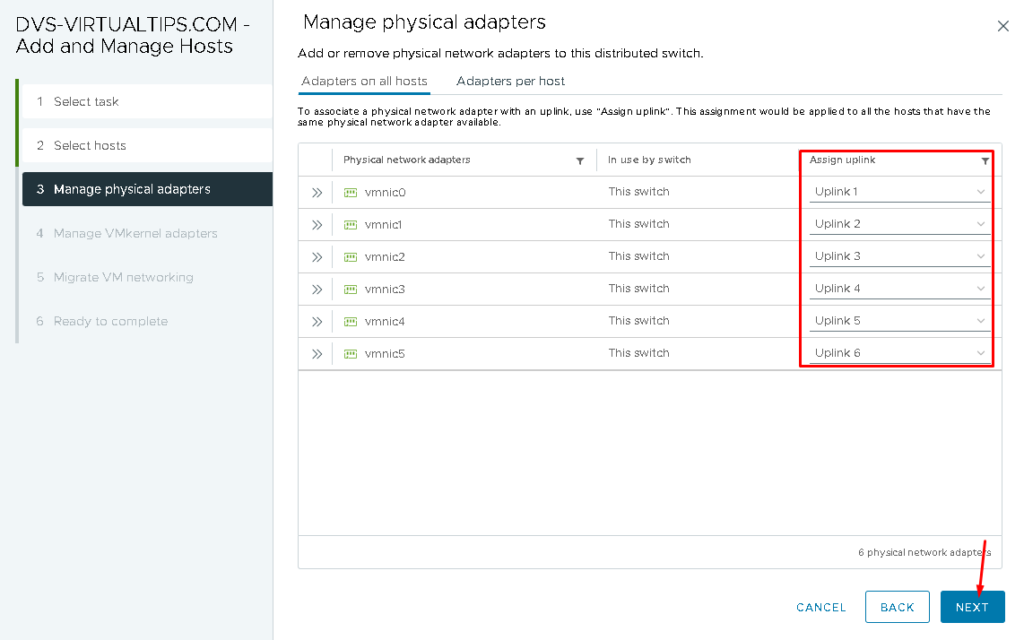
On Manage physical adapters we need to assign each physical network adapter to an uplink.
In our lab, each ESXi host has six physical network adapters. After assigning the uplinks, click on NEXT to continue:
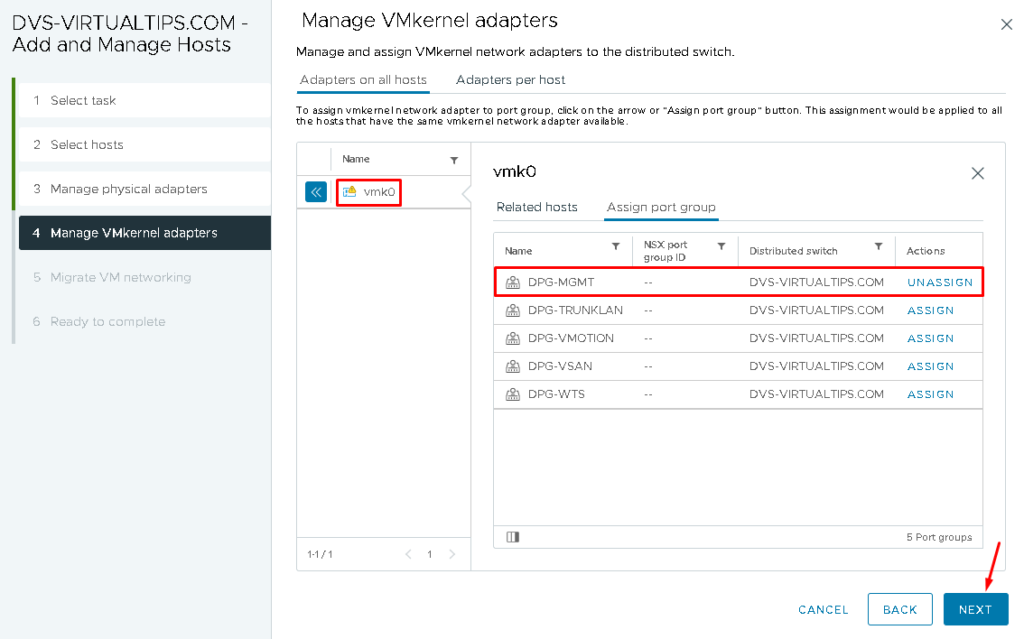
On Manage VMkernel adapters, we need to assign each VMkernel adapter to a Distributed Port Group. At this moment, we only have the vmk0 adapter (Management network). So, we will assign this VMkernel to the DPG-MGMT Distributed Port Group.
After doing the assignment, click on NEXT to continue:
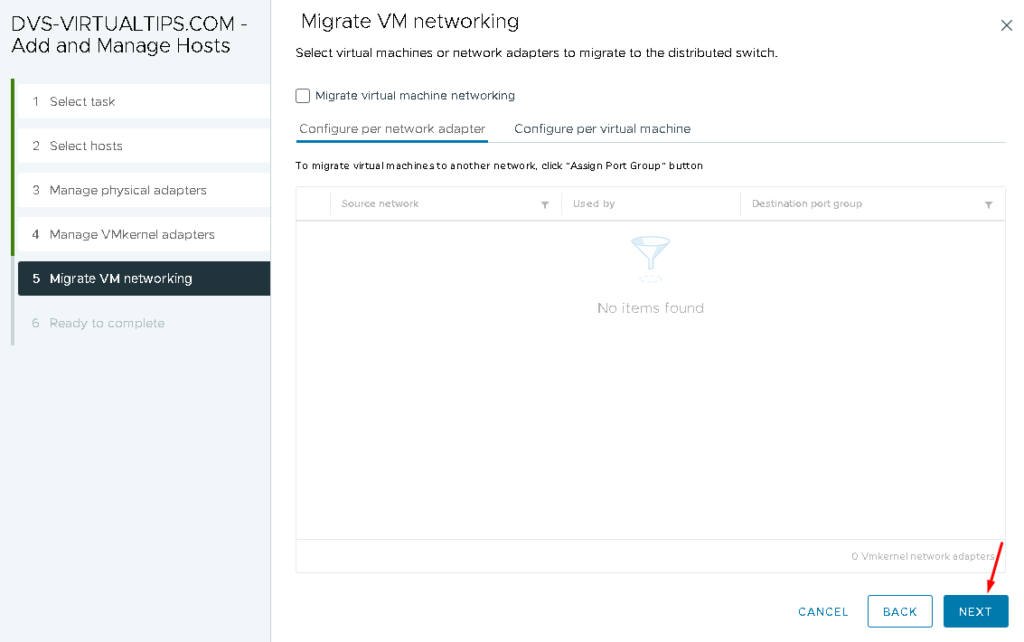
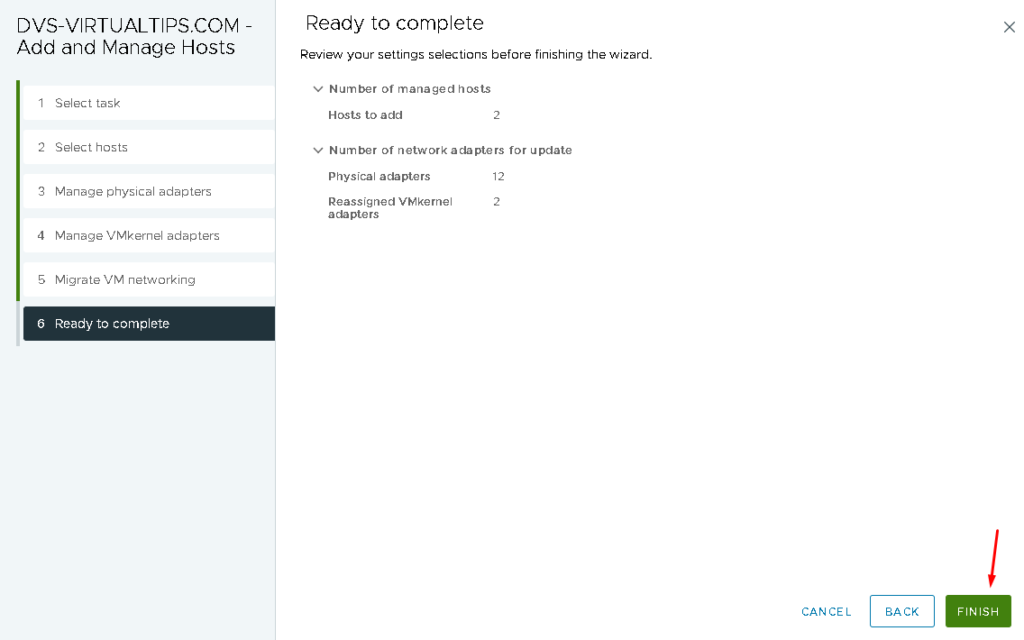
Later, click on NEXT –> FINISH to finish the assistant:
Adding VMkernel Adapters to the new Hosts
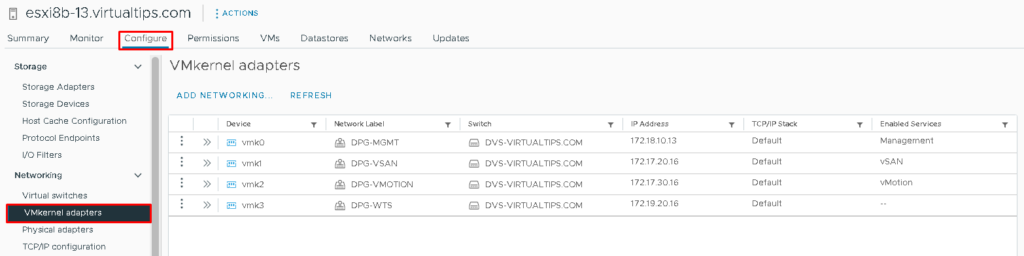
At this point, both new ESXi hosts are in the Distributed Switch. But, they don’t have the VMkernel Adapters for vSAN and vMotion network.
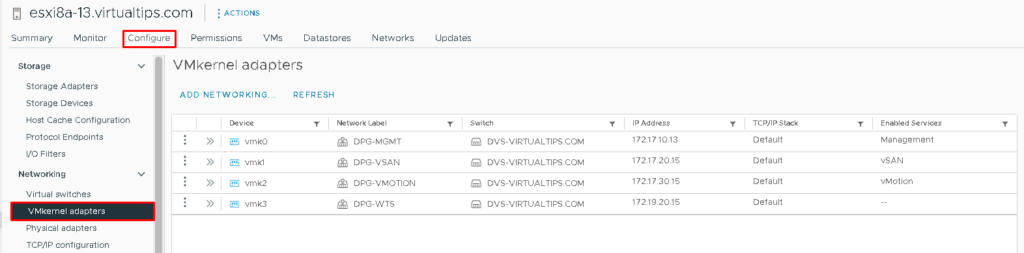
So, it is necessary to create the vSAN and vMotion adapters for each ESXi host.
In the pictures below, it is possible to see all VMkernel adapters necessary for this environment:
esxi8a-13:
esxi8b-13:
Adding Hosts into Fault Domains
Such our cluster is a vSAN Stretched Cluster. In this type of cluster, we have two Fault Domains + Witness Host. So, we will need to add each ESXi host inside a Fault Domain:
- In the Preferred Fault Domain, the ESXi host esxi8a-13 will be added
- In the Secondary Fault Domain, the ESXi host esxi8b-13 will be added
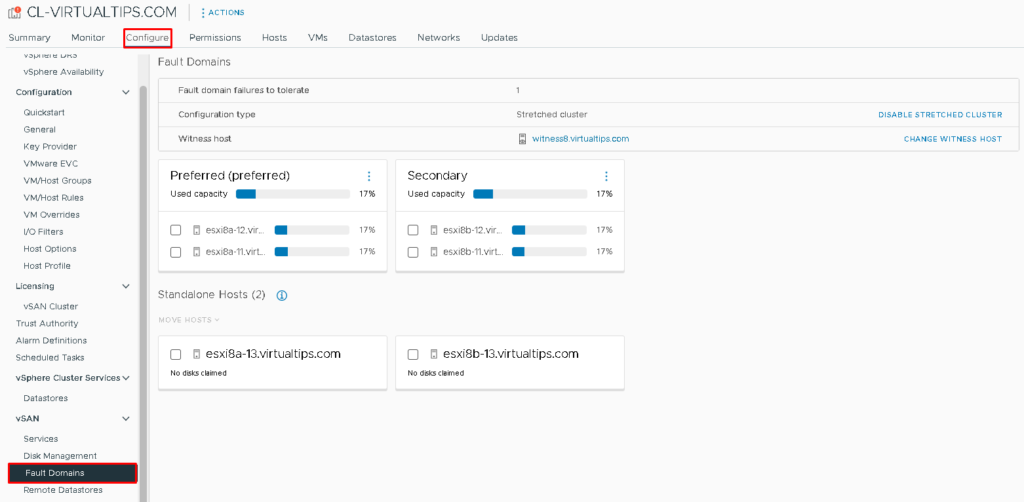
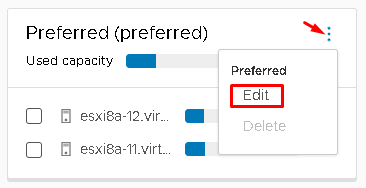
Under Preferred Fault Domain, click on three dots –> Edit:
Then, select the ESXi host esxi8a-13 and click on APPLY:
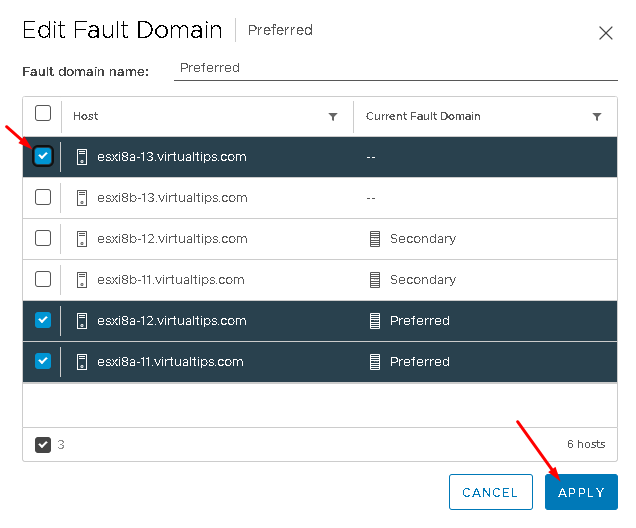
Do the same for the Secondary Fault Domain:
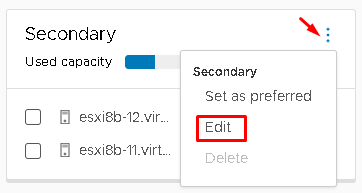
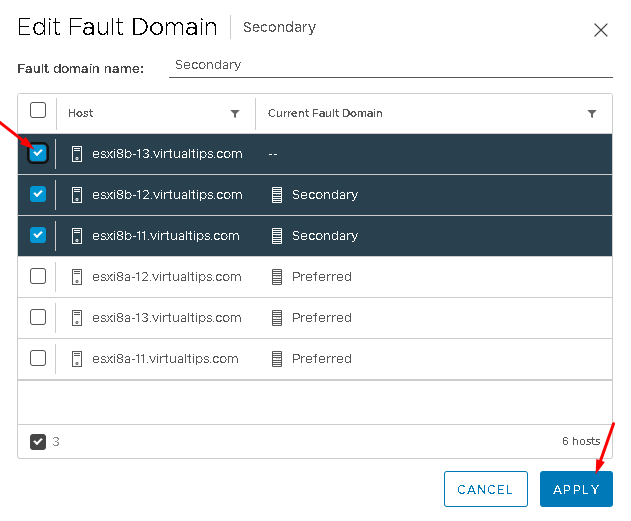
After that, both ESXi hosts will be added to their respective Fault Domain:
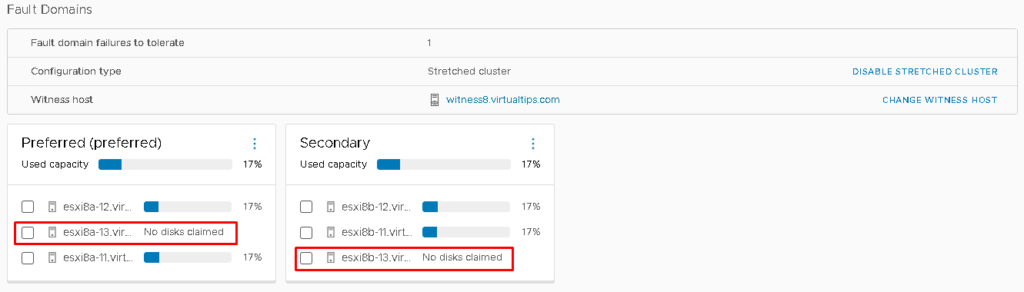
Note: Both ESXi hosts don’t have disks claimed to use for the vSAN Datastore. In the next step, we will adjust it!
Claiming Unused Disks for vSAN
Now, we need to claim disks to use on the vSAN datastore.
Select the Cluster Name –> Configure –> vSAN –> Disk Management.
Look that for each new ESXi host there are two disks, but nothing is being used for the vSAN yet.
Click on “CLAIM UNUSED DISKS (4)”:
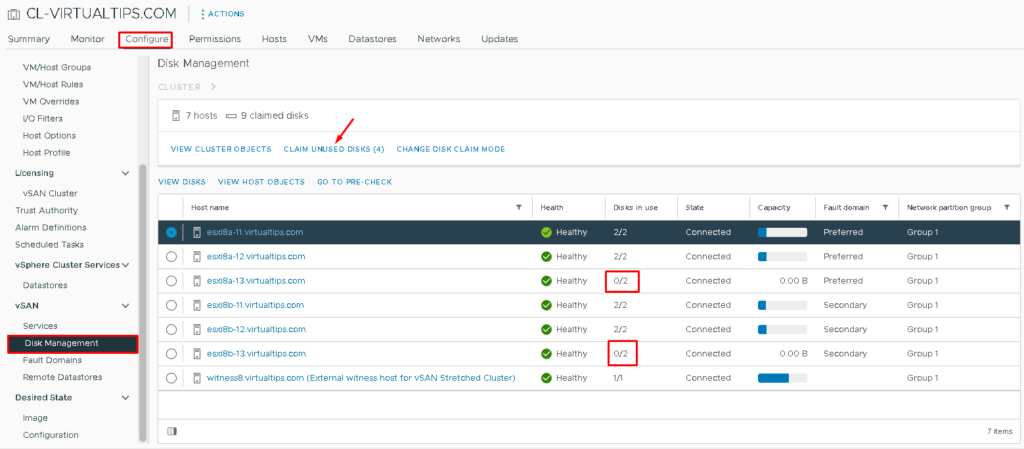
In the Claim column, mark the box and click on CREATE:
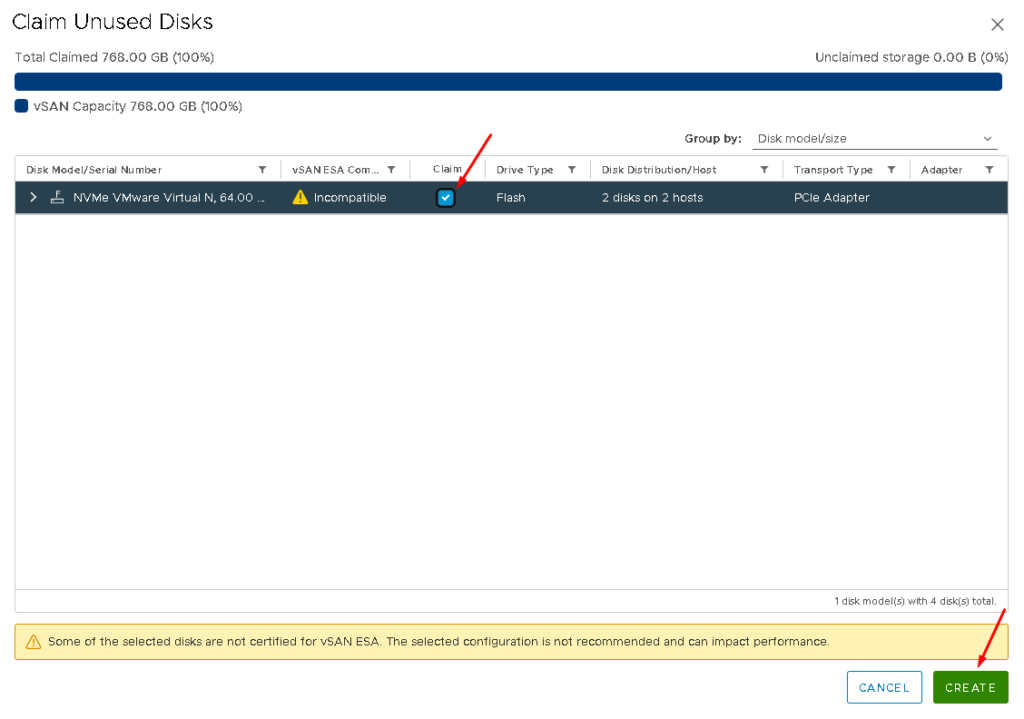
After that, the new disks will be added to the vSAN Storage Pool. It is possible to follow it in the tasks on the vCenter Recent Tasks:
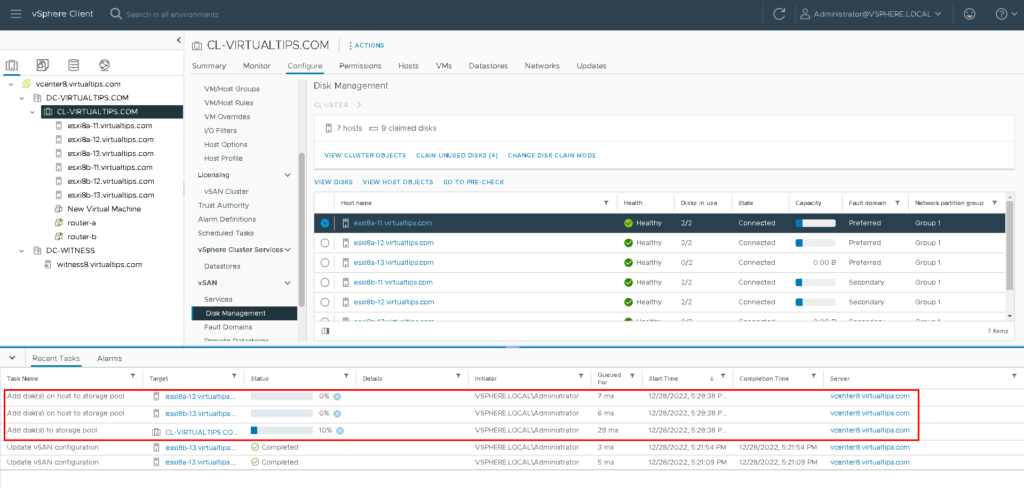
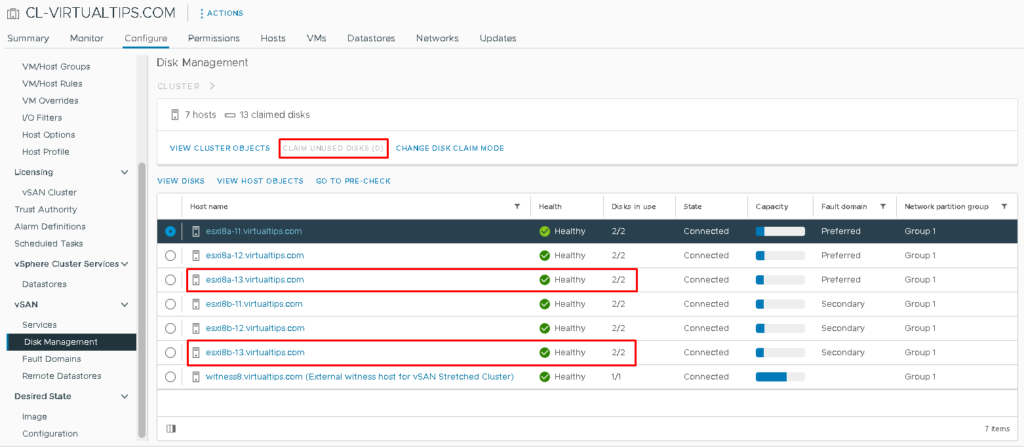
After some moments, all disks for the new ESXi hosts have been claimed for the vSAN:
Checking the Cluster Health
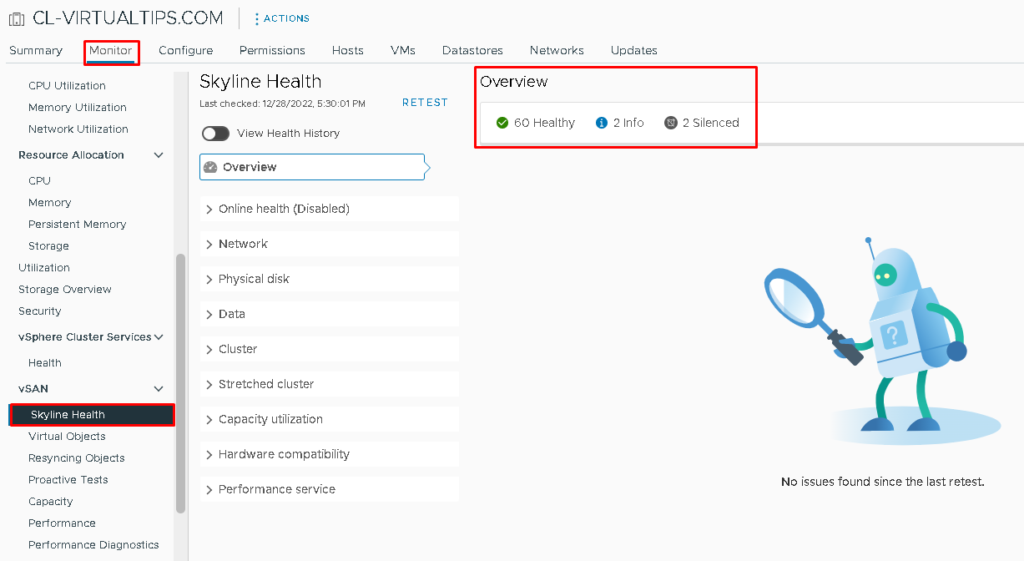
Now, on the vSAN Skyline Health, we don’t see any issue (all tests were executed with success):
Under Monitor –> vSAN –> Capacity, it is possible to see that the capacity was expanded 🙂
We would like to share some external links that help and provide additional details related to it:
